
That crusty white growth on your battery terminals isn’t just ugly—it’s a ticking time bomb. One slip with your wrench could turn your engine bay into a fireworks show, spraying molten metal across your garage. While your 12-volt car battery won’t electrocute you like a wall outlet, it will deliver 500+ amps straight through any metal tool touching both terminals. Forget Hollywood shocks—real danger comes from sparks igniting hydrogen gas or sulfuric acid burning through your skin in seconds.
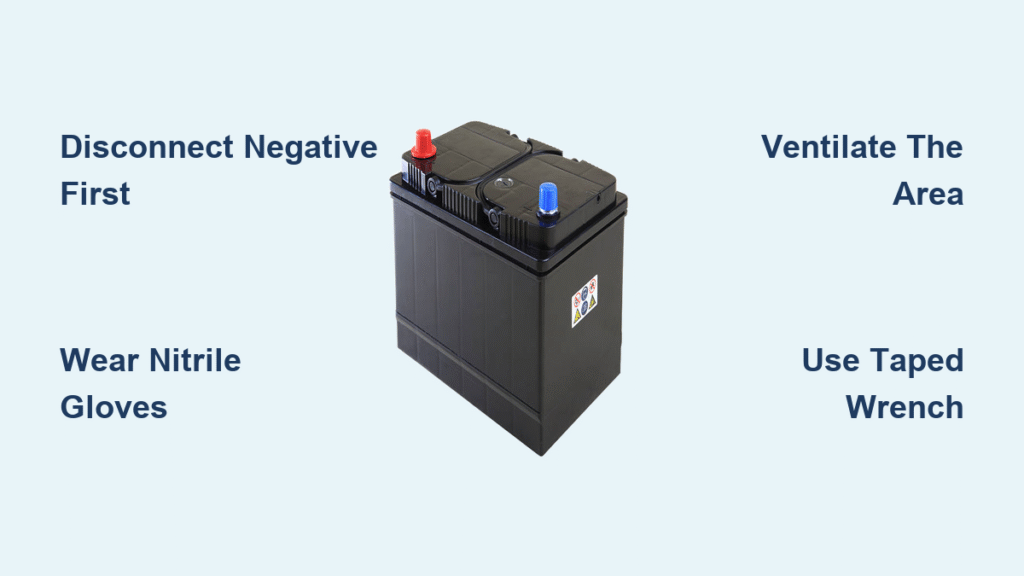
Here’s what mechanics know but rarely share: Changing your battery safely isn’t about avoiding “shock.” It’s about preventing short circuits that create instant arc welders. Follow this exact sequence—used by dealership technicians—and you’ll never fear corroded terminals again. You’ll learn why disconnecting the negative terminal first is your lifeline, how to handle batteries without dropping 40 pounds of acid on your foot, and why hybrid vehicles require a hard stop before you even pop the hood.
Why Your 12V Battery Won’t Shock You (But Can Still Melt Wrenches)
Car batteries can’t deliver dangerous electric shocks to humans because 12 volts lacks the “pressure” to push current through your skin’s resistance. Your real enemy? Short circuits. When a metal tool bridges the positive and negative terminals, you create a path with near-zero resistance. The battery dumps 300-600 amps through that wrench in milliseconds—hot enough to melt steel and spray molten metal like a blowtorch.
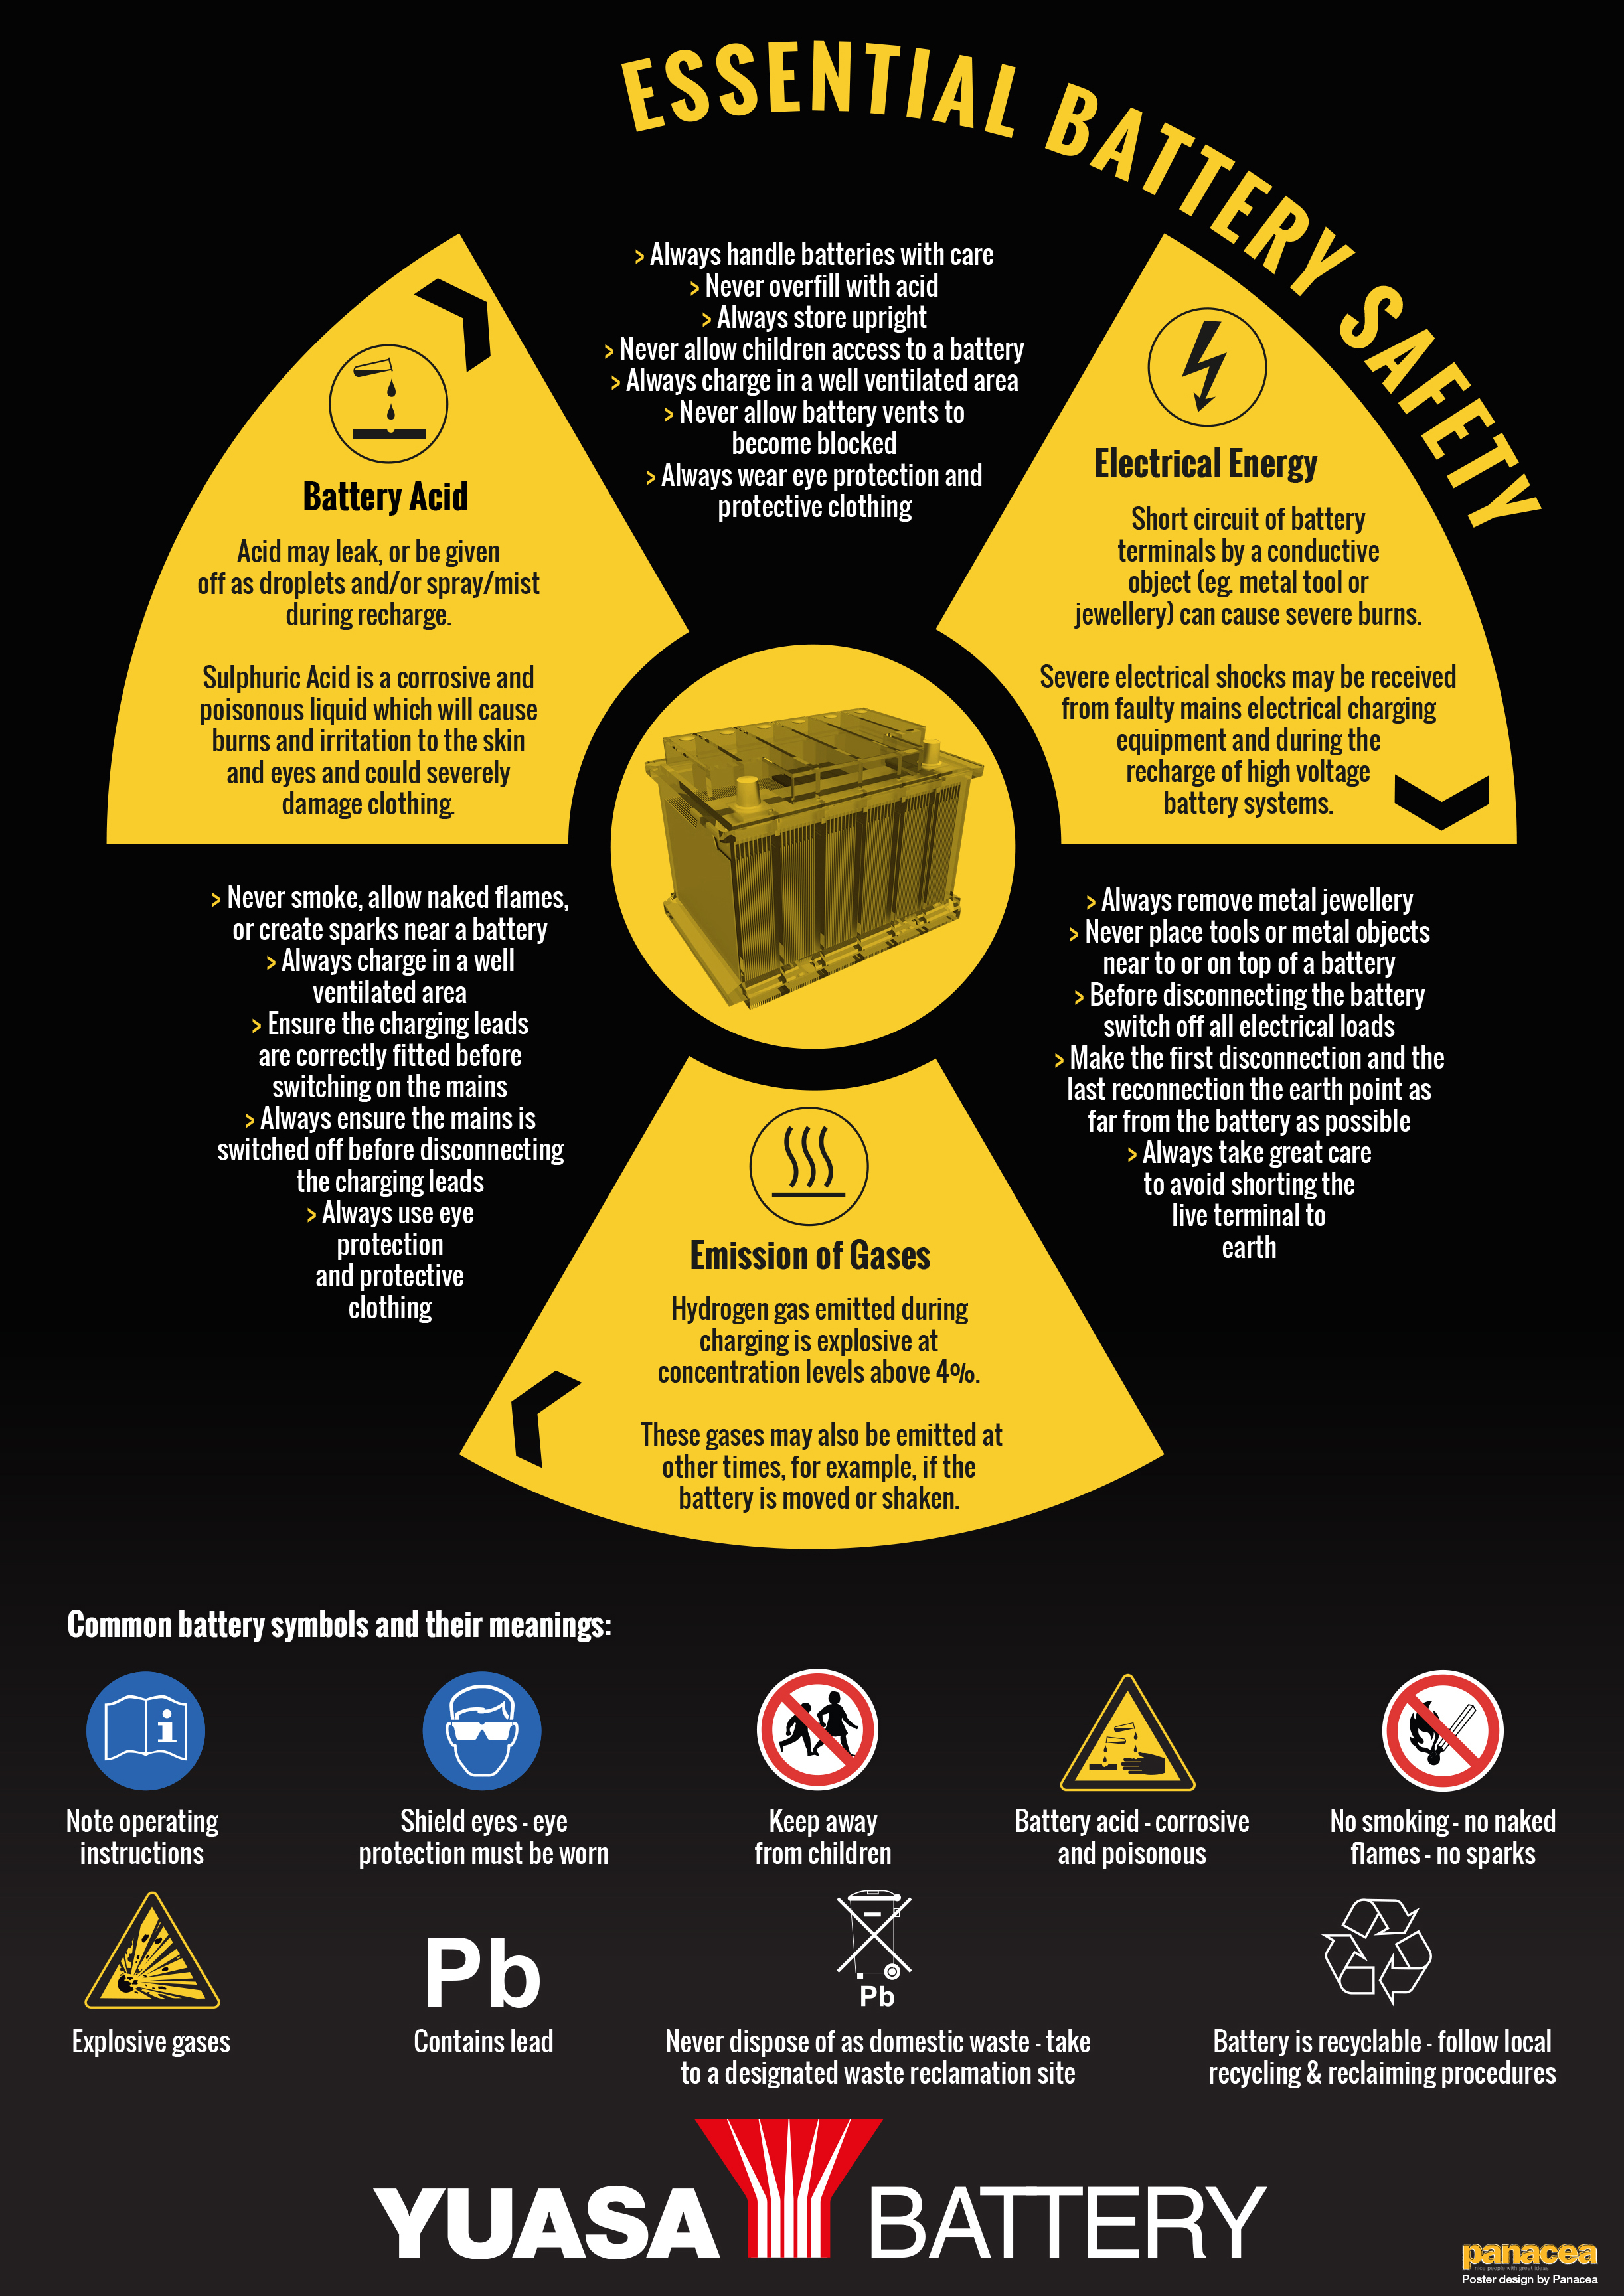
Hydrogen Gas: The Invisible Bomb in Your Engine Bay
Every time your battery charges, it vents highly explosive hydrogen gas. One tiny spark—from a wrench slipping or static electricity—can trigger an explosion strong enough to:
– Shatter the battery case, spraying acid 10+ feet
– Blind you with chemical burns from sulfuric acid mist
– Ignite engine fluids (test your garage’s hydrogen risk by sniffing for a rotten egg smell near the battery)
Critical Safety Insight: Your Body Isn’t the Target
Unlike household outlets, car batteries won’t send current through you. But if your ring or watch bridges terminals? That metal becomes a superheated conductor. A wedding band can weld itself to a terminal in 0.2 seconds, causing third-degree burns before you feel pain.
Essential Safety Gear Mechanics Never Skip (And Why Dollar-Store Gloves Fail)

Nitrile Gloves: Non-Negotiable for Acid Defense
Latex gloves disintegrate on contact with sulfuric acid. You need 3mm-thick nitrile gloves rated for battery acid exposure (check the label for “sulfuric acid resistance”). Test yours by pouring vinegar on the palm—if it soaks through in 10 seconds, they’re useless.
Eye Protection That Actually Saves Sight
Prescription glasses won’t stop acid splatter. Wrap-around safety goggles with indirect vents (like Uvex Sky 867) seal out mist while preventing fogging. Pro tip: Spray lenses with anti-fog solution before starting—panicked wiping during an acid splash causes more damage.
The 30-Second Jewelry Check That Prevents Burns
Remove all metal before opening the hood:
– Rings (even silicone bands conduct heat)
– Metal watch bands
– Necklace chains dangling near the engine
– Belt buckles if leaning over the battery
Ventilate Like Your Life Depends on It (Because It Does)
Hydrogen Gas Clearance Protocol
Park outside or open both garage doors. Position a box fan facing outward to create airflow away from the battery (blowing inward concentrates gas). Wait 5 minutes for the fan to clear hydrogen pockets before touching terminals. No fan? Walk away—hydrogen is odorless and invisible.
Emergency Fire Prep You Can’t Skip
Place a Class ABC fire extinguisher within arm’s reach before starting. Not in the trunk—under the hood where you work. If a battery ignites, water spreads the fire; only ABC extinguishers smother acid-fueled flames.
Step-by-Step: Disconnect Terminals Without Sparks
Why Negative Terminal Removal Comes First (The Lifesaver Step)
Your car’s chassis is connected to the negative terminal. Disconnect negative first, and even if your wrench touches metal, no circuit exists. Reverse this sequence, and one slip turns your tool into a plasma cutter.
Removing the Negative Terminal: The No-Slip Method
- Position yourself sideways to the battery (never straddle it—acid explosion risks your groin)
- Place your non-dominant hand on the cable to stabilize it (never brace on metal parts)
- Slide an 8mm or 10mm wrench onto the nut (most cars use these sizes—verify first)
- Turn counterclockwise with one firm motion—no wiggling that cracks the terminal
- Lift straight up—prying sideways breaks terminals (replace the whole battery if this happens)
- Tuck the cable under the hood latch—never let it dangle near the positive terminal
Positive Terminal Removal: Treat It Like Live Wires
Only proceed after confirming the negative cable is fully secured away. Cover the positive terminal with electrical tape immediately after removal. Why? If the cable swings back during battery removal, contact with the chassis fries your ECU.
Lifting the Battery Without Acid Spills or Broken Toes
Hold-Down Hardware: Find It Before You Lift
- Top-mounted brackets: Flat steel bars secured by 10mm bolts across the battery top
- Side clamps: J-shaped hooks with wing nuts at the battery base
- Bottom wedges: Hidden under the tray—slide a flashlight sideways to spot them
The 45-Degree Acid Spill Rule
Batteries contain liquid sulfuric acid. Tilt beyond 45 degrees, and acid leaks through vents. Lift vertically with your legs:
1. Support the battery with your non-dominant hand while removing the last fastener
2. Cradle it against your torso (not your legs—acid eats through jeans)
3. Walk slowly—no twisting—until placed on a plastic tray or cardboard
Install the New Battery Without Frying Your Electronics

Polarity Check: The $2,000 Mistake
Positive terminal = red cable = “+” marking. Negative = black = “–”. Reverse these, and your alternator diodes, ECU, and infotainment system melt instantly. Verify 3 times before connecting:
1. Trace cables from battery to components
2. Check terminal colors on the new battery
3. Confirm “+” and “–” stamps on both battery and cables
Connection Sequence: Positive First Saves Your Computer
- Slide positive terminal straight down until it clicks onto the post
- Hand-tighten the bolt (cross-threading ruins connections)
- Torque to 5-7 ft-lbs—snug enough that it won’t rotate when pushed
- Spray terminal with protectant (like CRC Battery Terminal Protector)
- Repeat for negative terminal
Post-Installation Checks Mechanics Do in 60 Seconds
The Hand-Crank Test (Before Starting the Engine)
- Turn ignition to “ON” (don’t start)
- Listen for fuel pump whirring (2-second hum means power is flowing)
- Check for flickering dashboard lights—indicates loose connections
- Test headlights: dim lights = reversed polarity (shut off immediately!)
Hold-Down Security Test
Grab the battery firmly and try to shift it. If it moves more than ½ inch, retighten the bracket. A loose battery cracks its case on bumpy roads, leaking acid onto your engine.
Hybrid Vehicle Warning: Stop Here If You See Orange Wires
DO NOT attempt battery service if you spot bright orange cables near the battery. Hybrid/electric systems operate at 200-600 volts—enough to stop your heart instantly. These require:
– Manufacturer-specific insulated tools ($300+ kits)
– High-voltage disconnect procedures
– OSHA-certified safety training
Take your car to a dealer. No YouTube tutorial makes this DIY-safe.
Emergency Response: Acid Splash or Explosion
If Acid Hits Your Skin
- Rip off contaminated clothes—acid keeps burning through fabric
- Flush with running water for 15+ minutes (use garden hose if outside)
- Neutralize with baking soda paste after flushing (1 cup baking soda + 1 cup water)
- Go to ER immediately—even small burns need medical treatment
Battery Explosion Protocol
- Evacuate the area—hydrogen gas may still be present
- Call 911 before attempting first aid
- Use Class ABC extinguisher only—water spreads acid fires
- Cover wounds with clean cloth—don’t rub acid into skin
Tools That Prevent 90% of Battery Change Disasters
The $5 Wrench Hack Mechanics Swear By
Wrap the metal shaft of your wrench with electrical tape where your fingers grip. If it slips, the tape prevents contact with both terminals. Pro tip: Use red tape for positive-side work, black for negative—visual polarity reminder.
Terminal Puller: When Corrosion Glues Cables On
Never hammer or pry stuck terminals. A battery terminal puller ($8) wedges under the clamp and lifts evenly without breaking posts. Spray with PB Blaster penetrating oil first if corrosion is severe.
3 Deadly Mistakes Even Experienced DIYers Make
The “I’ll Just Quickly” Terminal Touch
Reconnecting the negative cable while jewelry touches the positive terminal? That’s how you weld a ring to your hand. Always reconnect with one hand behind your back—prevents current crossing your chest.
Skipping the Hold-Down Bracket “Just for Now”
A loose battery becomes a 40-pound missile in a 35-mph crash. It can pierce the firewall and ignite fuel lines. Install the bracket before connecting cables—no exceptions.
Using a Memory Saver Without Disconnecting Negative First
Memory savers (to keep radio presets) plug into the cigarette lighter. But if you connect it after disconnecting negative, the car’s computer sees a voltage drop and throws error codes. Plug it in before touching terminals.
Changing your car battery safely isn’t about luck—it’s about sequence. Do the negative terminal first, ventilate for hydrogen, and treat every connection like live wires. If you feel uneasy at any step, stop. Most auto parts stores install batteries free when you buy from them. Your safety isn’t worth a $20 savings. Now pop that hood with confidence—just keep your wrench taped and your nitrile gloves on.


