
Your Honda key fob suddenly stops working when you’re rushing through a rainy parking lot. The unlock button requires five frantic clicks just to open the driver’s door, while the panic button barely responds. This frustrating scenario means one thing: it’s time for a Honda key fob battery replacement. The good news? This critical fix takes just five minutes with basic tools and saves you $75 compared to dealer service. Whether you drive a 2023 Civic or a 2016 Pilot, this guide delivers the exact steps to replace your battery without damaging the case.
Most Honda owners don’t realize their key fob battery dies predictably every 3-4 years. When the range drops from 50 feet to just 10 feet or the instrument cluster displays “KEY BATTERY LOW,” immediate action prevents lockout emergencies. By following this model-specific guide, you’ll learn to identify your exact battery type, avoid common pitfalls that crack fobs, and test your work before walking away. Let’s get your Honda key fob functioning like new.
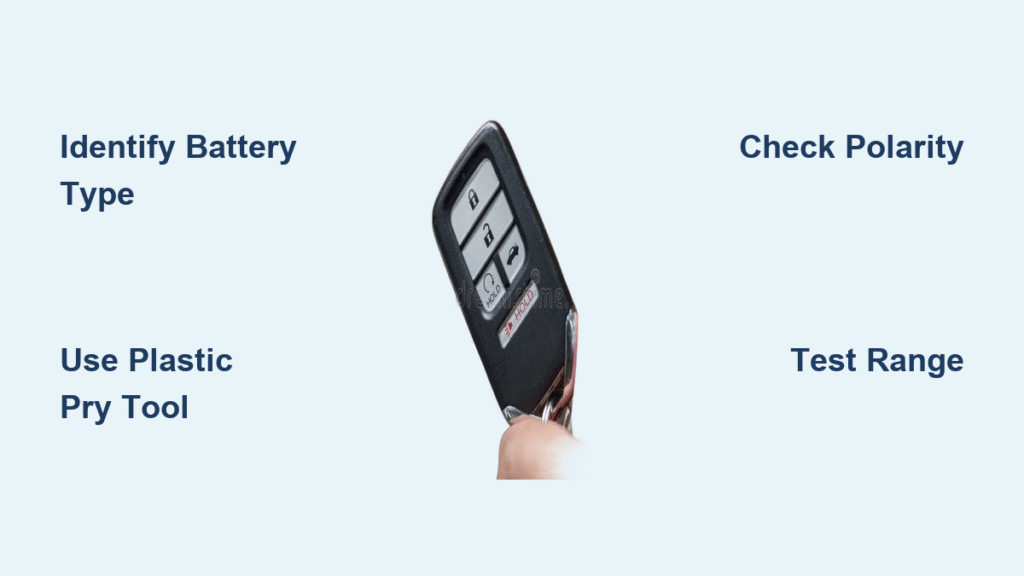
Identify Your Honda Key Fob Battery Type First

CR2032 vs CR2025 vs CR2016: Which Fits Your Model?
Don’t buy batteries until you verify your Honda key fob type—using the wrong size causes immediate failure. 90% of modern Hondas (2016+ Civic, 2018+ Accord, 2017+ CR-V, 2016+ Pilot) require CR2032 batteries with 220mAh capacity. Older models like pre-2016 Civics need smaller CR2025 batteries, while Civic Type R and Accord Touring card-style fobs demand CR2016 cells. Check your fob’s physical design before purchasing: traditional key fobs (pre-2014) typically use CR2025, while smart key fobs (2014-present) almost always need CR2032.
Critical mistake to avoid: Installing a CR2032 in a CR2025 slot creates pressure that cracks the plastic housing. If your fob feels tight when closing, you’ve used the wrong battery. Always remove your old battery first to confirm size—it’s stamped on the metal casing (e.g., “CR2032”).
Why Battery Quality Determines Fob Lifespan
Premium batteries like Panasonic or Energizer last 3-4 years without leaking, while dollar-store generics often fail within 18 months and corrode circuit boards. I’ve seen countless Honda key fobs destroyed by cheap batteries oozing potassium hydroxide onto delicate electronics. Keep spare batteries in their original packaging in your glove compartment—extreme temperatures accelerate degradation. Never store batteries loose in pockets where coins can short-circuit them.
Essential Tools to Prevent Costly Damage
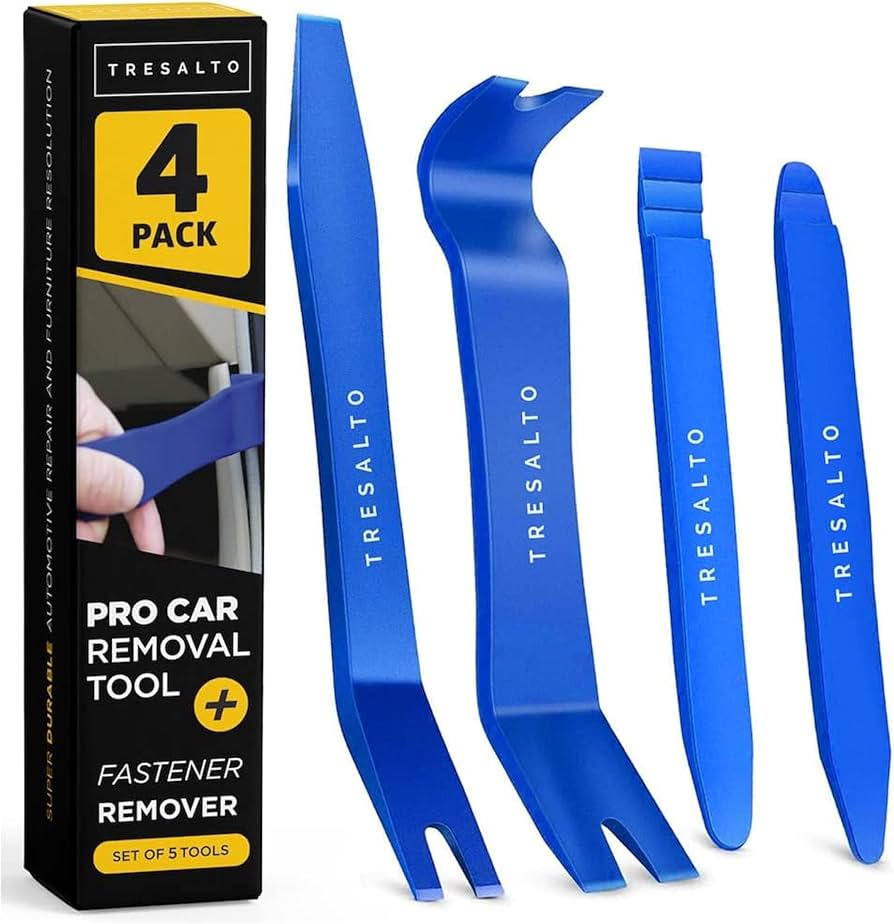
Must-Have Equipment Checklist
Skip the metal screwdriver that scratches your fob’s finish. Use a plastic pry tool ($2 on Amazon) to safely separate fob halves without cracking. Pair it with a microfiber cloth to protect your Honda key fob’s surface during disassembly. Keep needle-nose pliers handy for stubborn old batteries, but avoid metal contact with circuit boards. Your toolkit should include:
– Correct battery type (CR2032/CR2025/CR2016)
– Plastic pry tool or guitar pick
– Microfiber cloth
– Optional: needle-nose pliers for battery removal
Pro Techniques for Delicate Fobs
Smart key fobs contain moisture-sensitive electronics. Place your fob on a microfiber cloth with the circuit board facing up during disassembly to prevent component damage. When inserting tools, apply pressure at 45-degree angles—not straight down—to avoid snapping plastic clips. For card-style fobs, insert your tool into the edge notch and twist gently like opening a paint can. Forced prying is the #1 cause of irreparable Honda key fob damage.
Traditional Honda Key Fob Battery Replacement (Pre-2014 Models)
Open Without Cracking the Case
- Remove the physical key by pressing the release button and sliding it out completely
- Locate the seam running around the fob’s perimeter—this is your separation point
- Insert plastic tool at the key slot end and twist gently to create a gap
- Work around edges slowly; never force the tool deeper than 1/8 inch
Warning: Excessive force cracks the ultrasonic-welded seams. If you hear cracking sounds, stop immediately—your Honda key fob requires professional repair.
Replace and Test Correctly
Note the battery orientation before removal—most traditional fobs have the positive (+) side facing down toward the circuit board. Lift the old battery with your plastic tool, avoiding contact with copper contacts. Install the new battery matching the + and – symbols exactly; it should sit flush without pressure. Before reassembly, test the battery by pressing buttons while the fob is open—if LEDs light up, polarity is correct. Snap halves together until you hear distinct clicks around the perimeter, then reinsert your physical key.
Smart Key Fob Battery Change (2014+ Models)
Accessing the Hidden Compartment
Smart key fobs hide the battery behind the emergency key slot. Slide the release latch and pull your key straight out—don’t wiggle it. Locate the small slot revealed behind the key compartment. Insert your plastic tool at 45 degrees where the key base meets the fob body. Apply steady pressure while working the tool around the edges until the case separates. Lift the circuit board carefully to expose the battery compartment on the back side.
Critical Reassembly Steps
Check the rubber gasket positioning—it must sit perfectly in its groove for water resistance. A misplaced gasket causes moisture damage within weeks. Align both halves before pressing together; misalignment cracks internal clips. Press firmly around the perimeter until all clips engage—you’ll feel resistance give way to a solid “snap.” Test immediately: lock/unlock functions should work within 10 feet. If not, reopen and verify battery polarity.
Card-Style Fob Battery Replacement (Civic Type R/ Accord Touring)
Special Handling for Slim Designs
Card-style fobs require extra care due to their thin profile. Find the tiny notch on the long edge of your Honda key fob—often near the keyring hole. Insert your plastic tool just deep enough to catch the lip, then twist slowly like opening a cigarette pack. Slide out the metal tray containing the CR2016 battery. Note orientation: positive side usually faces the button side. Insert new battery with firm pressure until it clicks into place. Slide the tray back until it stops, then press the case closed with even pressure across the surface.
Immediate Post-Replacement Testing Protocol
4-Step Function Verification
Don’t assume it works—test thoroughly before leaving home:
1. Lock/unlock test: Stand 10 feet from vehicle and press buttons
2. Range check: Verify operation from 15-20 feet (critical for parking lots)
3. Panic button: Hold 3 seconds for full siren activation
4. Trunk release: Test if your model has this feature
Red flag: If range is less than 15 feet, the battery isn’t seated properly or polarity is reversed. Reopen and adjust immediately.
When Reprogramming Is Actually Necessary
Most Honda key fobs retain programming after battery changes—reprogramming is only needed if you see “KEY NOT DETECTED” on your dashboard or push-button start fails. To reset:
1. Sit in driver’s seat with all doors closed
2. Cycle ignition ON-OFF-ON-OFF-ON (don’t start engine)
3. Press driver’s door lock button
4. Press any fob button within 10 seconds
5. Listen for door lock cycling (success signal)
Common error: Skipping the door lock step causes programming failure. Always complete the full sequence.
Troubleshoot Critical Post-Replacement Failures
Why Your Honda Key Fob Still Won’t Work
Reversed battery polarity causes 80% of post-replacement failures—check that + and – symbols match the compartment markings. Voltage below 2.8V indicates a defective battery; test with a multimeter before installation. Corroded contacts appear as white crust; clean gently with isopropyl alcohol and cotton swab. Improper seating creates intermittent function—press down firmly on the battery until it clicks into place.
Repairing Accidental Damage
Hairline cracks can be fixed with cyanoacrylate glue applied with a toothpick. Severe cracks require full fob replacement ($150-$400 at dealers). Lost rubber gaskets compromise water resistance—order OEM part #35120-TZ5-A01 for most 2016+ models. Never use your Honda key fob with visible damage; moisture ingress destroys circuitry within weeks.
Model-Specific Honda Key Fob Secrets
Honda CR-V (2017-2022) Quirks
The backup key slides outward (not inward like other models). Critical step: After key removal, insert your tool at the 9 o’clock position of the key slot. The CR-V’s larger fob requires more separation force—apply pressure evenly around all four sides. Misalignment during reassembly causes the key slot to jam.
Honda Civic Type R Card Fob Warning
This model uses a CR2016 battery with reversed polarity (positive side down). Installing it like standard fobs destroys the circuit board instantly. Always verify orientation against your old battery—Type R fobs have the “+” symbol facing the circuit board.
Extend Your Honda Key Fob Battery Life
Proactive Maintenance Checklist
Replace batteries every 3 years regardless of symptoms—waiting for failure leaves you stranded. Store fobs away from phones/wallets to prevent accidental button presses that drain power. Keep spare CR2032 in glove box (original packaging prevents short-circuiting). Avoid extreme temperatures—never leave fobs on dashboards in summer or in freezing trunks.
Warning sign: If your Honda key fob requires multiple button presses to function, replace the battery immediately. Delaying causes permanent circuit damage from voltage fluctuations.
Key Takeaway: Changing your Honda key fob battery takes five minutes with the correct CR2032/CR2025/CR2016 battery and a plastic pry tool—no dealer visit needed. Always verify battery type before purchasing, note orientation during removal, and test range immediately after installation. Keep a spare premium battery in your glove compartment and replace it every three years proactively. If your fob still fails after replacement, check polarity first before considering reprogramming. This simple fix saves $72 compared to dealer service while preventing parking lot emergencies.


