
That sinking feeling when your Mazda 3 key remote stops working as you approach your car is all too familiar. You press the unlock button repeatedly from across the parking lot, but nothing happens until you’re practically leaning against your vehicle. This frustrating experience almost always signals one simple issue: your key fob battery is dead or dying. The good news is changing the battery in your Mazda 3 key remote is a quick, inexpensive fix you can complete in under five minutes with just a few basic tools. No special technical skills required—just the right battery and a gentle touch.
Replacing your Mazda 3 key remote battery yourself saves you a trip to the dealership and prevents those embarrassing moments when your key fails at the worst possible time. In this guide, I’ll walk you through the exact process for changing your Mazda 3 key remote battery, including how to identify your specific key model, select the correct replacement battery, open the fob without causing damage, and verify everything works perfectly afterward. By following these steps, you’ll restore full functionality to your key remote and avoid unnecessary service costs.
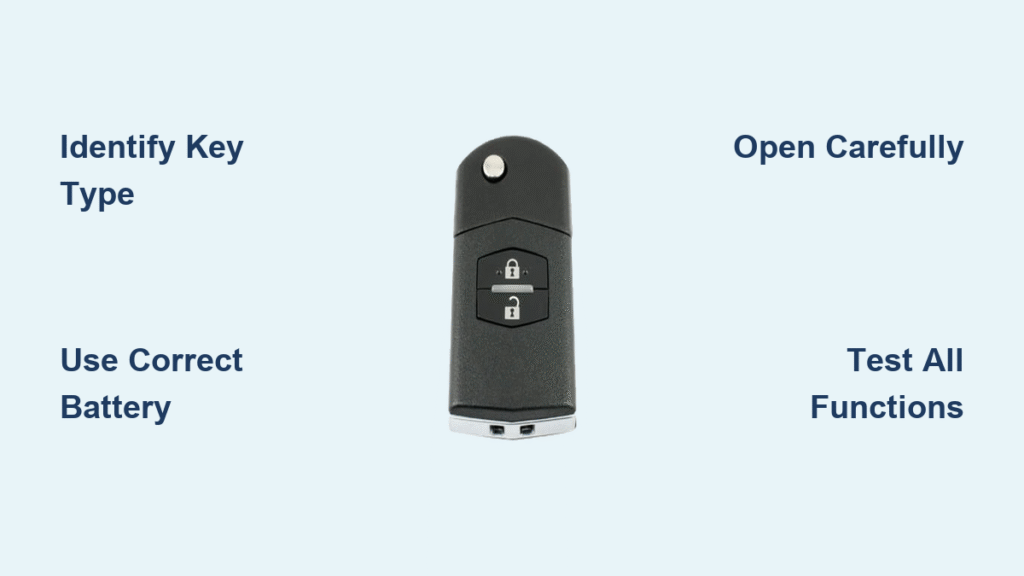
Identify Your Mazda 3 Key Remote Type First
Before attempting to open your key fob, correctly identifying your Mazda 3 key remote type is crucial since different models require slightly different opening techniques. Mazda has used three primary key designs across various model years, each with distinct opening mechanisms.
Flip Key Models (2014-2018) feature a traditional metal key that folds out from the fob body. These have a visible seam running along the side where the key mechanism tucks in. When holding this model, you’ll notice the seam creates a slight ridge where the two plastic halves meet—this is your entry point for prying the case open.
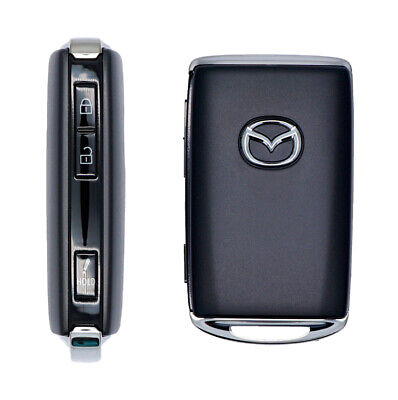
Smart Key Models (2019 and newer) present a sleeker, more modern design without an exposed metal key. Instead, look for a small, subtle notch on the back or side edge of the fob—this is where you’ll insert your screwdriver. These models often have a more seamless appearance, making the opening point less obvious than flip key designs.
Card Key Models (available on select trims) are significantly thinner and resemble credit cards with minimal button placement. Opening these requires extra care as their delicate construction makes them more prone to cracking. The seam on these models is extremely fine, so inspect carefully under good lighting to locate the separation point.
If you’re unsure which model you have, check your owner’s manual or search online using your specific Mazda 3 model year—this small identification step prevents damage during the opening process.
Select the Correct Replacement Battery Type
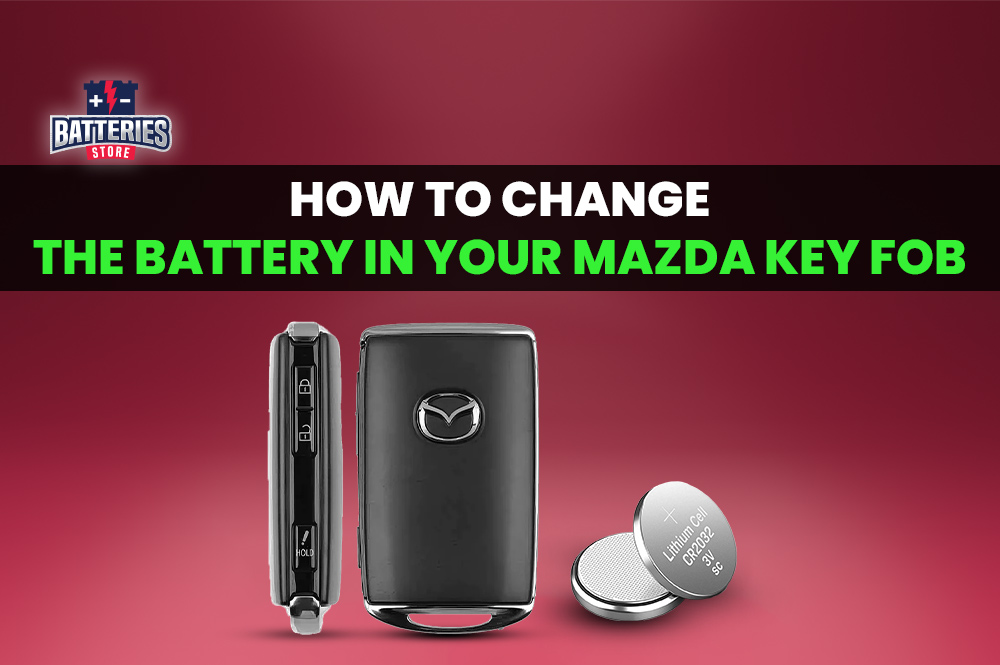
Choosing the right battery is critical—installing the wrong type can damage your key fob or simply fail to work. Mazda 3 key remotes primarily use either CR2025 or CR2032 lithium coin batteries, both delivering 3 volts with a 20mm diameter. The only difference is thickness: CR2025 measures 2.5mm while CR2032 is 3.2mm. Even this small difference matters significantly.
Which battery does your Mazda 3 need?
– CR2025: Typically used in older flip key models (2010-2015)
– CR2032: Standard for newer smart key models (2016 and later)
You can verify your specific battery type by checking the old battery after removal—both types clearly display their model number on the positive side. When purchasing, consider buying two batteries: install one immediately and store the second as a spare. These batteries typically last 1-2 years depending on usage, so having a backup prevents future lockouts.
Purchase your replacement battery from reliable sources like auto parts stores (AutoZone, O’Reilly Auto Parts), big box retailers (Walmart, Target automotive sections), or reputable online sellers on Amazon. While dealerships sell the correct battery, they often charge significantly more than retail alternatives.
Gather Essential Tools Before Starting
Having the right tools ready prevents damage to your key fob during the battery replacement process. You’ll need minimal equipment for this quick repair:
Must-have items:
– Small flathead screwdriver (precision size works best)
– Correct replacement battery (CR2025 or CR2032)
– Clean microfiber cloth (to protect your work surface)
Helpful extras:
– Tweezers for precise battery handling
– Magnifying glass for inspecting small components
– Cotton swabs and isopropyl alcohol for contact cleaning
Critical warning: Never use knives, metal objects with sharp edges, or excessive force when opening your key fob—these can easily crack the plastic casing or damage internal components. The entire process should require minimal pressure if done correctly.
Open Your Mazda 3 Key Fob Without Damage
Locate the Precise Opening Point
Examine your key fob under bright light to identify the exact separation point. Look for:
– A tiny notch or groove along the edge
– A thin line where the two plastic halves join
– Slight color variations indicating the seam
For flip key models, the seam runs along the side where the metal key folds in. Smart key models typically have a small indentation on the back edge. Card keys require the most careful inspection as their seams are extremely subtle.
Safe Opening Technique
- Protect your key: Place the microfiber cloth on your work surface to prevent scratches
- Position your tool: Insert the screwdriver tip into the identified notch
- Apply gentle pressure: Twist slowly and steadily—don’t pry aggressively
- Work around the seam: Move the screwdriver along the edge to gradually separate the halves
Pro tip: If the case resists opening, warm the key slightly by holding it in your hands for a minute—cold plastic becomes brittle and more prone to cracking.
Complete Separation
Once you’ve created a small gap:
– Switch to using your fingers to continue separating the halves
– Keep both pieces parallel to prevent damaging internal components
– Note any small springs or buttons that might dislodge during opening
This step requires patience—rushing increases the risk of cracking your key fob case.
Remove the Old Battery Correctly
Verify Battery Orientation First
Before removing the old battery, note these critical details:
– Positive (+) side direction: Usually faces toward the buttons
– Negative (-) side: Typically faces the circuit board
– Retention mechanism: Small metal clip holding the battery in place
Taking mental note of the orientation prevents installation errors with the new battery.
Safe Removal Steps
- Gentle lifting: Use your screwdriver edge or fingernail to carefully lift one edge
- Avoid circuitry: Don’t touch electronic components with metal tools
- Complete removal: Ensure no battery fragments remain in the holder
- Contact inspection: Check for corrosion or damage on the metal contacts
Critical warning: Never force the battery out with excessive pressure—this can bend or break the retention clip, making proper battery seating impossible.
Install the New Battery Properly
Correct Placement Technique
- Match orientation: Position the new battery exactly as the old one was installed
- Center alignment: Ensure the battery sits properly within the holder
- Firm seating: Press down until you feel it click into place
Verification Checklist
- Flush fit: Battery shouldn’t protrude above the holder
- Polarity confirmation: Double-check + and – alignment
- Secure placement: Battery shouldn’t shift when gently touched
Common mistake alert: Installing the battery upside down is the most frequent error—this prevents your key from working even with a fresh battery. If your key doesn’t work after replacement, this should be your first troubleshooting step.
Reassemble Your Key Fob Carefully
Precise Component Alignment
- Button verification: Ensure all rubber buttons sit correctly in their housings
- Seam matching: Align the two plastic halves perfectly before pressing together
- Even pressure: Apply firm, uniform pressure around the entire edge
Final Assembly Test
- Audible confirmation: Listen for distinct clicking sounds as the case snaps shut
- Visual inspection: Run your finger along the seam to confirm no gaps
- Button response: Test each button before considering the job complete
Pro tip: If buttons feel sticky or unresponsive after reassembly, reopen the case and check for misaligned components—forcing the case shut with improper alignment can cause permanent damage.
Test All Functions Thoroughly
Immediate Function Verification
Stand near your Mazda 3 and test:
– Lock function: Single press should engage all door locks
– Unlock sequence: Press twice for full door access
– Trunk release: Hold for 2-3 seconds to open the trunk
– Panic button: Brief press activates alarm (hold to cancel)
Range and Reliability Testing
- Distance verification: Should work reliably from 30-50 feet away
- Obstacle testing: Try operation through walls or windows
- Response consistency: Multiple presses should all trigger successfully
Important note: If your key’s operating range remains poor after battery replacement, you may need to reprogram the remote or investigate other issues.
Troubleshoot Common Post-Replacement Issues
Key Still Unresponsive
Immediate checks:
– Battery installed upside down (flip it and retest)
– Corrosion on contacts (clean with alcohol swab)
– Case not fully closed (reseat the halves)
– Internal damage (requires professional repair)
Button Malfunctions
- Stiff operation: Case misalignment—reopen and adjust components
- No tactile feedback: Button rubber pad out of position
- Multiple triggers: Debris under button membrane
Reprogramming After Battery Change
If your key requires reprogramming:
1. Sit in driver’s seat with all doors closed
2. Insert key (if equipped) and turn to ON position
3. Press lock button on remote within 10 seconds
4. Turn key off and remove
Maximize Your New Battery’s Lifespan
Smart Usage Habits
- Avoid rapid, repeated button presses which drain power quickly
- Store keys away from extreme temperatures (never leave in direct sunlight)
- Rotate between multiple keys if you have spares
Environmental Protection
- Keep key fob dry, especially after exposure to rain
- Avoid placing near strong magnetic fields (speakers, electronics)
- Remove battery from rarely used spare keys to prevent corrosion
Pro tip: If you primarily use one key, test your spare every few months to ensure its battery remains functional—this prevents surprises when you actually need the backup.
When to Seek Professional Help
Consider dealership service if:
– Your key fob case cracked during opening
– Multiple programming attempts failed
– Visible circuit board damage exists
– Water damage signs appear inside the fob
Cost comparison: Dealership battery replacement typically costs $15-25, while reprogramming runs $50-100. You can save significantly by purchasing the battery yourself and requesting installation only—many dealerships will honor this request at a lower cost than their full battery service package.
Replacing your Mazda 3 key remote battery is one of the simplest automotive maintenance tasks you can perform. By following these steps carefully, you’ll restore full functionality to your key fob in minutes, avoiding the inconvenience and expense of dealership visits. Keep a spare battery in your glove compartment for emergencies—when your key inevitably dies again in the future, you’ll be prepared to fix it on the spot. Remember that if your key still malfunctions after proper battery replacement, the issue likely extends beyond simple power failure, and professional diagnosis becomes necessary before further DIY attempts.


