
That frustrating click when you turn the key, dim headlights on a cold morning, or your Ram 1500 refusing to start altogether—these are unmistakable signs your battery needs replacement. Replacing your Ram 1500 battery isn’t just about swapping parts; it’s a critical maintenance task that keeps your truck’s sophisticated electronics humming. The good news? With the right approach, changing the battery in your Ram 1500 takes less than an hour and requires only basic tools. You’ll avoid dealership fees while gaining the confidence to handle this essential DIY job.
Unlike older vehicles, modern Rams store complex computer settings that reset during battery replacement. Skip key steps like using a memory saver, and you’ll battle erratic idle, lost radio presets, or even warning lights that won’t clear. This guide cuts through the confusion with model-specific instructions—whether your battery hides under the passenger seat in 2009-2018 models or you’re wrestling with dual batteries in a diesel. We’ll show you exactly how to replace your Ram 1500 battery safely while preserving your truck’s electronic personality.
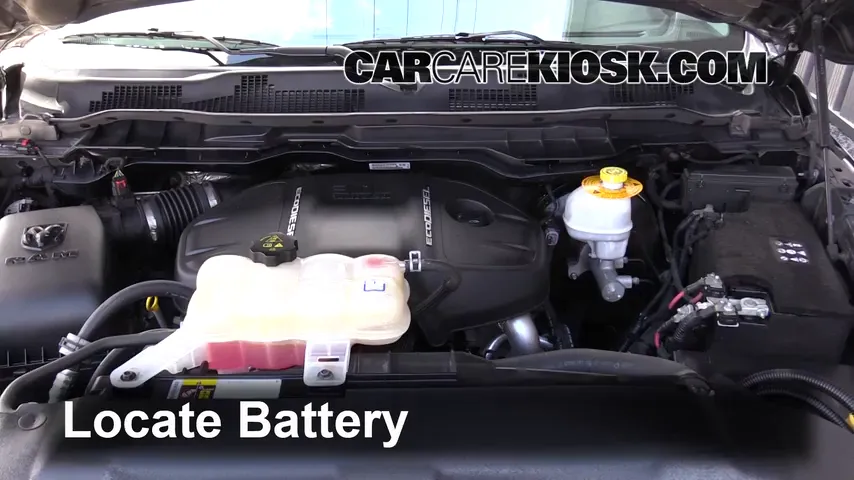
Locate Your Battery Position

Standard Engine Bay Location for Gas Models
Most 2019-2024 Ram 1500 gas models tuck the battery on the passenger side near the firewall, concealed under a black plastic cover labeled with a battery symbol. To access it, lift the front tabs of this heat-shielding cover and slide it toward the front bumper—no tools required. Critical tip: Never skip removing this cover; leaving it on traps heat that cooks your new battery, cutting its lifespan by up to 40%. If you spot corrosion on the cover’s underside, it’s a red flag that your old battery was leaking and needs immediate replacement.
Hidden Battery Locations
2009-2018 Models: Your battery likely hides under the passenger seat. Slide the seat fully forward, then remove two Torx T-50 screws securing the seat rail. Lift the seat cushion to reveal the battery compartment—common in Rams designed for better weight distribution. Warning: Disconnect the seat wiring harness first to prevent airbag errors.
Diesel Variants: EcoDiesel models demand dual-battery replacement. The primary battery sits under the hood (Group 94R), while the secondary lurks in the passenger fender well or under the rear seat (Group 48). Never replace just one—mismatched batteries cause charging imbalances that fry your alternator within months.
Choose Correct Battery Specifications
Gas Engine Requirements (2019-2024)
Your 5.7L Hemi Ram 1500 needs an H7 group battery with 700-850 cold cranking amps (CCA) and 140+ minutes reserve capacity. Settling for lower specs risks failure below 20°F—exactly when you need reliability most. Check the label on your old battery: If it shows “H6” instead of “H7,” your model requires the slightly smaller size (common in base trims). Pro tip: Measure your battery tray first; some aftermarket batteries overflow standard dimensions.
Diesel Dual Battery Setup
EcoDiesel Rams require matched pairs: Group 94R primary (850 CCA) and Group 48 secondary (550 CCA). Combined CCA must exceed 1,400. Mixing brands or ages here is catastrophic—imagine one battery dragging the other down like a weak link in a chain. Always buy both from the same batch to ensure identical chemical aging.
Essential Tools and Safety Gear
Required Tools List
- 10mm socket/wrench: For terminal bolts (loosen counterclockwise)
- 13mm socket: Hold-down clamp bolts (typically one bolt)
- Battery carrier strap: Prevents 45+ lb battery drops that crack trays
- Wire brush terminal cleaner: Removes corrosion without scratching
- Dielectric grease: Creates a moisture barrier on terminals
Critical Safety Steps
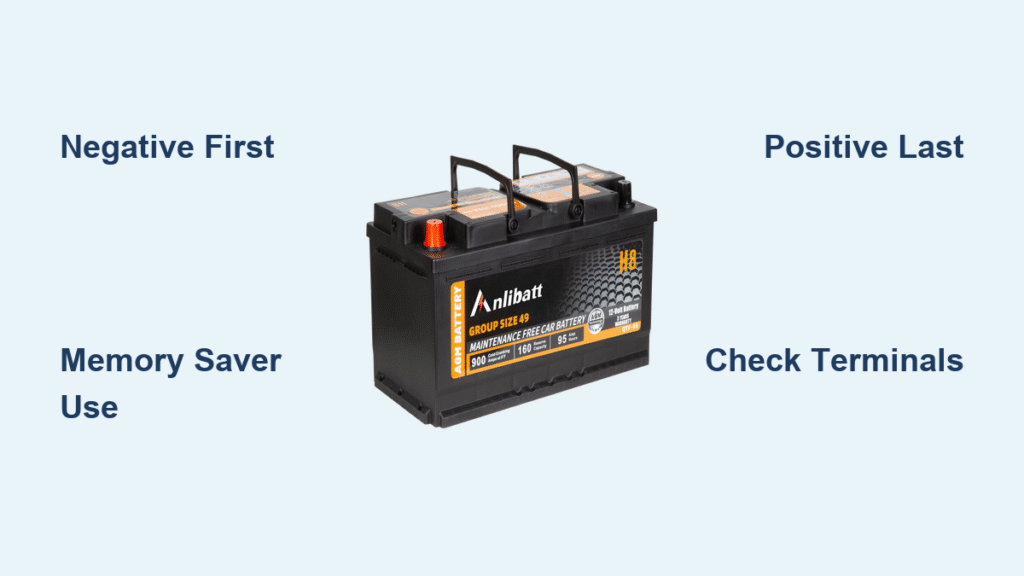
Park on level ground with the parking brake engaged and wait 30 minutes after shutdown—modern Rams retain live voltage in modules that can zap you or fry electronics. Never wear rings or bracelets near terminals; a slipped wrench could cause molten metal burns. Always disconnect the negative terminal first to break the circuit safely. Keep baking soda and water nearby to neutralize accidental acid spills.
Remove Old Battery Safely
Memory Saver Connection
Plug a $15 OBD-II memory saver into your diagnostic port before touching terminals. This maintains radio presets, seat positions, and engine computer adaptations. Without it, your Ram may run rough for 50+ miles while the computer relearns fuel trims—a headache you can avoid in 30 seconds.
Terminal Disconnection Order
Negative terminal first: Locate the black cable marked with “–”. Loosen the 10mm bolt, then wiggle the clamp side-to-side while pulling straight up—never twist. Secure the cable away with a zip tie. Positive terminal second: Repeat with the red “++” cable. Critical: If you see green crust inside cable insulation, replace the cable—it’s corroded internally and will cause voltage drops.
Install New Battery Correctly
Position and Secure
Lower the new battery using your carrier strap, ensuring the positive terminal faces the truck’s rear (matching factory orientation). Reinstall the hold-down clamp with the 13mm bolt—snug but not overtightened (10-12 ft-lbs max). Test by gently rocking the battery; it should move less than 1/4 inch. Over-tightening cracks the case and voids warranties.
Terminal Connection Sequence
Positive terminal first: Slide the red clamp fully onto the post until it seats with a click, then tighten the 10mm bolt to 7-8 ft-lbs. Verify it won’t rotate when tugged. Negative terminal last: Repeat with the black clamp. Pro tip: Apply dielectric grease after tightening to block corrosion without compromising conductivity.
Post-Installation System Check
Initial Startup Protocol
Start the engine immediately after connecting terminals—delaying risks module errors. Let it idle for 3-5 minutes while watching for:
– Warning lights that don’t extinguish after 10 seconds (indicates registration issues)
– Headlights that dim when AC kicks on (sign of weak alternator)
– Rough idle that smooths within 2 minutes (normal computer relearning)
Critical: If the “Check Engine” light stays on, drive 15+ miles before diagnosing—it often clears after a full drive cycle.
Computer Relearning Drive
Take a 15-minute drive mixing highway speeds (55+ mph) and stop-and-go traffic. This resets transmission shift points and fuel trims. Expect 10-15% lower fuel economy for the first 100 miles—your computer is recalibrating. Never skip this step; incomplete relearning strains engine components.
Troubleshoot Common Issues

Engine Won’t Start After Replacement
Check these in order:
1. Terminal tightness (loose clamps cause 80% of no-starts)
2. Battery voltage (must read 12.6V+ with engine off)
3. Transmission in Park (safety switch failure is common)
4. Blown 40A “IGN 1” fuse in the engine bay box
Warning: If you hear rapid clicking, your battery isn’t seated correctly—recheck hold-down tightness.
Accessories Not Working
Uconnect systems often freeze after battery swaps. Hold the radio power button for 10 full seconds to force a reboot. Power windows may work only with the key in “run” position—this clears after 30 minutes as modules synchronize. Persistent issues? Check the 30A “BODY” fuse.
Extend Battery Life Pro Tips
Monthly Maintenance Routine
Every 30 days, test terminal tightness with your fingers—snug enough to resist wiggling but not wrench-tight. Look for white powder (sulfation) or green crust (corrosion) starting at the post base. Clean with baking soda/water mix quarterly, then apply dielectric grease. This 5-minute ritual adds 2+ years to battery life.
Storage Best Practices
For storage over 30 days, use a smart battery tender ($35), not a trickle charger. Trickle chargers overcharge modern AGM batteries, boiling electrolytes dry. Set the tender to “AGM mode” if applicable—this maintains 13.2V without damage.
Dispose Old Battery Properly
Core Return Process
Return your old battery within 30 days to reclaim the $10-25 core charge. Keep your receipt—stores like AutoZone require it for refunds. Never toss batteries in trash; lead and acid contaminate groundwater. Most retailers accept cores even if you didn’t buy there, but call first to confirm.
Recycling Options
Scrap yards pay $5-10 for lead content, but auto parts stores offer instant core refunds. Pro tip: If storing the old battery temporarily, place it upright on cardboard in a garage corner—never on concrete (myth) but to prevent acid leaks on surfaces.
Model-Specific Variations
2009-2018 Under-Seat Removal
Skip awkward seat-rail contortions: Remove the entire passenger seat. Disconnect the wiring harness under the seat, unbolt the four Torx T-55 bolts, and lift the seat out. Now you’ll have full access to the Group 65 battery. Reinstall the seat before connecting terminals to avoid pinched wires.
TRX and High-Performance Models
TRX Rams need a heavy-duty Group 49 AGM battery ($180 vs. $120 standard) to power the supercharger’s electrical demands. Critical: After installation, use a $50 OBDLink scanner to register the new battery type—skip this and your charging system will underperform.
When to Call Professionals
Complex Access Locations
If your battery hides in the fender well (common on 2021+ diesels), professional help saves hours. Mechanics remove inner fender liners in 15 minutes—a 2-hour DIY headache. Worth the $75 labor fee if you lack socket extensions or panel tools.
Warranty Considerations
Check your RamCare warranty—many cover free battery replacement within 3 years. Dealerships handle battery registration seamlessly on 2018+ models, while independent shops may lack diagnostic tools. Always get a written quote before authorizing work.
Replacing your Ram 1500 battery correctly takes 30-60 minutes and prevents costly electrical gremlins down the road. Remember the golden rules: negative terminal off first, positive on first, and always use a memory saver. By following these model-specific steps, you’ll keep your truck’s sophisticated electronics happy while saving $100+ over dealership fees. If corrosion was severe on your old battery, inspect cables for internal damage—replacing frayed wires now avoids roadside breakdowns later. For ongoing reliability, add battery terminal checks to your monthly maintenance routine; that 5-minute investment doubles your battery’s lifespan in harsh conditions.


