
Your key fob clicks uselessly against a silent car as panic sets in—dead battery means locked doors and zero access to the battery itself. This exact nightmare strands over 2 million drivers annually when electronic locks fail with a completely drained battery. But you can bypass this trap using hidden mechanical systems and smart workarounds. Within 20 minutes, you’ll unlock your vehicle, replace the battery safely, and restore all functions—no locksmith or tow truck required. This guide delivers field-tested steps for modern vehicles where dead batteries disable all electronic entry.
Unlock Your Car Doors with a Dead Battery Using Mechanical Key
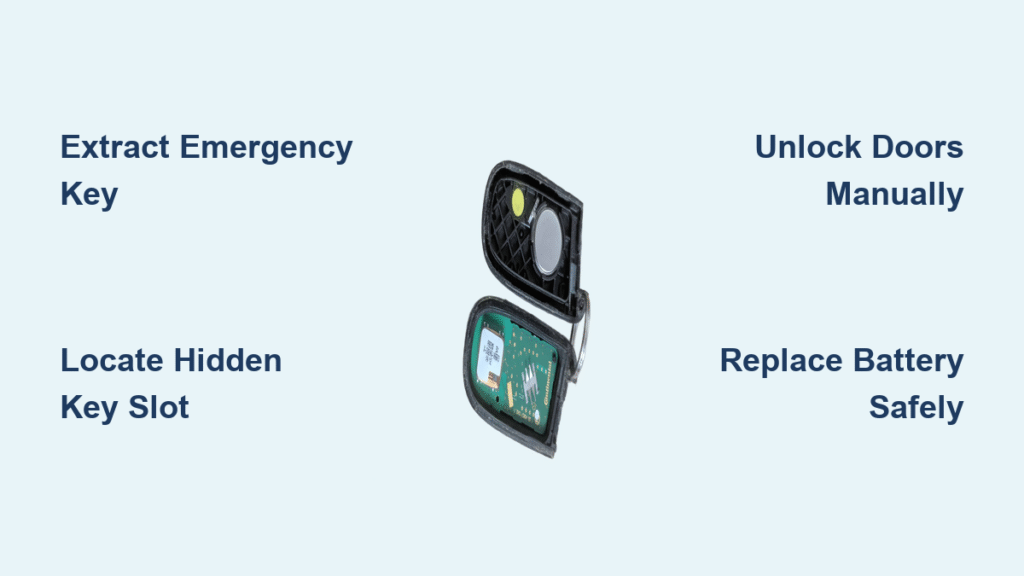
Locate and Extract Your Emergency Metal Key
Your key fob contains a hidden physical key designed for this exact crisis. Press the release button on the fob’s side (often marked with a key icon) to slide out the metal blade. For flip-out keys, locate the small lever on the fob body and snap the blade outward. If you have a separate valet key clipped to your ring, use this instead—it’s specifically designed for manual entry when electronics fail. Never force the mechanism; a gentle press releases the key without damaging internal components.
Find the Concealed Key Slot on Modern Vehicles
Modern cars hide mechanical key slots behind protective covers to prevent tampering. Run your finger along the driver’s door handle to locate a small rectangular plastic panel—typically 1-2 inches long near the base. Insert the tip of your emergency key under the cover’s edge and gently pry upward. You’ll feel it snap free, revealing the traditional keyhole. On BMWs and Mercedes, this cover often matches the door handle color; on Toyotas, it’s a black rectangle near the handle base.
Unlock Doors Without Damaging the Mechanism
Insert the metal key fully into the exposed slot. Turn counterclockwise with steady pressure—do not jerk or force it. Modern locks seize from disuse, requiring 2-3 seconds of consistent torque to engage. If the driver’s door resists, try the passenger side; many vehicles like Hondas and Fords have simpler lock mechanisms on non-driver doors. If both fail, proceed to trunk access: Insert your key into the trunk lock (usually left of license plate), fold down rear seats using the pull handle inside the trunk, then crawl into the cabin to access the hood release.
Access Your Battery Through a Locked Vehicle

Activate Hood Release from Inside the Cabin
Once inside, locate the hood release lever under the driver’s dashboard—typically within 6 inches of the footwell on the left side. Some vehicles like Ford F-150s hide it behind a small panel; others like Subarus require pulling a lever near the steering column. Pull firmly until you hear a distinct “thunk” from the hood. Exit and slide your fingers under the hood’s front edge to find the secondary safety latch. Push it sideways while lifting the hood to fully open it.
Navigate Alternative Battery Locations When Hood is Inaccessible
If your battery isn’t in the engine bay (common in BMWs, Cadillacs, and Audis), check under rear seats first. Lift the seat cushion by pulling the release strap at the front base—many German cars store batteries here. For trunk-mounted batteries (Jaguars, some Mercedes), remove the trunk floor panel by locating the battery symbol near the spare tire well. Peel back the carpet to reveal a plastic cover secured by hand-twist screws; remove these to access the battery. Luxury vehicles often use click-in panels marked with lightning icons—press along the edges to release hidden clips.
Remove the Dead Battery Without Short-Circuiting
Critical Safety Steps Before Touching Terminals
Put on safety glasses immediately—battery acid can cause permanent eye damage if the case cracks. Slide on nitrile gloves (latex won’t block sulfuric acid) and remove rings or watches that could bridge terminals. Ensure the parking brake is engaged and ignition key is stowed away from metal surfaces. If you smell rotten eggs (hydrogen sulfide), ventilate the area first—this indicates dangerous gas buildup from the dead battery.
Disconnect Terminals in the Correct Sequence
Always loosen the negative (black) terminal first using an 8mm or 10mm wrench—this prevents sparks that could ignite hydrogen gas. Grip the terminal clamp (not the bolt) and twist while pulling upward; if corroded, tap the clamp with a screwdriver to break the seal. Label cables with masking tape (“POS” and “NEG”) before removing the positive (red) terminal. Corrosion appears as white/green crust; brush it off with a baking soda paste before disconnecting. Skip this step and you risk damaging the vehicle’s computer systems.
Lift the Battery Safely from Tight Spaces
Most batteries weigh 35-45 pounds—bend at the knees, not the waist, to avoid back injury. Remove the hold-down bracket with a 13mm socket, noting its position for reinstallation. For under-seat batteries, use a towel as a sling through the terminal posts to lift it straight up. Place the old battery upright on cardboard or plastic; tipping it spills corrosive acid. If the battery is swollen or leaking, call a professional—never handle compromised units.
Install the Replacement Battery Correctly

Match Battery Specifications to Avoid Damage
Verify three critical specs before purchasing: Group Size (tray dimensions), Cold Cranking Amps (CCA—must meet OEM minimum), and terminal orientation (top-post vs. side-post). An incorrect CCA rating (e.g., 500 CCA in a BMW requiring 680 CCA) will cause repeated failures. Luxury vehicles like Mercedes often require AGM batteries—substituting a standard lead-acid unit triggers “battery malfunction” warnings. Check your owner’s manual appendix or the old battery’s label for exact specs.
Secure Connections to Prevent Electrical Failures
Position the new battery with posts facing the cables—reversing it strains wiring harnesses. Reinstall the hold-down bracket first; a loose battery shifts during driving and cracks terminals. Connect positive (red) terminal before negative and apply dielectric grease to both posts to block corrosion. Tighten until the clamp doesn’t rotate—but over-torquing strips lead posts. Test connections by gently tugging cables; they shouldn’t move more than 1/8 inch.
Restore Electronics After Battery Replacement

Immediate Power Verification Steps
Turn the key to “ACC” position—dashboard lights should illuminate within 2 seconds. If not, recheck terminal tightness and clean corrosion with a wire brush. Test power locks: Press the unlock button on your fob; if it works, the battery is correctly installed. No response? Your key fob battery may also be dead—replace it with a CR2032 coin cell. Still no luck? Check the 120-amp main fuse in the engine bay fuse box; a blown fuse blocks all accessory power.
Reset Systems That Fail After Power Loss
Re-enter your radio code within 10 minutes—found in the glove compartment or owner’s manual (never taped to the radio). For recalibrating power windows: Start the engine, roll each window down completely, then hold the switch up for 5 seconds after it closes. Reset the clock by pressing the “HR” and “MIN” buttons simultaneously until digits flash. Luxury cars like BMWs require dealer programming for the battery management system—if the “Check Engine” light stays on, schedule a $75 dealer reset.
Prevent Future Lockouts from Dead Batteries
Emergency Kit Essentials for Stranded Drivers
Store a portable jump starter in your center console—lithium units like NOCO Boost Plus (size of a soda can) deliver 1000 amps to start any engine. Include a mechanical key duplicate (labeled for trunk/doors) and spare key fob batteries. Download your vehicle’s owner’s manual PDF to your phone; search “mechanical key” during emergencies. Most importantly: test battery voltage monthly with a $10 multimeter—below 12.4 volts means immediate replacement.
Early Warning Signs You’re About to Get Locked Out
Notice if your key fob range shrinks—needing to touch the door to unlock signals a weak fob battery. Dashboard warnings like “Check Charging System” or flickering interior lights precede total failure by 2-3 weeks. If doors unlock slowly (with a delayed “clunk”), your main battery is dying. Replace batteries at 4 years old regardless of symptoms; 80% fail between 3-5 years. Keep a printed list of radio security codes in your wallet—digital copies vanish when your phone dies.
Your dead battery no longer traps you outside a silent car. By using the hidden mechanical key to gain entry, accessing alternative battery locations, and installing the correct replacement with precise terminal sequencing, you restore full functionality in under 30 minutes. Implement the emergency kit and monthly voltage checks outlined here, and you’ll never face this lockout crisis again—turning a potential $200 locksmith call into a $120 battery swap you control. The next time your key fob goes silent, you’ll calmly extract that emergency key and reclaim your day.


