
Your car won’t start on a freezing Tuesday morning. The dashboard lights flicker weakly, and the engine emits a dreaded clicking sound. Before calling roadside assistance, remember this: changing your car battery at home is one of the simplest automotive repairs you can master. With the right tools and 20 minutes of your time, you’ll avoid $75+ service fees and gain the confidence to handle future breakdowns. This guide delivers exactly what you need to know to safely and efficiently replace your car battery at home—no prior mechanical experience required. You’ll learn critical safety steps, how to choose the perfect replacement, and avoid costly mistakes that could damage your vehicle’s electronics.
Most drivers face dead-battery emergencies, but few realize that over 80% of these situations can be resolved by swapping the battery yourself. Modern vehicles make this task remarkably straightforward, yet many people pay for unnecessary towing simply because they don’t know the process. By following this guide, you’ll not only solve your immediate problem but also extend your new battery’s lifespan through proper installation techniques. Let’s get your engine roaring again.
Essential Safety Gear First
Skip this step, and you risk chemical burns or electrical damage. Car batteries contain sulfuric acid that can blind you in seconds or melt clothing on contact. Never work without these non-negotiable protections:
- Safety glasses with side shields—standard sunglasses won’t cut it
- Chemical-resistant gloves (nitrile or rubber, never latex)
- Long-sleeved cotton shirt and pants—synthetics can melt onto skin
- Sturdy closed-toe shoes—batteries weigh 30-50 pounds and slip easily
Clear your workspace immediately: Work outdoors or in a garage with the door fully open. Remove all jewelry (watches, rings, necklaces) that could accidentally bridge terminals and cause sparks. Keep cigarettes, lighters, and open flames at least 15 feet away—hydrogen gas from batteries is highly explosive. Place a bucket of baking soda and water nearby to neutralize any acid spills instantly. If acid contacts your skin, rinse under running water for 15 minutes and seek medical help.
Required Tools for Battery Replacement

Must-Have Tools
- Adjustable wrench or battery terminal wrench (8mm, 10mm, or 12mm sizes cover 90% of vehicles)
- Wire brush with steel bristles—essential for removing terminal corrosion
- Battery terminal puller—saves you from prying clamps with screwdrivers
- Bright LED flashlight—engine compartments are notoriously dark
Smart Additions
- Battery carrier strap—prevents back strain when lifting heavy units
- Digital multimeter—confirms your new battery has 12.4-12.7V before installation
- Anti-corrosion grease—applies in seconds to extend connection life
- OBD-II memory saver ($12 on Amazon)—preserves radio codes and ECU settings
Pro Tip: Wrap your wrench handles in electrical tape to prevent accidental short circuits against metal surfaces. One slip could fry your car’s computer system.
Choose Correct Battery Type

Buying the wrong battery is the #1 DIY mistake. Your vehicle’s group size (like 24F, 35, or 65) dictates physical dimensions—measure your old battery’s length, width, and height before shopping. Never assume size based on vehicle model year; a 2018 Honda Civic might need a different battery than a 2022 model.
Check these specs on your old battery’s label:
– Cold Cranking Amps (CCA)—must meet or exceed your manufacturer’s rating (e.g., 600 CCA minimum)
– Reserve Capacity (RC)—time (in minutes) the battery powers essentials if the alternator fails
– Terminal configuration—top posts (most common) vs. side posts (some imports)
Take a photo of your old battery’s label to the store. Auto parts clerks often confuse similar group sizes like 24 and 24F, which differ by just 1/4 inch but won’t fit securely.
Prepare Vehicle for Battery Swap
- Park on solid level ground—engage the parking brake firmly
- Turn off ALL electronics—headlights, radio, phone chargers, even USB ports
- Remove keys from ignition—prevents accidental accessory power drain
- Let the engine cool 30 minutes—hot components increase acid burn risks
- Locate your battery—90% are under the hood, but BMWs and some hybrids hide them in trunks
Critical Warning: European vehicles (BMW, Mercedes, Volvo) often require battery registration via diagnostic tools after replacement. Check your owner’s manual—if it mentions “battery coding” or “registration,” skip DIY and visit a dealer.
Remove Old Battery Safely
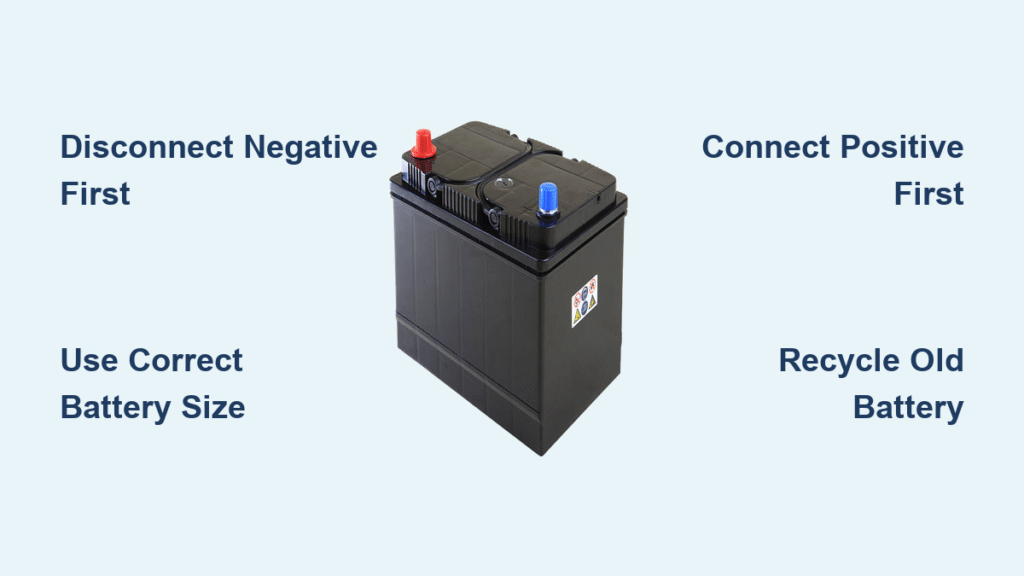
Disconnect Negative Terminal First
Always remove the black negative (-) terminal first. Loosen the clamp bolt counterclockwise with your wrench, then wiggle the clamp side-to-side while lifting straight up—never pry against the battery case. Secure the cable away from metal using a zip tie. Skipping this order risks a dangerous short circuit if your wrench touches both terminals.
Disconnect Positive Terminal
Repeat for the red positive (+) terminal. Double-check that the cable can’t swing back and touch metal—it carries live voltage. If corrosion glues the clamp in place, spray it with a baking soda-water mix, wait 5 minutes, then use your terminal puller.
Remove Hold-Down Hardware
Most batteries use a simple bracket or plastic wedge. Remove securing bolts (typically 10mm or 13mm), noting their orientation for reinstallation. Clean the tray with your wire brush—corrosion here can eat through your new battery’s casing.
Lift Battery Out
Grip the battery from the bottom with both hands (top handles often break), or use a carrier strap. Lift straight up—no tilting—to avoid spilling acid. Place it on cardboard away from children and pets.
Install New Battery Correctly
Clean and Position New Unit
Scrub the battery tray with your wire brush until bare metal shows. Check your new battery’s voltage with a multimeter—it must read 12.4-12.7V. Apply anti-corrosion grease to both terminals before installation. Position the battery ensuring positive/negative posts align perfectly with cables.
Secure Hold-Down Hardware
Reinstall brackets exactly as you removed them. Tighten bolts until snug—over-torquing cracks the plastic casing. The battery should move less than ½ inch when pushed side-to-side.
Connect Terminals (Reverse Order)
Attach positive first, then negative. Slide the red positive clamp straight down onto the post until it seats fully, then tighten clockwise. Repeat for black negative. Never force a clamp—if it doesn’t fit smoothly, reposition the battery.
Post-Installation Testing
Immediate Verification
Start the engine—it should crank vigorously within 1 second. If not, immediately check:
– Terminal tightness (clamps shouldn’t rotate when tugged)
– Hold-down security (excessive vibration kills new batteries)
– Voltage with multimeter (engine off: 12.4V+; running: 13.7-14.7V)
Reset Electronics
Most cars lose radio presets and clock settings. Re-enter radio codes (found in glove box manuals), then reinitialize power windows by holding each switch up/down for 5 seconds. A $15 OBD-II memory saver plugged before disconnecting the old battery prevents all this.
Troubleshoot Common Problems
Engine Won’t Start After Replacement
- Check terminal polarity—reversed connections melt fuses instantly
- Inspect main fuses—look for blown 80-100A fuses near the battery
- Verify voltage—below 12.2V means the battery is defective or discharged
Battery Warning Light Stays On
This indicates alternator issues, not a bad battery. Test charging voltage at the battery posts with the engine running—if below 13.7V, your alternator needs service.
Dispose Old Battery Responsibly
Illegal and dangerous to trash batteries. Return your old unit to any auto parts store (AutoZone, O’Reilly) for free recycling—they’ll often refund a $10-20 core charge instantly. Lead and sulfuric acid in batteries contaminate soil for centuries if landfilled; recycling recovers 99% of materials.
Extend New Battery Life
Monthly Maintenance
- Clean terminals with baking soda-water mix if white/green corrosion appears
- Check hold-down tightness—vibration is the silent killer of batteries
- Test voltage with a $10 multimeter every 3 months
Critical Warning: Swollen battery cases or slow cranking in cold weather mean replacement is urgent—don’t wait for total failure. With proper care, your new battery will deliver 3-5 years of reliable service.
Final Note: Changing your car battery at home saves money, builds confidence, and takes less time than your morning coffee run. By following these precise steps, you’ve not only solved today’s emergency but also gained a lifelong skill that keeps your vehicle running smoothly for years. Remember to recycle responsibly—every returned battery prevents environmental harm while earning you a small refund. Now go enjoy the satisfaction of starting your car with the knowledge that you did it yourself.


