
That dreaded click instead of an engine roar. Your Hyundai Tucson sits silent in the parking lot, battery completely dead. Before you call for help, know this: replacing your Tucson’s battery is simpler than you think—and you’ll save $75 in shop fees. With basic tools and this step-by-step guide, you can complete the entire how to change car battery Hyundai Tucson process in under 30 minutes. No special skills needed, just careful attention to sequence.
Whether you drive a 2010 Tucson or the latest model, the battery replacement procedure remains consistent across all generations. The real challenge isn’t the physical work—it’s avoiding the common mistakes that leave your electronics scrambled or trigger warning lights. This guide covers every critical detail, from selecting the exact battery size to resetting finicky systems afterward. You’ll gain confidence handling your vehicle while ensuring your Tucson starts reliably for years.
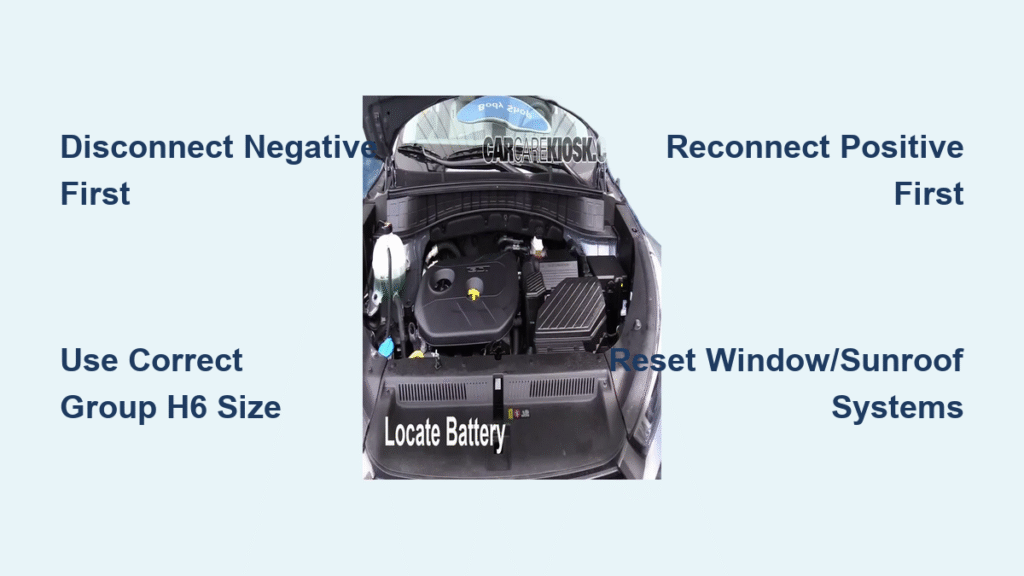
Locate Your Tucson’s Battery Correctly
Hyundai tucks the battery in the driver-side engine bay behind protective plastic housing—a smart design that shields it from heat and road debris. But this placement trips up first-time DIYers who expect it on the passenger side. Spot it immediately by looking for the black rectangular cover near the firewall (the wall separating engine and cabin). Missing this location wastes precious time when you’re already stranded.
Remove the Battery Cover Without Damage
Pop your hood using the dash-mounted lever, then release the secondary latch under the hood’s center. With the hood propped open, find the black plastic cover on the left side—it snaps into place with two prominent tabs. Press both tabs inward simultaneously while lifting straight up. Never pry with screwdrivers; the plastic snaps easily. If the cover resists, wiggle gently side-to-side while lifting. This cover comes off cleanly every time when you apply even pressure on both tabs.
Verify Terminal Orientation Before Disconnecting
Your Tucson uses a reversed terminal configuration—a critical detail often overlooked. The positive (+) terminal sits closest to the front bumper (marked with red plastic), while the negative (-) terminal faces the windshield (black cover). Getting this backward during installation prevents cable connection and risks electrical damage. Confirm this layout matches your new battery before proceeding. If your replacement battery has terminals reversed, return it immediately—forcing a mismatched battery causes dangerous sparks.
Gather These Exact Tools for Success

Skipping proper tools risks damaging terminals or straining your back lifting the heavy battery. Grab these specific items before starting:
- 10mm socket/wrench: For terminal clamps (most common size)
- 12mm socket/wrench: For hold-down bracket bolts
- Battery carrier strap: Essential for safe lifting (35-45 lb weight)
- Wire brush + baking soda: For corrosion removal
- Terminal protector spray: Prevents future corrosion
- Safety glasses + gloves: Non-negotiable for acid protection
Select the Correct Battery Size (No Guessing)
Your Tucson requires Group Size H6 (also called Group 48 or 124R) batteries. Get this wrong and cables won’t reach. Verify these specs before purchase:
– 12-volt system
– 70-80 amp-hour capacity
– Minimum 600 cold cranking amps (700+ for cold climates)
– Top-post terminals with reversed configuration
OEM Hyundai batteries offer perfect fitment, but trusted alternatives like Interstate Megatron H6 or Optima RedTop H6 work flawlessly. Expect to pay $130-$180 for quality 3-5 year warranty coverage. Never buy a battery without checking the group size stamp—auto parts stores often mislabel H6 as H7.
Disconnect Terminals in Strict Safety Order
Working on electrical systems demands military precision. Park on level ground, engage parking brake, turn off all accessories, and ensure the engine is cold. One slip here could fry your Tucson’s computer. Always disconnect the negative terminal first—this breaks the circuit and prevents dangerous shorting. Using your 10mm wrench, loosen the clamp bolt counterclockwise. Twist and wiggle the clamp upward (don’t pry!) until it slides free. Secure the cable away from metal with a zip tie—it must NOT touch the battery post.
Disconnect Positive Terminal Safely
Only after the negative cable is secured should you touch the positive terminal. Repeat the same process: loosen the 10mm bolt, remove the red clamp, and immediately cover the exposed post with a shop rag. This rag acts as a spark shield during battery removal. If you skip covering it, accidental contact with metal tools could cause explosive arcing. Double-check both cables are clear before proceeding.
Remove the Old Battery Safely
Release the Hold-Down Bracket Properly
A loose battery shifts during driving, causing terminal damage. Locate the metal bracket spanning the battery top—it secures with two 12mm bolts. Remove both bolts completely before lifting. Note any plastic spacers or rubber cushions; these prevent vibration damage and must be reinstalled. If bolts are rusted, spray with penetrating oil and wait 10 minutes before retrying. Never force bolts—stripped threads ruin the mounting tray.
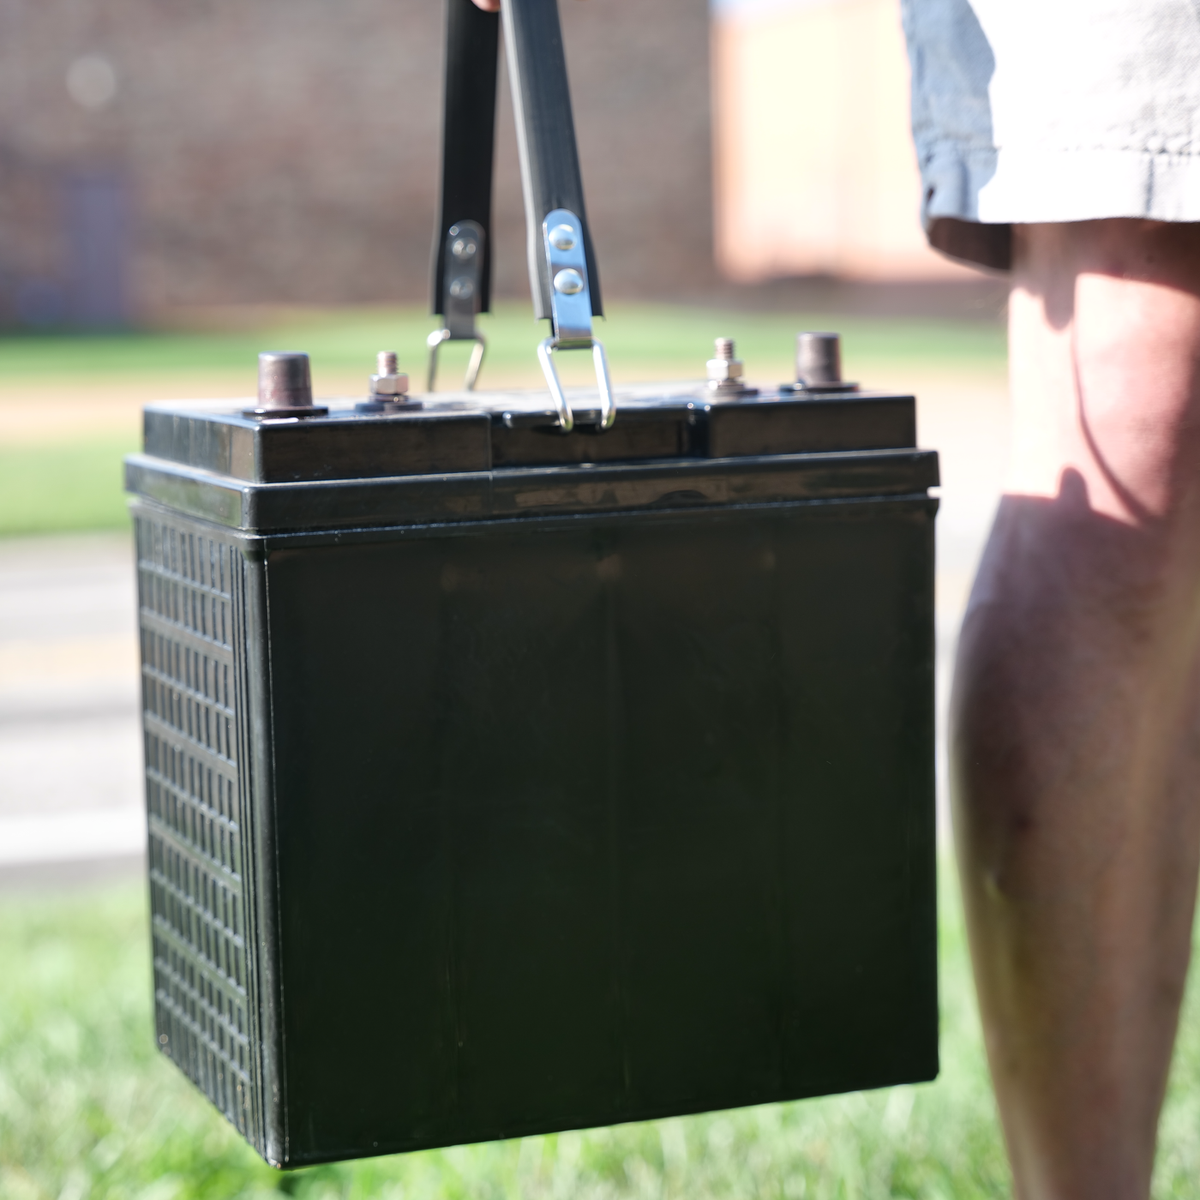
Lift the Battery Without Injury
Batteries weigh as much as a toddler. Use your battery carrier strap: loop it under the battery base, cross straps over the top, and lift with your legs—not your back. If no strap, grip firmly with both hands under the base (never lift by terminals!). Lift straight up without tilting—any tilt risks sulfuric acid leaks. Place the old battery on cardboard away from children and pets. Auto parts stores recycle these for free, so keep it accessible for your new battery trip.
Prepare the Tray for New Battery
With the old battery out, inspect the tray for blue-white corrosion—a sign of acid leakage. Left untreated, this eats through metal and causes electrical faults. Mix 1 tablespoon baking soda with 1 cup water in a spray bottle. Spray generously on corroded areas—it will fizz violently as it neutralizes acid. Scrub with a wire brush until metal shines, then wipe dry with clean rags. Never use water alone; it spreads corrosion.
Protect New Connections Proactively
Before installing the new battery, apply terminal protector spray to both cable ends. This waxy coating blocks moisture and prevents future corrosion. Skip this step, and you’ll face the same problem in 18 months. Petroleum jelly works in a pinch but melts in engine heat—spray protectors last longer. Ensure cables move freely without tension; kinked wires cause voltage drops.
Install and Secure the New Battery

Position for Perfect Terminal Alignment
Lower the new battery into the tray, matching the old unit’s orientation. Critical check: positive terminal must face the front bumper, negative toward the windshield. If posts don’t align with cables, rotate the battery 180 degrees—H6 batteries have symmetrical cases but reversed terminals. Ensure the battery sits flat with no rocking. Uneven seating cracks cases during bumps.
Tighten the Hold-Down Correctly
Reinstall spacers and the metal bracket exactly as removed. Tighten 12mm bolts to “hand-tight plus a quarter-turn”—overtightening cracks the battery case. Under-tightening allows dangerous movement. Test by shaking the battery; zero movement means secure. Never let the bracket touch terminals; this causes short circuits that melt wiring.
Reconnect Terminals in Critical Sequence
Attach Positive Terminal First
Connect the red positive cable first—this completes the circuit safely. Slide the clamp onto the post until it seats fully. Tighten the 10mm bolt clockwise until snug (about 5-8 ft-lbs). Test security by wiggling hard; no rotation should occur. Loose connections cause voltage drops that mimic dead batteries.
Connect Negative Terminal Last
Only now attach the black negative cable. Tighten securely, then apply terminal protector to both posts. This final step prevents sparks that could ignite battery gases. If you smell sulfur (rotten eggs) during installation, stop immediately—ventilate the area before continuing.
Reset All Affected Systems Immediately
Your Tucson’s electronics reset after power loss, but some need manual recalibration. Start the engine and let it idle for 2 minutes while systems reboot. Watch the dashboard—all warning lights should extinguish after the self-test. If the battery light stays on, shut off immediately and recheck connections.
Perform Essential Resets in Order
- Power windows: Lower each window fully, raise and hold switch 2 seconds after closing
- Sunroof: Open fully, close and hold switch 3 seconds
- Steering calibration: Turn wheel hard left → hard right → center (resets stability control)
- Radio presets: Reprogram favorites immediately to avoid frustration
The ECU relearns idle settings during your first 10 miles of driving. Avoid short trips during this period.
Troubleshoot Common Post-Installation Issues
Engine Cranks But Won’t Start
If your Tucson turns over but won’t fire:
– Verify battery voltage (12.6V+ with engine off)
– Check hold-down bracket clearance from terminals
– Inspect main fuses in the engine bay box
– Ensure positive/negative cables are on correct posts
Persistent Battery Warning Light
This indicates charging system failure:
– Re-tighten both terminals (corrosion causes false readings)
– Test alternator output (should be 13.8-14.4V at idle)
– Get free charging system tests at auto parts stores
Dead Accessories After Replacement
When radio or windows fail:
– Check interior fuse box (look for “ACC” or “CIG” fuses)
– Reprogram window/sunroof as outlined above
– Reset ECU by disconnecting negative terminal for 15 minutes
Maintain Your New Battery for Long Life
Check terminals every 3 months for blue-white corrosion. Clean with baking soda solution and reapply protector spray. During summer, ensure the hold-down bracket isn’t loose—vibration kills batteries. In winter, keep terminals coated thickly to combat moisture. For storage over 30 days, disconnect the negative cable and use a $25 battery maintainer. Never let your Tucson sit with voltage below 12.4V; this causes permanent sulfation damage.
Final Tip: Always register your new battery’s warranty and keep the receipt in your glovebox. Most quality H6 batteries offer 3-5 years free replacement—but without proof of purchase, you’re paying full price for early failures. Now that you’ve mastered how to change car battery Hyundai Tucson, you’ve eliminated one of the most common roadside emergencies. Your Tucson starts reliably, your wallet stays full, and you’ve gained confidence to tackle future DIY repairs. Remember: the next time that click happens, you won’t need a tow truck—you’ve got this.


