
Your Chrysler Pacifica’s dashboard lights dim, the engine cranks sluggishly on a cold morning, and that dreaded clicking sound confirms it—your battery has reached its expiration date. Knowing how to change Chrysler Pacifica battery properly isn’t just about swapping a component; it’s about restoring your minivan’s nerve center to prevent costly electrical gremlins. With most Pacificas requiring battery replacement every four years due to chemical degradation, this guide delivers the precise steps to avoid radio lockouts, transmission hiccups, and security code nightmares. You’ll discover exactly where Chrysler hides the battery (spoiler: it’s rarely where you’d expect), the critical sequence for terminal disconnection, and the post-replacement rituals that prevent $300+ dealership visits.
Unlike conventional vehicles with hood-mounted batteries, your Pacifica’s power source plays hide-and-seek across three potential locations depending on model year and trim. The 2017 Touring 3.6L V6 configuration serves as our reference, but these steps apply universally with minor location variations. By following this procedure correctly, you’ll bypass common pitfalls like corrupted transmission programming or permanent radio lockouts—saving $150 in labor while gaining confidence for future DIY maintenance.
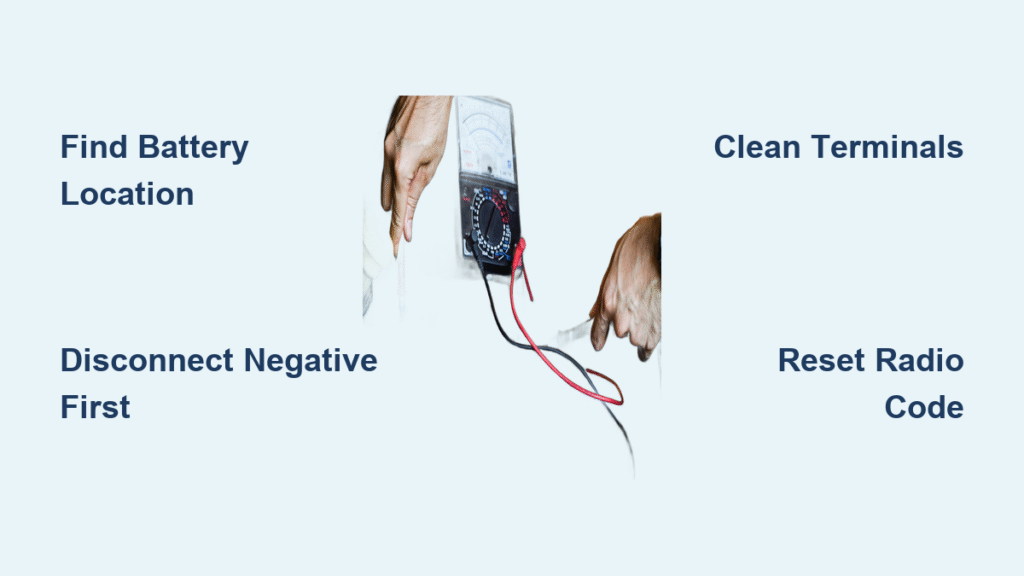
Find Your Chrysler Pacifica Battery in 3 Possible Locations
Chrysler engineers strategically relocated the battery to optimize weight distribution and cabin space, creating confusion for first-time replacers. Don’t waste time searching under the driver’s seat—start systematically with these locations.
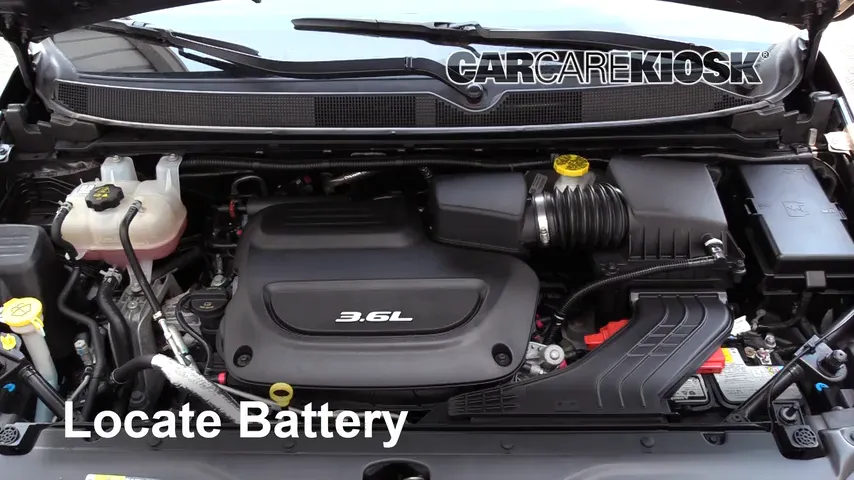
Check Engine Bay Air Filter Housing First
Pop the hood and remove the plastic engine cover (lift straight up with both hands). Now locate the air filter housing on the passenger side—this black rectangular box often conceals the battery beneath its lid. Remove the two wing nuts securing the top, lift the cover, and you’ll typically find the Group 48 battery nestled underneath. If your Pacifica lacks this configuration, inspect the cowl area near the windshield wiper mechanism where some models tuck the battery behind plastic trim.
Verify Trunk or Rear Fender Locations
When engine bay searches come up empty, pivot to these alternative spots:
– Trunk floor compartment: Lift the spare tire cover and remove the rectangular floor panel near the wheel well
– Rear fender well: Check behind interior trim panels on the driver’s side near the rear seat
– Second-row seat base: Some hybrid models hide batteries under removable floor panels
Essential Tools and Safety Setup for Pacifica Battery Replacement
Skipping safety protocols risks electrical damage to your Pacifica’s sensitive computer modules. This isn’t your grandfather’s car battery—modern Chrysler systems require specific precautions before touching a single terminal.
Must-Have Tools Checklist
- 10mm socket wrench: For terminal nuts (never use pliers that could short terminals)
- Battery terminal cleaner: Wire brush specifically for lead-acid terminals
- Nitrile gloves and safety glasses: Essential protection against sulfuric acid
- Memory saver device (optional): Maintains radio presets and ECU settings ($20 at auto parts stores)
Critical Pre-Work Safety Sequence
Park on level ground with parking brake engaged. Turn off all accessories, remove ignition keys, and wait 10 full minutes before starting. This allows the vehicle’s computers to fully power down, preventing voltage spikes that could corrupt modules when disconnecting the battery. Never skip this step—even brief electrical surges can trigger transmission relearning issues.
Remove Old Battery Using Correct Terminal Sequence
The sequence for disconnecting terminals is non-negotiable. One wrong move could fry your Pacifica’s electrical system costing thousands in repairs.
Disconnect Negative Terminal First—Always
Locate the black cable marked with a minus (-) symbol. Using your 10mm wrench, loosen the clamp nut just enough to wiggle the terminal free—never pry with metal tools. Once disconnected, immediately secure the cable away from the battery post using zip ties or tape. This prevents accidental contact that causes dangerous sparks.
Remove Positive Terminal Only After Negative Is Secured
The red cable with plus (+) symbol comes off second. If the terminal feels stuck, spray penetrating lubricant and wait 2 minutes before gently wiggling free. Critical warning: If you accidentally touch the positive cable to any metal surface while the negative remains connected, you’ll create a direct short circuit—potentially destroying fuses or control modules.
Extract Battery With Proper Lifting Technique
Most Pacifica batteries weigh 40+ pounds. Bend at the knees, grip the battery case firmly (never lift by terminals), and lift straight up. If obstructed by air filter housings or cowl pieces, remove those components first—never force the battery out. Note the battery’s orientation (positive terminal position) for correct reinstallation.
Install New Battery With Precision Terminal Connection
Reinstalling incorrectly causes immediate electrical damage. Your Pacifica requires specific Group 48 or H6 batteries—using the wrong size risks poor connections and acid leaks.
Position New Battery Matching Original Orientation
Place the new battery so positive (+) and negative (-) posts align exactly with cable positions. The hold-down bracket must sit flush against the battery’s top edges—never force a misaligned battery. If your replacement lacks a bracket, purchase one immediately; loose batteries vibrate terminals loose causing premature failure.
Connect Terminals in Reverse Order (Positive First)
Start with the red positive (+) terminal. Before connecting, scrub both cable end and battery post with your terminal cleaner until shiny metal appears. Tighten the clamp nut until snug, then give exactly one-quarter turn more—overtightening cracks battery posts. Repeat for negative terminal, ensuring no cable strands touch metal surfaces.
Reset Pacifica Electronics After Battery Replacement
This is where most DIYers fail. Skipping these steps triggers radio lockouts and transmission confusion that mimic serious mechanical failures.
Recover Radio Security Code Immediately
Your radio displays “CODE” or remains silent post-replacement. Find the security code in your owner’s manual—typically a sticker inside the front cover or on a separate card. Enter using radio presets. If lost: Call Chrysler customer service with your VIN—they provide codes free within 24 hours. Never guess codes; three failed attempts lock the system for 1 hour.
Allow Transmission Computer to Relearn Driving Patterns
Expect delayed shifts or harsh gear changes for the first 50-100 miles. The transmission control module lost its adaptive memory of your driving style. Drive normally during this period—avoid rapid acceleration as it confuses the relearning process. This isn’t transmission failure; it’s normal system recalibration.
Test New Battery Installation With Voltage Verification
Don’t assume success after the first crank. Verify everything functions before closing the hood.
Check Charging System With Multimeter
Set your multimeter to DC voltage. With engine off, read should show 12.4-12.6 volts. Start the engine—reading must jump to 13.8-14.4 volts. Anything lower indicates alternator problems; higher than 14.6 volts risks overcharging. Also test electrical loads: headlights should burn bright (not dim) and power windows operate at full speed.
Avoid These 3 Costly Pacifica Battery Mistakes
Reversing Terminal Connection Sequence
Connecting positive first creates a direct path to ground through your wrench—causing catastrophic shorts. Always negative first when removing, positive first when installing. The positive cable routes to the starter and alternator; negative grounds to chassis.
Ignoring Transmission Relearning Period
Many owners panic when shift patterns change post-replacement, assuming transmission failure. This is normal relearning—aggressive driving during this phase forces repeated recalibration. Drive gently for the first day.
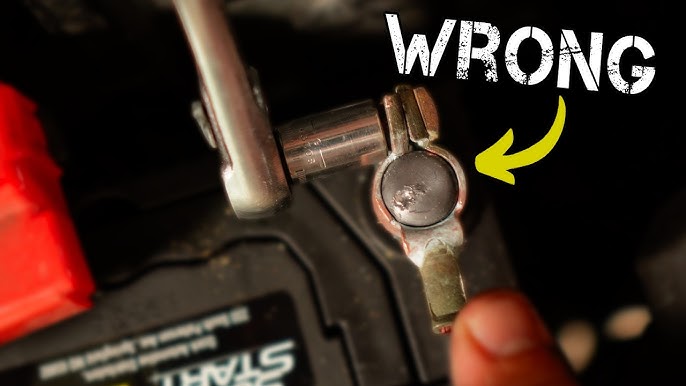
Skipping Terminal Cleaning
Installing on corroded posts causes voltage drops. Clean both battery posts and cable ends with baking soda solution and wire brush before connecting. Residue creates resistance that mimics weak battery symptoms.
Extend Your New Pacifica Battery’s Lifespan
Chrysler recommends replacing batteries every four years as chemical degradation accelerates. But proper care can add 12-18 months to its life.
Monthly Terminal Maintenance Routine
Check connections for white/green corrosion. Mix 1 tablespoon baking soda with 1 cup water, apply with old toothbrush, then rinse thoroughly. Ensure hold-down bracket remains tight—loose batteries fail 60% faster due to vibration damage. Pro tip: Apply dielectric grease after cleaning to prevent future corrosion.
Recognize Pre-Failure Warning Signs
Dim headlights during idle, slow cranking in warm weather, or intermittent electrical glitches signal impending failure. Test voltage monthly after year three—anything below 12.2 volts at rest indicates replacement time. Don’t wait for complete failure; degraded batteries strain the alternator.
When to Skip DIY and Call a Professional
While most Pacifica battery replacements take 30 minutes, certain scenarios warrant professional help.
Tricky Battery Locations Require Expertise
If your battery hides under second-row seats or requires disassembling interior trim, dealerships charge $75-150 labor. Many auto parts stores install batteries free if purchased there—worth considering for trunk or rear-fender locations. Critical exception: Hybrid models often need computer reprogramming only dealerships can perform.
Your Chrysler Pacifica now delivers reliable starts and smooth electronics—just drive normally for 50 miles while the transmission relearns your habits. Store your radio security code in your phone’s notes (not the glovebox!) for next time. Remember: replacing your battery every four years prevents those 3 AM stranding emergencies, and with these skills, you’ve just saved $150 while gaining confidence for your next DIY victory. Keep this guide handy—it’ll serve you well through your Pacifica’s next 200,000 miles.


