
Your Nissan sputters to life one morning with a sluggish crank, dashboard lights flicker like a faulty neon sign, and that ominous battery warning symbol glows red. By afternoon, you’re stranded in a grocery store parking lot as the engine refuses to turn over. This exact scenario strands thousands of Nissan owners yearly—but replacing your battery yourself saves $75+ in labor costs and gets you back on the road before your coffee goes cold. Follow this exact Nissan-specific process to swap your battery safely in under 30 minutes while preventing electrical nightmares. You’ll learn critical model-specific tricks dealers won’t tell you, like why disconnecting terminals in the wrong order could fry your infotainment system.
Why Your Nissan Won’t Start: 4 Clear Battery Failure Signs
Ignoring these symptoms guarantees a dead-battery emergency. Most Nissan batteries fail between years 3-5, but extreme heat in Phoenix or freezing Chicago winters can slash lifespan by 40%. Watch for these model-specific red flags:
- Slow cranking that worsens daily (Your Altima or Rogue takes 2+ seconds to start where it used to fire instantly)
- Persistent battery warning light after engine warm-up (Not the brief startup chime—this stays illuminated)
- Electrical gremlins like power windows lagging on your Pathfinder or headlights dimming at stoplights
- Swollen battery case visible under the hood (Common in sealed AGM batteries used in newer Nissans)
Don’t wait for total failure. Test your battery with a $20 multimeter each fall: below 12.4 volts when parked means replacement is urgent. Pro tip: Nissans with start-stop systems (like the 2020+ Rogue) drain batteries faster—replace at 3 years regardless of symptoms.
Pick the Exact Nissan Battery: Avoid Fitment Nightmares

Slapping in any “Group 35” battery causes connection issues or electrical damage in Nissans. Your Altima sedan and Titan truck need completely different specs. Verify these before buying:
Physical Must-Haves:
– Correct group size (Altima/Maxima/Rogue: Group 35; Frontier/Titan: Group 24F)
– Terminal position matching cable lengths (Some Nissans like the Murano have offset terminals)
– Top-post vs. side-post design (2018+ models often use side terminals)
Performance Non-Negotiables:
– CCA rating (Cold Cranking Amps): Must match or exceed OEM spec (e.g., 650 CCA for a 4-cylinder Altima)
– Reserve capacity: Critical for models with heavy electronics (65+ minutes for Armada SUVs)
– Warranty: Minimum 3-year coverage—Nissans drain batteries harder than most brands
Auto parts stores like O’Reilly or Advance Auto have Nissan-specific databases. Give your VIN—they’ll pull the exact fit. Never settle for “close enough”; a misaligned terminal on your Pathfinder can arc and melt wiring.
Gather Nissan-Specific Tools: Skip the Guesswork

Nissan battery terminals use smaller fasteners than most brands, causing DIYers to strip nuts with wrong tools. Collect these before starting:
Critical Tools:
– 10mm socket/wrench (for 90% of Nissan terminals)
– 13mm socket (for hold-down brackets on trucks like the Frontier)
– Terminal puller tool (Prevents breaking brittle plastic clamps on 2015+ models)
Safety Essentials:
– Chemical-resistant gloves (Battery acid eats through latex)
– Safety goggles (Acid splashes blind—no exceptions)
– Baking soda paste (1 tbsp baking soda + 1 cup water) for corrosion neutralization
Pro Move: Snap a photo of your battery connections with your phone before disconnecting anything. Nissan’s compact engine bays (like the Versa) make reconnection confusing with cables dangling.
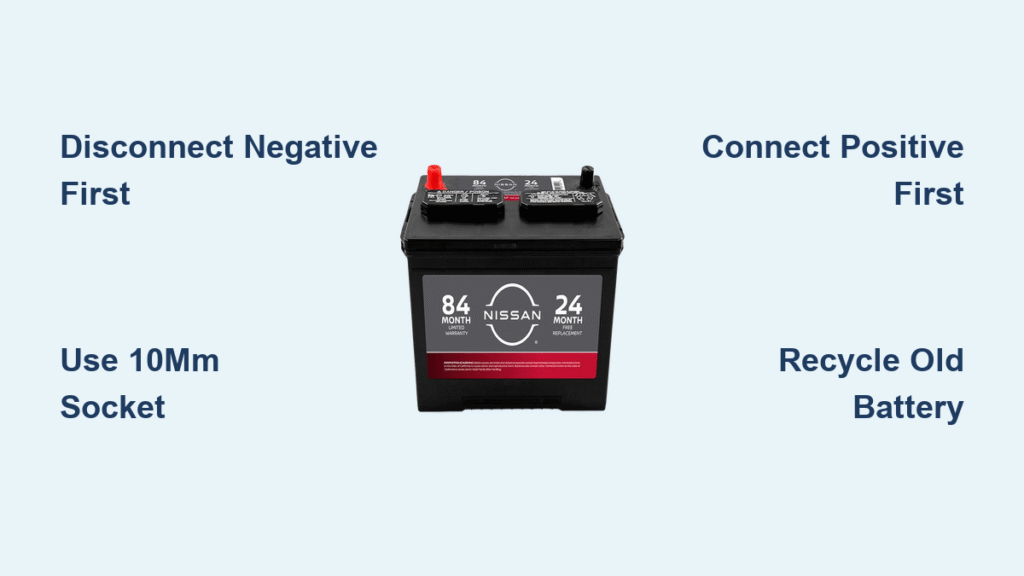
Disconnect Terminals Safely: The Nissan-Specific Sequence
Critical Rule: Always disconnect the negative terminal first on Nissans. Their aluminum engine blocks create instant shorts if your wrench touches metal while loosening positive cables. One slip fries the Body Control Module—$1,200+ in repairs.
Remove Negative Terminal in 4 Steps
- Locate the black cable marked with “–” (Usually on passenger side in Altimas, driver’s side in Rogues)
- Slide 10mm socket onto negative terminal nut, turn counter-clockwise
- Wiggle cable side-to-side while lifting straight up—never pry with screwdriver
- Tape cable end to fender with duct tape (Prevents accidental contact)
Remove Positive Terminal Correctly
- Find red cable marked “+” (Shorter cable on most Nissans—don’t confuse with hood latch)
- Loosen nut with 10mm socket—watch for hidden corrosion under rubber boot
- Lift cable off post without twisting (Breaks internal connections)
- Secure both cables away from battery tray
Warning: If you hear a click when loosening nuts, your wrench contacted metal—stop immediately. Test for electrical damage before proceeding.
Extract Your Old Nissan Battery Without Damage
Nissans use three hold-down types—know yours to avoid cracking the tray:
- Top bracket (Most sedans): Remove two 13mm bolts on metal bar spanning the battery
- Base clamp (SUVs like Pathfinder): Loosen single 10mm bolt at battery base wedge
- Side bracket (Compact models): Unscrew clamp on long side of battery
Lift the battery straight up using leg strength—Nissan batteries weigh 38-52 lbs. Never tilt; spilled acid destroys paint. Place old battery upright in a plastic bin (Auto parts stores provide these for recycling).
Clean Terminals Like a Nissan Tech: Stop Corrosion Recurrence
Nissan’s lead-calcium batteries cause blue-green corrosion that chokes connections. Skip this step and your new battery fails in 6 months.
Terminal Cleaning Protocol:
1. Scrub cable clamps and posts with brass wire brush (Steel brushes embed metal)
2. Dab baking soda paste on crusty areas—fizzing means neutralizing acid
3. Rinse with water bottle (Never spray—water enters electronics)
4. Dry with microfiber cloth (Moisture causes instant re-corrosion)
Tray Revival: Remove battery tray (2 screws on most models). Soak in baking soda solution, then scrub with old toothbrush. Apply dielectric grease to tray corners—prevents future acid damage.
Install New Battery: Nissan Alignment Secrets

Positioning errors cause cable strain and terminal melting. Ensure:
- Terminals face correct direction (Positive on left for Altimas, right for Rogues—check your photo)
- Battery sits flush in tray (Rocking cracks the case during bumps)
- Hold-down bracket is reinstalled before connecting cables
Tighten brackets to “snug plus 1/4 turn”—overtightening cracks AGM batteries common in 2020+ Nissans. The battery should move less than 1/4 inch when shoved side-to-side.
Reconnect Terminals: Prevent Nissan Electrical Resets
Reverse order is non-negotiable: Positive first, then negative. Doing it wrong triggers security codes that lock your radio.
Connect Positive Terminal Precisely
- Slide red cable onto post straight down—no angling
- Hand-tighten nut, then 1/2 turn with 10mm socket
- Test: Cable shouldn’t twist when tugged
Connect Negative Terminal Last
- Attach black cable—listen for faint click (Good contact sound)
- Tighten to same snugness as positive
- Critical check: Both terminals stay cool after 30 seconds of cranking
Pro Tip: Spray battery terminal protector on connections—prevents corrosion for 2+ years.
Test Drive & Reset Nissan Systems: Avoid Post-Swap Headaches
Start the engine immediately—delayed starts drain the new battery. Confirm:
- Strong, smooth cranking (Under 1 second for 4-cylinders)
- No battery warning light after 30 seconds of running
- All electronics function (Test power seats on Maxima, moonroof on Rogue)
Reset Essentials:
– Radio: Enter 4-digit code (Found in glovebox manual)
– Windows: Hold switch down 5 seconds after full close, then up 5 seconds
– Start-stop system: Drive 5 miles to recalibrate (2019+ models)
Take a 10-minute drive—short trips won’t recharge the battery fully.
Recycle Your Old Nissan Battery: Get $20 Instant Credit
Nissan batteries contain lead and sulfuric acid—never trash them. Most dealers and auto parts stores pay $10-$20 for cores. Bring your old battery to:
- O’Reilly/Advance Auto: Instant $15-$20 credit toward new battery
- Nissan Dealership: $20 core refund (Ask service desk—no appointment needed)
- Walmart: Free recycling (No credit, but convenient)
Warning: Leaking batteries must go to hazardous waste facilities—call 800-CLEANUP for locations.
Replacing your Nissan battery takes 22 minutes on average once you know the model-specific tricks. By following this exact sequence—from disconnecting negative first to resetting start-stop systems—you’ll avoid the #1 mistake that bricks infotainment systems. Remember: Annual terminal cleaning prevents 80% of premature failures, and always recycle for instant cash. If your Pathfinder still cranks slowly after replacement, test the alternator—it’s likely failing and killing new batteries. Now grab that 10mm socket and never pay for a tow truck again.


