
Your Subaru Outback sputters to life on a frigid Monday morning, the engine cranking slower each time you turn the key. The dashboard battery warning light glows ominously as you curse the $150 mechanic quote you received last week. Don’t get stranded—replacing your Outback’s battery takes just 30 minutes with basic tools. This guide delivers the exact process to safely swap your battery while avoiding common pitfalls that could fry your electronics. You’ll save $100+ in labor fees and gain confidence for future repairs.
Why Your Subaru Outback Won’t Start: Critical Warning Signs
Engine Cranks Slowly But Won’t Fire
That sluggish “rur-rur-rur” sound when turning the key means your battery can’t deliver enough power to ignite the engine. This isn’t an overnight failure—it creeps up over weeks as the battery’s capacity degrades. If you notice dimming interior lights during cranking or delayed starts even after short drives, replacement is urgent. Jumpstarting might work temporarily, but a failing battery won’t hold charge long enough for safe travel.
Dashboard Battery Warning Light Stays Illuminated
When the battery-shaped warning symbol glows steadily after startup, it signals a charging system failure. This could mean either a dying battery that won’t accept charge or an alternator malfunction. Test by revving the engine to 2,000 RPM—if the light stays on, the battery needs replacement. Ignoring this risks complete electrical failure mid-drive, leaving you stranded with no power for lights or steering assist.
Complete Failure to Start After Overnight Rest
Hearing rapid clicking with zero engine turnover means your battery has 0% usable charge. If jumpstarting gets you moving but the car dies immediately after disconnecting jumper cables, the alternator isn’t charging the battery. This scenario requires immediate battery replacement—continuing to drive risks damaging sensitive electronics like the ECU from unstable voltage.
Selecting Your Subaru Outback’s Exact Replacement Battery
Verify Physical Dimensions Before Buying
Measure your old battery’s length, width, and height before purchasing. Most Outbacks (2010-2025 models) require Group 35 or 24F batteries, but fitment varies by trim. Lift your hood and check the tray size—some trims have narrower spaces that reject standard Group 35 batteries. Always cross-reference with your owner’s manual; a battery that’s 1/2 inch too long won’t seat properly under the hold-down clamp.
Match Cold Cranking Amps to Your Climate
Subaru specifies a minimum 550 CCA (Cold Cranking Amps) for reliable starts. If you live where temperatures drop below 20°F (-7°C), upgrade to 650-700 CCA. Higher CCA delivers more power in freezing conditions when chemical reactions inside the battery slow down. Never install a lower-CCA battery—it may start your Outback on warm days but will fail miserably during winter commutes.
Confirm Terminal Configuration and Polarity
Inspect your old battery’s terminal placement: Most Outbacks have top-post terminals with positive (+) on the left when facing the battery. Side-terminal models (common on newer trims) require specific orientation. Take a photo before removal—reversing polarity during installation can melt wiring harnesses. Ensure the new battery’s terminals align with cable positions; stretched cables cause dangerous arcing.
Essential Safety Gear and Workspace Setup

Non-Negotiable Protective Equipment
Slip on chemical-resistant gloves and safety goggles before touching terminals. Battery acid causes permanent eye damage and severe skin burns. Keep a baking soda/water mix (1 cup baking soda to 1 gallon water) nearby to neutralize acid spills instantly. Never wear metal jewelry—accidental contact between terminals and rings can cause molten metal burns.
Required Tools Checklist
- 10mm socket wrench (for terminal bolts)
- 13mm socket (for hold-down clamp)
- Wire brush and battery terminal cleaner spray
- Dielectric grease (prevents future corrosion)
- Shop rags (for spill containment)
Pro Tip: Wrap the positive cable end in a rag after disconnection to prevent accidental contact with metal.
Safe Vehicle Positioning Protocol
Park on level ground with wheels turned away from traffic. Engage the parking brake and shift into Park. Open the hood fully and secure it with the prop rod. Work in daylight or with a headlamp—fumbling with dim lighting increases short-circuit risks. Remove keys from the ignition to prevent accidental accessory activation during replacement.
Locate and Access Your Outback’s Battery
Front Right Corner Engine Bay Position
Lift the hood and look toward the passenger-side front fender. The battery sits in a black plastic tray, often covered by a protective shroud clipped to the air intake duct. On 2015+ models, unclip the shroud by pressing plastic tabs on both sides—it lifts straight off. Avoid confusing it with the fuse box (usually black with diagrams printed on top).
Terminal Identification and Cable Routing
Positive terminal: Red cover marked “+” with thicker cable running toward the starter motor. Negative terminal: Black cover marked “-” connected directly to the chassis. Note the cable slack—some Outbacks have tight routing that requires loosening adjacent brackets. Check for corrosion on cables; green/white crust means you’ll need extra cleaning time.
Safe Removal of Dead Battery
Disconnect Negative Terminal First—Critical Step
Loosen the 10mm negative terminal bolt with clockwise taps using a wrench (prevents rounding). Wiggle the clamp side-to-side while pulling upward—never pry against the post. Once free, tuck the cable behind the radiator support away from metal surfaces. Skipping this order risks shorting tools across terminals when removing positive.
Positive Terminal Disconnection Technique
Repeat the same loosening method for the positive terminal. Before removal, spray corrosion inhibitor on the connection point if crusty buildup exists. Hold the cable steady while lifting the clamp off to avoid stressing the wiring. Place it on the engine block far from the battery tray.
Release Hold-Down Clamp Without Damage
Locate the metal bracket spanning the battery top (secured by one 13mm bolt). Loosen the bolt completely before attempting removal—forcing a corroded clamp cracks battery cases. On Outbacks with side clamps, slide the plastic wedge backward first. Keep all hardware in a magnetic tray; losing the clamp bolt means a trip to the dealership.
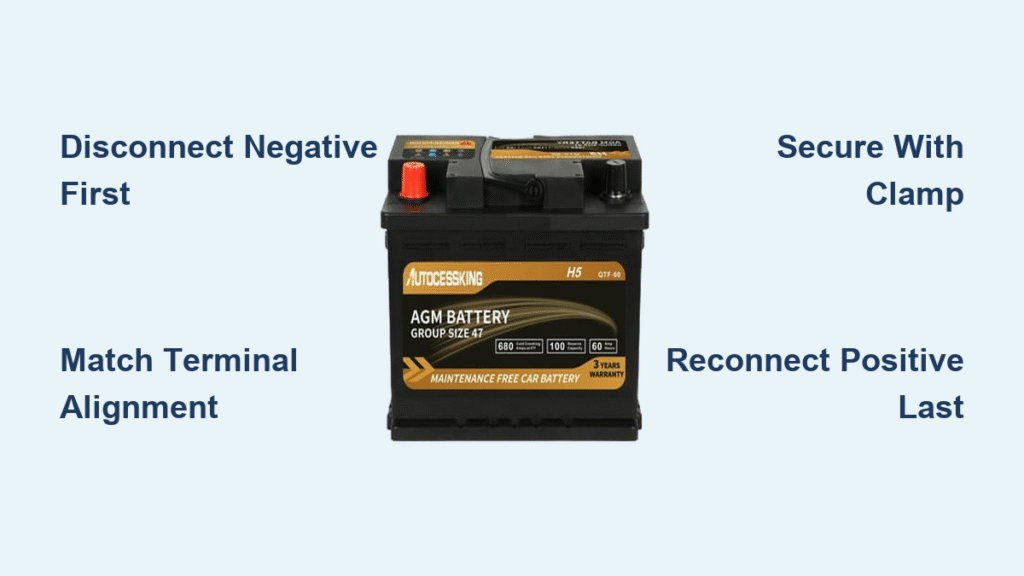
Install New Battery Correctly

Deep Clean Tray Before Placement
Scrub corrosion from the tray using a wire brush dipped in baking soda solution. Focus on drainage holes—clogged holes trap acid against the new battery. Rinse with water and dry thoroughly with compressed air. Inspect for rust holes; severe tray damage requires replacement before installation.
Position Battery With Terminal Alignment
Lower the new battery straight down into the tray. Ensure terminals face the exact direction as the old unit—reversed orientation strains cables. The battery should sit flush with no rocking. If it shifts when pushed, you have the wrong group size (common when using “universal fit” batteries).
Secure With Proper Clamp Tension
Reinstall the hold-down bracket with original hardware. Tighten until the battery can’t move when pushed firmly, but stop before the plastic case cracks (about 8-10 ft-lbs torque). Over-tightening is the #1 cause of premature battery failure—it damages internal plates.
Terminal Connection Sequence That Prevents Damage
Positive Terminal Connection First
Slide the positive clamp onto the post until it seats fully. Tighten the bolt until snug, then add exactly 1/4 turn more with your wrench. Test by trying to rotate the clamp—it should stay fixed. Apply dielectric grease to the connection to block moisture.
Negative Terminal Final Connection
Connect the negative cable last using the same tightening method. Double-check both terminals can’t rotate when pulled. Wipe excess grease from connections to avoid attracting dirt. Never skip dielectric grease—it prevents 95% of corrosion-related failures.
Post-Installation Verification Checklist
Start the engine and check for smooth operation. Test headlights (shouldn’t dim at idle), radio presets, and power windows. Confirm the battery warning light extinguishes within 3 seconds of startup. If accessories malfunction, recheck terminal tightness before assuming battery defects.
Reset Systems After Battery Replacement
Radio and Clock Reprogramming
Enter radio presets immediately—most Outbacks lose memory after 10 minutes without power. Have your security code ready (check glovebox or registration documents). Set the clock accurately; incorrect time disrupts navigation system functionality.
Window and Sunroof Initialization
For each window: Roll completely down, then up while holding the switch 2 seconds past closure. This resets auto-up/down sensors. Repeat for sunroof if equipped. Skipping this causes windows to stall mid-operation.
Proper Disposal and Maintenance
Recycling Old Batteries for Core Refund
Return your old battery to AutoZone, O’Reilly, or Advance Auto within 30 days for $10-20 core refund. Never discard in trash—lead and acid contaminate groundwater. Most stores accept batteries without purchase receipt if you show your new battery receipt.
Monthly Maintenance That Doubles Battery Life
Check terminals for white powder buildup monthly. Clean with wire brush and terminal cleaner spray. Tighten loose connections during oil changes. Pro Tip: Spray terminal protector after cleaning—it creates a moisture barrier that prevents corrosion for 6+ months.
Troubleshooting Common Post-Replacement Issues
Engine Cranks But Won’t Start
Recheck terminal tightness—loose connections cause voltage drops. Verify positive cable isn’t touching metal surfaces. Test battery voltage with a multimeter; below 12.4V indicates defective new battery.
Battery Warning Light Remains On
This signals charging system failure. Check alternator belt tension and connections. If lights dim at idle, the alternator isn’t charging the new battery—require professional diagnosis.
Power Windows Malfunction
Reinitialize windows as described in reset section. If issues persist, check fuse #7 (15A) in the engine compartment fuse box. A voltage spike during installation may have blown this fuse.
Your Subaru Outback now has reliable power for years of trouble-free driving. This 30-minute DIY prevents $120+ mechanic fees while ensuring you never face another dead-battery emergency. For longest life, clean terminals every 3 months and test battery health annually before winter. A well-maintained Outback battery typically delivers 4-5 years of service—far beyond the “couple of months” some mistakenly believe.


