
Your car won’t start and the battery terminals are crusted with white-green corrosion. Before you grab a wrench, knowing how to disconnect car battery terminals correctly could prevent costly electrical damage or dangerous acid burns. Modern vehicles contain sensitive computers that can be fried by a single spark from improper disconnection. This guide gives you the exact sequence to safely disconnect your battery—protecting both you and your vehicle’s electronics—whether you’re replacing a dead battery or storing your car for winter.
Essential Safety Equipment for Battery Work

Protective Gear Requirements
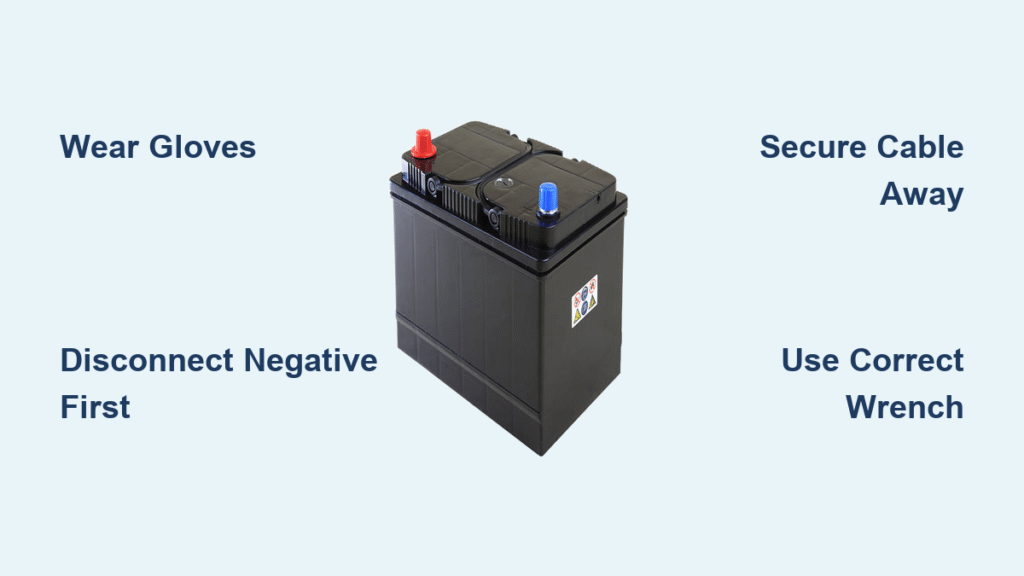
Always wear acid-resistant gloves before touching battery terminals—they prevent chemical burns from sulfuric acid leaks. Safety glasses are non-negotiable to shield your eyes from explosive hydrogen gas sparks or acid splashes. Cover exposed skin with long sleeves and pants since battery acid can eat through fabric, and wear closed-toe shoes with grip for stable footing when lifting heavy batteries. Never skip these; one splash can cause permanent eye damage.
Why Safety Matters More Than You Think
Car batteries store explosive hydrogen gas that ignites with a single spark from a dropped wrench. The sulfuric acid inside causes third-degree burns on contact with skin. Worse, short-circuiting terminals with metal tools can melt wiring harnesses costing thousands to replace. I’ve seen DIYers accidentally weld wrenches to battery posts—creating a white-hot plasma arc that melts through sheet metal. This isn’t theoretical risk; it happens daily in repair shops because someone skipped safety steps.
When to Disconnect Your Battery: Critical Scenarios
Common Situations Requiring Disconnection
Replace failing batteries when jump-starts become weekly rituals or voltage drops below 12.2V. Prevent parasitic drain during storage exceeding two weeks—modern cars constantly siphon power for computers. Isolate electrical systems before replacing alternators or starters to avoid frying control modules. Protect sensitive electronics during engine work where metal tools could bridge terminals. Reset stubborn check-engine lights after clearing fault codes. Never attempt this on hybrids or EVs—their high-voltage systems require certified technicians.
Critical Warning: These steps apply only to standard 12V lead-acid batteries. Electric vehicle battery packs operate at 400+ volts—contacting these can be fatal. If you see orange cables or “high voltage” labels, call a professional immediately.
Pre-Disconnection Preparation: Avoid Costly Mistakes
Locate Your Battery Before Starting
Don’t assume it’s under the hood—many manufacturers hide batteries to balance weight distribution. Honda Civics tuck them under rear seats, BMW 3-Series models mount them in trunks, and Chrysler Pacificas bury them under front fender liners. Check your owner’s manual’s “jump starting” section—it always shows battery location. If you’re working on a luxury import, expect surprises: I once spent 20 minutes hunting a Mercedes battery under floor mats before finding it.
Identify Terminal Types at a Glance
Negative (-) terminals have black cables and a minus sign etched into the plastic—this is your disconnection starting point. Positive (+) terminals feature red cables and a plus symbol. Side-post batteries (common on GM trucks) use bolts instead of top posts—loosen the 8mm nut with a socket. Top-post batteries (most Japanese cars) require 10mm or 13mm wrenches. If corrosion obscures markings, trace cables: negative always connects to the car chassis, positive to the starter motor.
Required Tools Checklist for Flawless Execution
Basic Tool Requirements You Can’t Skip
Grab a 10mm wrench first—it fits 80% of domestic vehicles—but keep 8mm and 12mm wrenches nearby for European imports. Socket sets with extensions reach deep-set batteries in Audi trunks. Wire brushes remove corrosion without scratching terminals—never use screwdrivers. Battery terminal pullers ($15 at auto stores) save hours when cables seize to posts. Skipping the right tool risks rounding off nuts or cracking battery cases—a single slip costs $300 in electrical repairs.
Optional But Smart Additions
Dielectric grease applied after reconnection prevents future corrosion on terminals. Battery carrier straps ($10) eliminate back strain lifting 40-pound units. Anti-rust spray protects mounting trays during long storage. Zip ties secure disconnected cables away from metal surfaces—preventing accidental reconnection sparks. These small investments prevent big headaches.
Step-by-Step Disconnection Guide: The Only Safe Sequence
Step 1: Complete Engine Shutdown (Non-Negotiable)
Turn off your ignition and remove keys immediately—leaving them in risks accidental cranking. Wait three full minutes for computers to power down completely. Modern vehicles like Teslas or BMWs keep systems live after shutdown; rushing this step can corrupt infotainment modules requiring $1,200 dealership resets.
Step 2: Access Battery Compartment Safely
Release hood latches using the cabin lever, then locate the secondary safety catch under the hood edge. Remove all plastic covers—some snap off, others require Phillips screws. Never pry with metal tools; broken plastic shards cause shorts. If your battery hides in the trunk (like a Subaru Outback), check for hidden access panels under carpeting.
Step 3: Disconnect Negative Terminal First (Critical Rule)
Loosen the negative nut counterclockwise with your wrench—never clockwise as this tightens it. If stuck, tap the wrench handle with a mallet (not the terminal!). Lift straight up—wiggling side-to-side cracks battery posts. Secure the cable with a zip tie to the strut tower—never let it dangle near metal. I’ve seen DIYers skip securing it, then accidentally reconnect via a dropped wrench—melting their entire fuse box.
Step 4: Disconnect Positive Terminal Last
Repeat the counterclockwise loosening on the red terminal. Wrap the exposed end in a shop towel before moving it—bare copper touching metal causes fireworks. Double-check clearance—positive must be 6+ inches from all surfaces. This is where most beginners fail: they disconnect negative first but let positive brush against the hood, blowing main fuses.
Step 5: Remove Battery Hold-Down Correctly
Loosen J-bolt brackets by turning nuts on both sides equally—uneven pressure cracks battery cases. For wedge clamps, remove the center bolt completely before sliding out the wedge. Store hardware in a magnetic tray; losing these bolts means driving with a loose battery that can short-circuit during turns.
Step 6: Lift Battery with Proper Technique
Grip battery handles firmly—no handles? Slide hands under the base. Lift with your legs, not your back—batteries weigh 30-50 lbs. Keep it perfectly level; tilting spills acid through vents. Set it on cardboard in a ventilated area—never concrete (it discharges faster). Always store upright: tipped batteries leak electrolyte that corrodes floors and shoes.
Terminal Cleaning Process for Reliable Reconnection

Clean Cable Connectors Thoroughly
Scrub inside cable clamps with a pipe-cleaning wire brush until shiny metal shows—corrosion increases resistance, causing starting failures. Remove all white powder with shop towels; it’s toxic lead sulfate. For stubborn buildup, soak clamps in baking soda/water solution for 10 minutes before brushing.
Clean Battery Posts to Bare Metal
Use a cup-style wire brush on posts—twist like a drill until surfaces gleam. Corrosion creates insulating barriers that prevent proper charging. Never file posts down; this damages lead surfaces. Check for pitting—if posts feel rough, replace the battery; compromised terminals cause voltage drops.
Apply Protective Coating Smartly
Spray anti-corrosion gel on clean terminals—it forms a vapor barrier against acid fumes. Wipe excess with towels; thick globs attract dirt. Reconnect within 24 hours—delaying lets new corrosion form. This simple step doubles battery life in coastal climates where salt air accelerates corrosion.
Common Mistakes That Destroy Modern Vehicles
Never Do These Costly Errors
Disconnecting with engine running creates voltage spikes that fry engine control units—repairs exceed $1,500. Touching wrench to both terminals shorts 500+ amps through metal, welding tools to posts. Removing positive first sends current through your wrench when negative contacts metal—sparking near hydrogen gas causes explosions. Using wrong wrench sizes rounds off nuts, requiring drill-out removal.
Modern Vehicle System Warnings
BMW/Mercedes need radio codes after disconnection—lose these and infotainment becomes paperweight. Toyota hybrids require hybrid system resets—skip this and you get “check hybrid system” lights. Ford F-150s with smart chargers may need battery registration—ignoring this triggers alternator failures. When in doubt, photograph wire positions before disconnecting.
Time and Cost Breakdown for Realistic Planning
DIY Timeline Expectations
Beginners take 45 minutes including cleaning—rushing leads to mistakes. Experienced mechanics need 15 minutes with correct tools. Complex vehicles (battery in trunk) add 30 minutes for panel removal. Never attempt this when rushed; I’ve seen mechanics snap terminals off while hurrying before closing time.
Reconnection Sequence: Getting It Right Matters
When reinstalling, attach positive terminal first—reverse of disconnection. Tighten snugly but don’t over-torque (8-10 ft-lbs max). Test connections by tugging cables—they shouldn’t budge. Start immediately to verify systems; delayed starts drain new batteries. Reset radio codes and clock settings before closing the hood.
Maintenance Prevention Tips for Long Battery Life
Monthly Terminal Inspections
Check for white powder buildup—clean immediately with baking soda paste. Ensure cables stay tight—vibration loosens connections. Apply dielectric grease quarterly in humid climates. Test voltage monthly—below 12.4V indicates charging issues. Catching corrosion early prevents 70% of no-start emergencies.
Storage Recommendations for Long Absences
Disconnect negative terminal for storage over 30 days. Use a battery tender ($30) instead of full disconnection—maintains 13.2V optimal charge. Check fluid levels in conventional batteries every 3 months. Store in cool, dry places—heat above 80°F accelerates sulfation.
Disconnecting your car battery terminals safely protects your wallet and your body. Follow this exact sequence—negative first, positive last, secure cables—and you’ll avoid the $2,000 computer repairs I see weekly from improper disconnection. Always prioritize safety gear: those gloves and glasses cost less than an emergency room visit for acid burns. When your battery needs replacement or storage, now you know how to disconnect car battery terminals like a pro mechanic—keeping your vehicle’s sensitive electronics intact and yourself out of harm’s way. If corrosion looks severe or your vehicle has complex electronics, consult your manual or a professional—this one task isn’t worth risking thousands in damage.


