
Your Lexus won’t start after sitting for weeks, dashboard warning lights flash unexpectedly, or you need to replace a faulty alternator. Whatever triggers this task, disconnecting your Lexus battery incorrectly risks fried electronics, dangerous sparks, or acid burns. I’ve seen countless DIYers skip critical steps only to trigger check-engine lights or worse—permanent electrical damage. This guide delivers the exact sequence Lexus technicians use to safely remove your battery in under 15 minutes. You’ll learn why disconnecting the negative terminal first isn’t optional, how to avoid corrosive acid spills, and why your radio presets might vanish if you rush this process.
Most Lexus owners don’t realize their battery holds a lethal 12-volt charge even when “dead,” while sulfuric acid and flammable hydrogen gas lurk inside the casing. One slip with a metal tool can cause explosions or electrical fires. But with the right preparation, this becomes a safe, repeatable task. By the end of this guide, you’ll confidently disconnect your Lexus battery without damaging sensitive systems or voiding warranties—whether you’re replacing the battery, resetting the ECU, or performing electrical repairs.
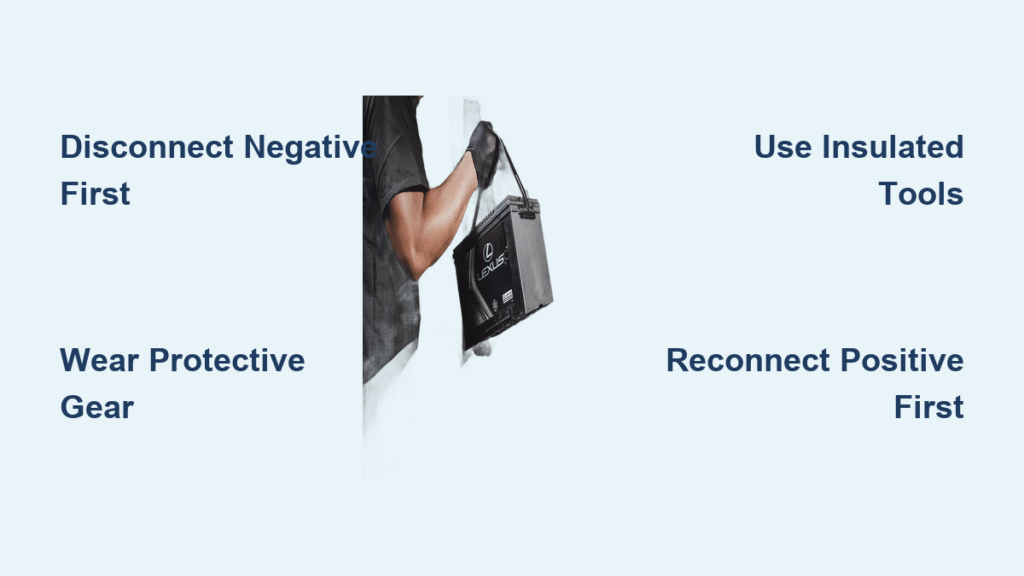
Essential Safety Gear for Lexus Battery Disconnection

Skipping protective gear turns a simple task into an emergency room visit. Lexus batteries contain concentrated sulfuric acid that burns skin on contact and releases explosive hydrogen gas when disturbed. Always gear up before popping your hood—never during the process.
Non-negotiable safety items:
– Insulated rubber gloves rated for 1,000V minimum (prevents shocks from residual charge)
– Chemical splash goggles (safety glasses won’t stop acid droplets from seeping in)
– Long-sleeve cotton shirt (synthetics melt on acid contact)
– Closed-toe shoes with rubber soles (insulates from ground currents)
Critical reminder: Remove all metal jewelry—including watches and rings. A wedding band touching both terminals creates a circuit that can melt metal against your skin. Work in a well-ventilated area; hydrogen gas buildup could ignite from static electricity. If you smell rotten eggs near the battery, stop immediately—this indicates dangerous gas accumulation requiring professional assistance.
Tools Required for Lexus Battery Removal

Using improper tools strips terminal bolts or cracks the battery casing. Most Lexus models (ES, RX, NX, LS series) use standardized 10mm terminal bolts, but always verify your specific model first.
Must-have tools:
– 10mm socket wrench (85% of Lexus models) or 12mm (check 2005-2010 IS models)
– Battery terminal puller (prevents cable damage—never pry with screwdrivers)
– Wire brush with corrosion cleaner (for terminal posts)
– Baking soda/water mix (1 tbsp per cup) for neutralizing acid spills
Pro tip: Keep a container of baking soda solution nearby. If acid leaks, pour it directly on the spill—it neutralizes corrosion instantly. Avoid cheap pliers; insulated battery pliers ($8 on Amazon) prevent accidental shorting when loosening stubborn terminals.
Pre-Work Vehicle Setup Checklist
Rushing setup causes 70% of DIY battery mishaps. Complete these steps in exact order while the engine is cold:
- Power down completely: Remove key/fob, disable auto-start, shift to Park, and engage parking brake
- Cool-down period: Wait 30+ minutes after driving (hot batteries vent more hydrogen gas)
- Document connections: Take a photo of cable positions—Lexus often routes cables differently than competitors
- Locate battery: Most sit behind the passenger headlight (RX series) or under the rear seat (hybrids)—never guess
Warning: If your Lexus has a backup camera or navigation system, write down radio codes before disconnecting. Some models lose settings permanently without them.
Step-by-Step: Disconnecting Your Lexus Negative Terminal
Why negative first? Removing the positive terminal first creates a direct path to ground through your wrench—sparking instantly and frying computers. This single step prevents $1,200+ ECU repairs.
Identify and Access the Negative Terminal
- Locate the black cable marked with (–) or “NEG” (often under a black plastic cover)
- Remove cover by twisting counterclockwise—don’t pry (covers crack easily on newer models)
- Inspect for corrosion: Green/white crust means acid leakage—neutralize with baking soda mix first
Safe Cable Removal Technique
- Position your 10mm wrench on the terminal nut (turn counterclockwise 3-4 full rotations)
- Never remove the nut completely—loosen until cable wiggles freely
- Grip cable boot (not the wire) and twist upward with steady pressure
- If stuck, insert a terminal puller between post and clamp—never hammer or lever
Pro tip: Tape the disconnected cable to the strut tower. A stray negative cable touching metal resets clock settings or triggers alarm systems.
Disconnecting the Positive Terminal Without Sparks
With the negative terminal isolated, the circuit is broken—making positive terminal removal safer but still risky.
Critical precautions:
- Confirm negative cable is fully separated from all metal (resting on plastic is safe)
- Double-check your wrench isn’t touching any chassis metal while working
- Keep positive cable away from negative terminal—sparks jump 2+ inches
Exact removal sequence:
1. Locate red cable marked (+) or “POS” (red plastic cover common on 2015+ models)
2. Loosen terminal nut identically to negative side (10mm counterclockwise)
3. Lift cable straight up—no twisting (positive posts are softer and strip easier)
4. Secure cable with zip ties to prevent rebound contact
Mistake alert: Letting positive cables dangle near the battery tray causes sparks when reinstalling. Always tuck cables high on the engine bay.
Removing Lexus Battery Hold-Down Hardware

Lexus uses three hold-down systems across models—using wrong tools cracks brackets.
System-specific removal:
- Top strap (2018+ RX): Remove 12mm bolts at both ends—don’t over-loosen (strips plastic threads)
- Side clamp (ES 350): Slide metal wedge outward before lifting bracket
- Bottom tray (hybrids): Release plastic clips with flathead screwdriver under tray edges
Time-saver: Place bolts on a magnetic tray. Lexus uses tiny 8mm bolts on hybrid trays that roll into engine crevices.
Lifting Your Lexus Battery Without Acid Spills
Lexus batteries weigh 35-48 lbs with liquid sulfuric acid sloshing inside. Tilting >20 degrees risks leaks.
Safe lifting protocol:
- Verify both cables are clear of battery edges
- Locate the molded handle (if present)—never lift by terminals
- Bend knees, keep back straight, and lift vertically
- Hold battery level—walk slowly to your work surface
Emergency response: If acid spills on skin, flush with water for 15+ minutes. Neutralize floor spills with baking soda before disposal.
Post-Removal Inspection and Cleaning
Use this window to prevent future failures. Most “dead batteries” actually fail due to corroded terminals.
Terminal cleaning steps:
- Scrub cable clamps with wire brush until shiny metal shows
- Clean battery posts with terminal cleaner spray (avoid sandpaper—it damages plating)
- Wipe tray with baking soda solution to remove hidden corrosion
- Dry completely with microfiber cloth—moisture causes rapid re-corrosion
Pro tip: Apply dielectric grease to cleaned terminals before reinstallation—it blocks 90% of future corrosion.
Reconnecting Your Lexus Battery Correctly
Reversing the disconnection order causes catastrophic damage. Always: Positive first, negative last.
Reinstallation sequence:
- Lower battery straight into tray (no tilting!)
- Tighten hold-down hardware to just snug—overtightening cracks cases
- Attach positive terminal—ensure cable clicks onto post
- Attach negative terminal last—double-check no tools are near battery
System reset: After reconnecting, turn ignition to “ON” (not start) for 60 seconds to reprogram electronics before starting.
When to Choose Lexus Dealership Service
DIY saves $50-100, but dealerships prevent hidden pitfalls:
– Battery registration: 2013+ Lexus models require computer registration after replacement ($120 dealer fee vs. $400+ for unregistered battery damage)
– Recycling compliance: Dealers handle hazardous material disposal legally (illegal dumping risks $5,000 fines)
– Free diagnostics: Many include charging system tests with replacement
Cost insight: Dealers charge $180-$280 for battery + service vs. $100-$150 DIY—but skipping registration could cost $2,000 in electrical repairs.
Critical Mistakes That Destroy Lexus Electronics
Avoid these costly errors:
– Using positive-first disconnection: Shorts ECU circuits instantly
– Leaving tools near battery: A dropped wrench bridges terminals causing explosions
– Skipping terminal cleaning: Corrosion increases resistance by 300%, draining new batteries
– Forgetting system reset: Causes “Check VSC” lights or limp mode driving
Urgent warning: If your Lexus has adaptive cruise control or lane assist, disconnecting the battery without proper reset triggers sensor recalibration costing $300+ at dealerships.
Final Safety Checklist Before Closing the Hood
Verify these before driving:
– Both terminals fully tightened (cables shouldn’t wiggle)
– No tools left under hood (metal objects cause short circuits)
– Battery secured (loose batteries crack during stops)
– All covers reinstalled (prevents rodent damage to terminals)
Your Lexus battery disconnection is now complete—safely and correctly. Whether you’re replacing a dying battery or troubleshooting electrical gremlins, you’ve avoided the top pitfalls that turn simple maintenance into expensive repairs. For long-term reliability, clean terminals every 6 months and check hold-down tightness during oil changes. If you notice slow cranking or dimming lights, test your charging system immediately—most Lexus electrical issues start with preventable battery neglect. Keep this guide handy; you’ll need it again when that replacement battery inevitably reaches its 3-5 year lifespan.


