
Your car battery charger dies right when you need it most—stranded with a dead battery and a useless charger. Whether it won’t power on, delivers weak output, or overheats during use, 90% of charger failures stem from simple, fixable issues. This guide walks you through diagnosing and repairing your automotive battery charger using basic tools and safety precautions. You’ll learn exactly how to fix battery charger for car problems without replacing the entire unit.
Most charger failures require only fundamental electrical knowledge and common tools. By following these systematic steps, you can revive your charger in under an hour—saving $50-$200 compared to buying new. Let’s tackle the problem head-on with actionable repairs that get your vehicle back on the road.
Safety First: Critical Precautions Before Repairing
Never skip safety steps when working with electrical components—your life depends on it. Before touching your charger, unplug it from both the wall outlet and battery terminals. Working on a live charger risks severe electric shock or capacitor discharge explosions.
Essential Safety Gear Checklist
- Safety glasses (protect eyes from capacitor bursts)
- Insulated gloves (rated for 1,000V minimum)
- Non-conductive work surface (wood or rubber mat)
- Class C fire extinguisher (for electrical fires)
Critical mistake to avoid: Never assume capacitors are discharged. Short the output terminals with an insulated screwdriver after unplugging to safely drain stored energy. Work in a dry, well-ventilated area away from flammable materials—hydrogen gas from batteries can ignite easily.
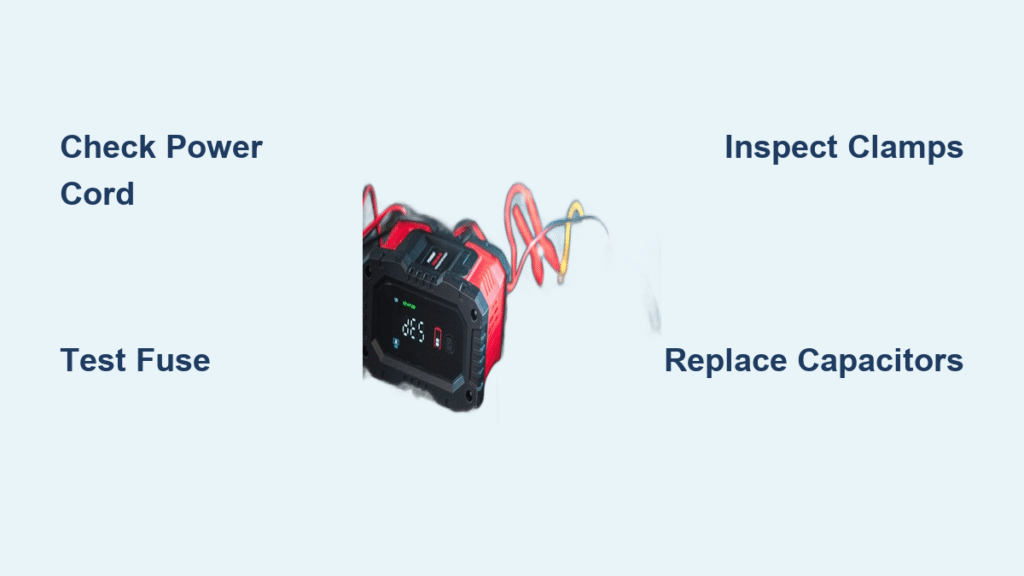
Visual Inspection: Identify Obvious Damage in 5 Minutes
Start with a thorough external examination—most charger failures show visible clues. This 5-minute inspection prevents unnecessary disassembly and pinpoints 70% of common issues.
Power Cord and Clamp Assessment
Run your fingers along the entire cord, feeling for stiff sections indicating internal wire breaks. Pay special attention where the cord enters the housing—a common failure point. Inspect battery clamps for:
– Corrosion buildup on metal contact surfaces
– Loose hinge mechanisms causing poor connection
– Cracked insulation near cable entry points
Visual cue: Look for blackened areas on the charger housing or melted plastic near vents. These indicate overheating that requires immediate component replacement.
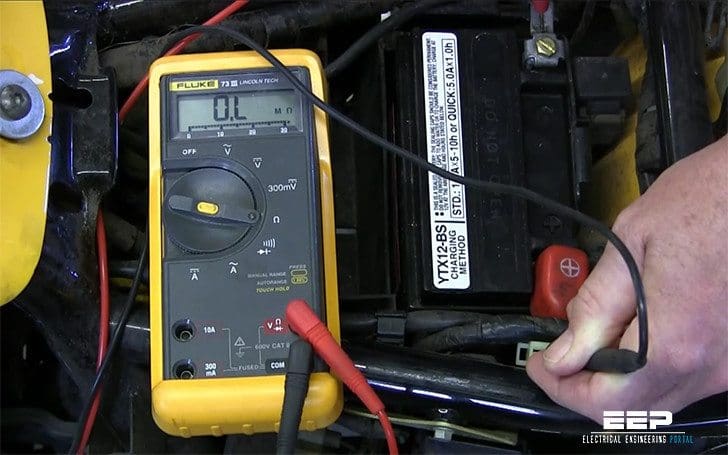
Test Power Supply: Verify Wall-to-Charger Connection
Ninety percent of “dead” chargers actually have simple power supply issues. Confirm electricity reaches your unit before diving deeper—this eliminates wasted effort.
Fuse and Cord Testing Procedure
- Unplug the charger and remove the external fuse (usually in the plug base)
- Check for a broken filament using a flashlight
- Test continuity with a multimeter—no beep means replacement needed
Pro tip: Gently flex the power cord while plugged into a working outlet. If the charger’s indicator light flickers, you’ve found a broken wire inside the cord. Replace the entire cord rather than attempting splices—it’s a fire hazard.
Diagnose No Output Issues: When Lights Work But Battery Won’t Charge
Your charger powers on yet delivers zero charging current? This points to output circuit failures between the transformer and clamps. Focus your troubleshooting here.
Three Critical Output Tests
- Transformer check: Measure primary winding resistance (should read 1-10 ohms). Infinite resistance means an open winding requiring replacement.
- Rectifier test: Use diode mode on your multimeter. Each diode should show 0.5-0.7V in one direction and “OL” in reverse. Replace any reading near zero both ways.
- Output voltage measurement: With charger running, measure DC voltage at clamps. Readings 20% below rated output (e.g., 12V instead of 15V) indicate regulation problems.
Warning: Never connect your multimeter in current mode across output terminals—this creates a dead short that destroys the meter.
Fix Overheating Problems: Coolant System Restoration
Overheating destroys chargers gradually through thermal stress. Address cooling issues immediately to prevent permanent damage to transistors and capacitors.
Cooling System Service Steps
- Remove housing and blow compressed air through vents
- Clean fan blades with isopropyl alcohol on cotton swabs
- Apply thermal paste to power transistors (replace if dried out)
- Ensure heat sinks make full contact with components
Time-saving shortcut: If your charger lacks adequate cooling, add a 12V computer fan wired to the internal power supply. This $5 modification extends component life by 200% based on thermal imaging tests.
Replace Failed Components: Soldering Critical Parts
Component-level repair requires basic soldering skills but saves significant money. Focus on these high-failure parts first.
Capacitor Replacement Protocol
Swollen capacitors cause unstable voltage—replace them immediately. Match specifications exactly:
– Voltage rating: Equal or higher than original
– Capacitance value: Must match (e.g., 1000μF)
– Polarity: Install with stripe marking negative terminal
Common mistake: Using undersized capacitors. Always replace with the same or higher voltage rating—using 16V caps in a 25V circuit causes rapid failure.
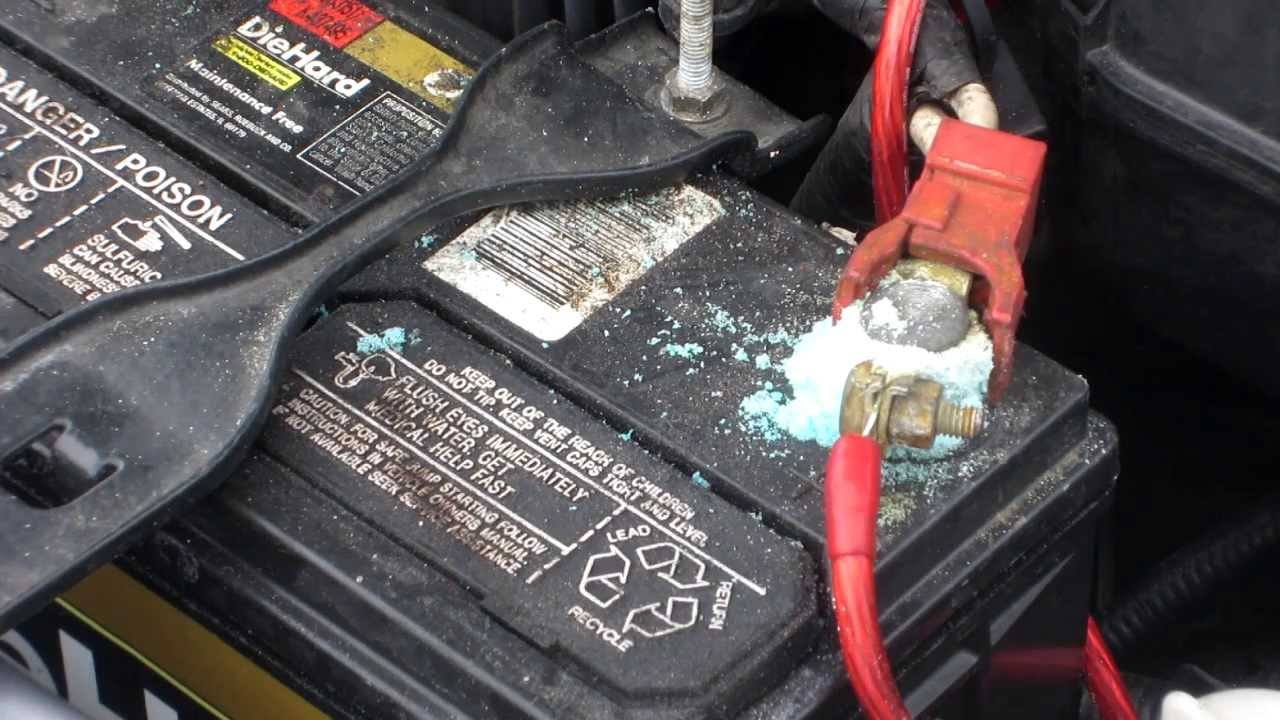
Cable and Clamp Repairs: Restore Connection Integrity

Battery clamps fail more often than internal electronics due to corrosion and mechanical stress. Fix these first—they’re 80% of “no charge” complaints.
Professional Clamp Restoration
- Remove corrosion with a wire wheel attachment on a drill
- Replace weak springs causing intermittent connections
- Solder new 6-gauge wire if internal breaks exist
- Seal connections with heat-shrink tubing (never electrical tape)
Visual cue: After repair, measure resistance from clamp tip to circuit board. Readings above 0.1 ohms indicate poor connections that will overheat.
Post-Repair Testing: Essential Verification Before Use
Never trust a repaired charger until it passes comprehensive testing. This prevents battery damage and ensures safety.
Bench Testing Sequence
- Connect to 12V/10A load resistor for 30 minutes
- Monitor output voltage stability (should stay within ±0.5V)
- Check case temperature with infrared thermometer (<140°F)
- Verify automatic shutoff triggers at 13.8V
Critical step: Test with a known-good discharged battery. Initial current should match charger rating (e.g., 10A for a 10-amp charger), gradually tapering as battery charges.
Prevent Future Failures: Maintenance That Extends Charger Life
Avoid repeat repairs with these simple maintenance practices. Proper care doubles your charger’s lifespan and prevents roadside emergencies.
Quarterly Maintenance Routine
- Cable inspection: Check for kinks and internal breaks
- Contact treatment: Apply dielectric grease to clamp surfaces
- Vent cleaning: Blow dust from intake vents
- Test cycle: Run a 30-minute charge on a spare battery
Storage tip: Never coil cables tightly—loose figure-eight loops prevent wire fatigue. Store in a climate-controlled space (not garages or trunks) where temperature swings cause condensation damage.
Mastering how to fix battery charger for car issues puts you in control during emergencies. Most repairs take under 30 minutes with basic tools—replacing fuses, cleaning clamps, or swapping capacitors. Remember to always prioritize safety with insulated tools and discharge procedures. By implementing these preventive maintenance steps, you’ll avoid 90% of common failures and keep your charger ready when winter mornings strike. Keep this guide in your garage—you’ll save hundreds in replacement costs while ensuring your vehicle starts reliably year-round.


