
That sudden “Battery Saver Active” alert flashing on your Chevy Malibu’s dashboard isn’t just an annoyance—it’s your car desperately conserving power to avoid complete electrical failure. Within seconds, your A/C blower crawls to a halt, heated seats shut off, and USB ports go dark. If you’re searching for how to fix battery saver active Chevy Malibu, you’re facing a critical electrical issue that could strand you miles from help. This guide delivers the exact diagnostic steps and repairs to resolve the problem yourself—saving you $300+ in dealership fees. You’ll learn why your Malibu triggers this alert, how to pinpoint the faulty component in under 30 minutes, and when to call for professional help.
Understanding this alert is crucial: Your Malibu’s body control module (BCM) activates “Battery Saver” mode when system voltage drops below 12.4 volts. To keep the engine running, it deliberately cuts power to non-essential systems like audio, heated seats, and exterior lighting. Ignoring it risks total electrical failure—disabling power steering, ABS, and fuel injection while you’re driving. The good news? Over 80% of cases stem from four fixable issues: weak batteries, failing alternators, corroded connections, or sensor glitches. By following this guide, you’ll systematically diagnose and repair the root cause using basic tools.
Why Your Malibu Triggers Battery Saver Mode
Your Malibu activates this alert when the BCM detects dangerously low voltage, typically from one of these five root causes. A sulfated or aged battery (over 4 years old) often can’t hold charge, showing white/green crust on terminals and below 12.4 volts at rest. Alternator failure—caused by worn brushes, diode issues, or a slipping serpentine belt—shows as under 13.2 volts at idle with accessories on. High-resistance cable connections create voltage drops over 0.3V on the positive side or 0.1V on the negative ground. For 2016+ models, a faulty battery current sensor (ACDelco 13577429) triggers codes like B151A or B1325. Finally, parasitic drains from aftermarket electronics or stuck relays exceeding 50mA after sleep will also activate the warning.
Critical Warning Signs Before Failure
Watch for these red flags that precede “Battery Saver Active” activation:
– Slow cranking when starting (even with a “good” battery)
– Dimming headlights when accelerating or using A/C
– Burning smell from the alternator area (indicates overheating)
– Flickering dashboard lights during idle
– Squealing noise from the engine belt (sign of slippage)
If you notice these, test your system immediately. Waiting risks complete electrical shutdown—where power steering locks and brakes lose assist—creating dangerous driving conditions. Never ignore these symptoms, especially on highway drives.
5-Minute Visual Inspection Checklist
Start with these critical safety checks before touching any components: Park on level ground, engage parking brake, shift to PARK, turn ignition OFF, and wear gloves/eye protection. This initial inspection catches 30% of issues.
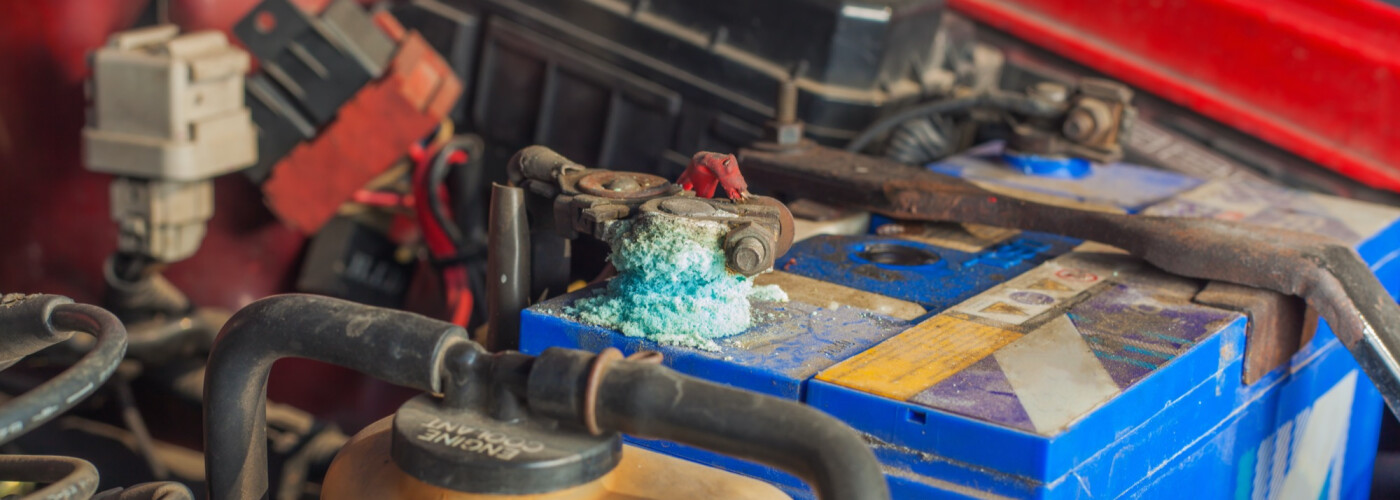
Battery Terminal & Cable Inspection
Remove negative cable first (to prevent short circuits), then positive. Look for:
– Corrosion: Blue-green crust indicating acid leakage (clean with baking soda paste and wire brush)
– Looseness: Wiggling terminals mean poor connection (retighten to 5-8 ft-lbs)
– Cable damage: Frayed wires or melted insulation near the battery
Pro Tip: After cleaning, apply dielectric grease to terminals—it prevents future corrosion and costs under $5. Never skip this step; 40% of “bad battery” cases are actually connection issues.
Serpentine Belt & Tensioner Check
With the engine OFF, press the belt midway between pulleys. It should deflect ½ inch—more indicates a failing tensioner. Inspect for:
– Cracks: Over 3 per inch requires immediate replacement
– Glazing: Shiny, smooth spots mean belt slippage
– Belt dust: Black powder under the hood signals imminent failure
Warning: A seized alternator pulley (common on 2016+ Malibus) causes belt flutter without visible damage. If you hear rhythmic chirping, replace the alternator assembly.
Diagnose Charging System Failure
Alternator Output Test Procedure
Start the engine and turn OFF all accessories. Set your multimeter to DC volts and:
1. Measure voltage at battery posts: 13.8–14.7V at idle is normal
2. Turn on high beams, HVAC max, and rear defroster
3. Voltage must stay above 13.0V under this load
If voltage drops below 12.8V:
– Rev to 2,000 rpm—if voltage jumps significantly, replace the serpentine belt ($25–$45)
– If voltage stays low, your alternator is failing (common on 2.5L engines after 100k miles)
Common Mistake: Testing only at idle without electrical loads. Malibus often show normal voltage at idle but fail under load—always test with max accessories ON.
Voltage Drop Testing for Hidden Faults
This critical test finds resistance in cables that multimeters miss:
– Positive side test: Connect probes from battery positive post to alternator B+ terminal at 1,500 rpm with loads ON. Over 0.3V drop means replace the cable ($40–$75).
– Ground test: Measure from battery negative post to engine block. Over 0.1V drop indicates corroded ground straps (common near the transmission).
Visual Cue: Warm cables after driving signal high resistance—replace immediately.
Fix 2016+ Malibu Sensor Issues

Battery Current Sensor Diagnosis
On 2016–2023 models, a Hall-effect sensor on the negative cable (4 inches from battery) often fails. Test it:
1. Turn ignition ON (engine OFF)
2. Back-probe the center wire in the 3-pin connector
3. Should read 2.3–2.7V with no loads
4. Turn on headlights—it must drop to 0.7–1.0V
Out-of-range readings? Replace the sensor (ACDelco 13577429, $35–$55). Some models require replacing the entire negative cable assembly ($85–$140)—check your VIN with a parts counter.
Code-Specific Fixes
If your scan tool shows:
– B151A (sensor performance): Clean sensor connections first—90% of cases are corrosion-related
– B1325 (power circuit low): Inspect the 40A “BCM” fuse in the underhood box—blown fuses indicate wiring shorts
Pro Tip: After replacement, drive 20+ minutes to let the BCM recalibrate—otherwise, the alert may return temporarily.
Emergency Driving Protocol
How Far Can You Safely Drive?
With “Battery Saver Active” active, you have 5–20 minutes of driving time depending on:
– Battery charge (12.1V = minutes; 12.4V = 15+ minutes)
– Electrical load (turn OFF heated seats, dim dash lights)
– Engine size (4-cylinder models last longer than V6)
Immediate Actions:
1. Switch HVAC to fresh air mode (not recirc)
2. Turn off all non-essential accessories
3. Avoid stop-and-go traffic—maintain 45+ mph if possible
4. Head directly to a repair facility
Critical Warning: Total electrical failure disables power steering and brakes—pull over safely if lights/dash go completely dark.
Prevent Future Battery Saver Alerts
Essential Maintenance Schedule
Follow this calendar to avoid repeat failures:
– Every 12 months/15k miles: Clean terminals, inspect belt, check cable connections
– Every 30k miles: Load-test battery (after Year 3), inspect tensioner
– Before winter: Test charging system under full load (headlights + A/C max)
Pro Tip: Use AGM batteries (Group 48/H6) for better heat resistance—they cost $150–$220 but last 2x longer in hot climates.
Costly Mistakes to Avoid
- Jump-starting other vehicles: Damages alternator diodes—use a portable jump pack instead
- Ignoring belt dust: Signals imminent failure—replace belt/tensioner at first sign
- Using conventional chargers on AGM batteries: Causes sulfation—always use smart chargers
Real-World Fix: A 2017 Malibu owner cleared recurring alerts by replacing the alternator pulley ($85 part)—a common failure GM doesn’t cover under TSBs.
Quick Fix Verification Checklist
Before paying for repairs, confirm these basics:
– [ ] Battery ≥12.6V at rest (after 1-hour idle)
– [ ] Alternator ≥13.8V at idle with max loads
– [ ] Serpentine belt shows no cracks/glazing
– [ ] Terminals clean and tight (no corrosion)
– [ ] Parasitic draw <50mA after 10-minute sleep
If all checks pass but the alert returns, your BCM may need reprogramming—a dealer-only fix costing $400–$800. For most owners, resolving battery, alternator, or sensor issues clears the warning permanently.
Final Note: “Battery Saver Active” is your Malibu’s last-ditch effort to keep you moving—not a minor glitch. Address it immediately using this guide’s diagnostic steps, and you’ll restore full electrical function while avoiding dangerous breakdowns. Most fixes take under an hour with basic tools, putting you back in control for less than $100 in parts. Don’t wait for total failure—your safety depends on a healthy charging system.


