
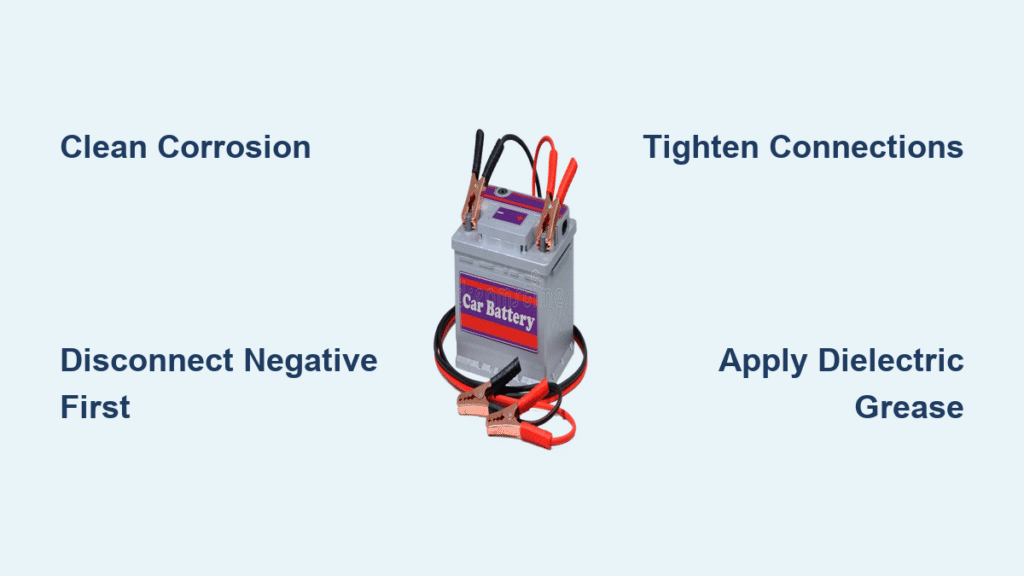
Your engine clicks but won’t turn over as you’re already late for work. The dashboard lights flicker weakly when you turn the key. Before you call a tow truck or shell out $150 for a new battery, check your car battery cables—corroded or loose connections cause 70% of “dead battery” emergencies. Learning how to fix car battery cables yourself solves most starting failures in 20 minutes with basic tools, saving you $100+ in unnecessary service calls.
Most drivers ignore these critical power pathways until disaster strikes. But warning signs appear weeks in advance: slow cranking that worsens in cold weather, intermittent starting where the car fires up fine one morning but refuses the next, or visible crusty buildup on the battery posts. This guide delivers a step-by-step battery cable repair process that works even if you’ve never touched a wrench. You’ll diagnose cable failures, replace damaged cables safely, and prevent future breakdowns—all while avoiding costly mistakes.
Spot Dangerous Cable Corrosion Before Stranding You
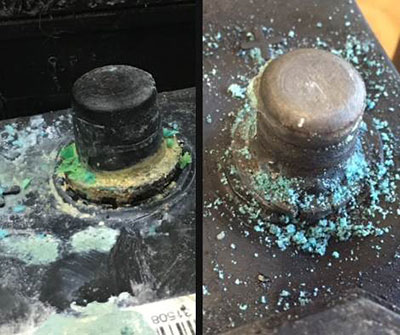
Identify Green or White Crystalline Buildup
White, blue, or fuzzy green deposits around battery terminals signal acid leakage eating through cable insulation. This corrosion creates electrical resistance that starves your starter motor. Even a thin layer can reduce current flow by 50%, causing slow cranking that mimics a failing battery. Immediately disconnect cables if you see this—continued use risks complete electrical failure.
Recognize Hidden Internal Cable Damage
Surface corrosion often masks worse damage inside the cable strands. Squeeze the cable near the terminal clamp—if it feels brittle or crumbles, internal corrosion has compromised conductivity. Pro Tip: Flex the cable while attempting to start the car. If the engine suddenly cranks when you move the cable, internal breaks are blocking current flow. Replace cables showing this symptom immediately.
Critical Safety Steps That Prevent Acid Burns

Gear Up Before Touching Terminals
Safety glasses are non-negotiable—battery acid (a corrosive mix of sulphuric acid and water) can spray into your eyes during disconnection. Wear latex gloves to protect against chemical burns on your skin. One drop of acid causes painful blisters within seconds. Never skip protection, even for “quick checks.”
Break the Circuit Before Disconnecting
Always remove the negative (black) cable first. This severs the electrical loop, preventing dangerous sparks if your wrench contacts metal. Removing the positive cable first risks short-circuiting through your tools—potentially melting cables or frying your car’s computer. After disconnecting negative, confirm the circuit is dead when interior lights shut off instantly.
Remove Damaged Cables Without Sparking
Access Terminals Safely
Pop off plastic terminal covers by squeezing side clips inward. If electrical tape blocks access, slice it lengthwise with a utility knife—never cut across cables where you might nick wires. Peel tape slowly to avoid damaging attached sensor wires. Clear all debris from the battery tray first; stray metal fragments cause shorts.
Execute Perfect Disconnection Sequence
- Loosen negative terminal bolt with a 10mm socket wrench (most common size). Twist counterclockwise until the clamp moves freely.
- Pull the clamp straight up—wiggling damages terminal posts. If stuck, tap wrench handle gently with a screwdriver.
- Tuck negative cable away from the battery to prevent accidental contact.
- Repeat for positive (red) cable, noting any additional wires attached to the terminal (these power your fuse box).
Critical Mistake Alert: Forgetting to disconnect negative first causes sparks that can ignite hydrogen gas from the battery—potentially causing an explosion. Always follow this sequence.
Install New Cables for Reliable Starts

Match Cables to Your Vehicle’s Specs
Buy replacement cables labeled for your car’s make and engine size. Mismatched cables cause failure: too-thin wires overheat, while oversized cables won’t fit terminal posts. Check your owner’s manual for gauge specifications (typically 2-4 AWG for starters).
Secure Connections Properly
- Slide new positive cable onto battery post until it seats fully.
- Tighten terminal bolt until snug—overtightening strips soft lead posts. Correct tension allows no movement when you tug the cable.
- Repeat for negative cable, then trace both cables along factory routes. Secure them with zip ties to avoid contact with exhaust manifolds or sharp edges.
Pro Tip: Apply a pea-sized dab of dielectric grease inside each terminal clamp before installation. This repels moisture and prevents future corrosion without blocking conductivity.
Test for Flawless Operation
Verify Strong Cranking Power
Reconnect cables (positive first, then negative), then turn the key. A healthy system produces one solid “VROOM” without hesitation. If the engine still cranks slowly:
– Recheck terminal tightness (loose connections cause 40% of reoccurring issues)
– Inspect cable routing for pinches against metal surfaces
– Confirm no corrosion remains on battery posts
Prevent Immediate Re-Corrosion
Spray terminals with corrosion inhibitor spray after installation. This single step doubles cable lifespan by neutralizing acid fumes. Wipe excess away—thick coatings attract dirt. Reapply every 6 months during oil changes.
Essential Tools for a $0 Mistake-Free Repair
Must-Have Toolkit
- 10mm socket wrench (most common terminal size—verify yours first)
- Replacement cables specific to your vehicle (auto parts stores scan your VIN)
- Battery terminal brush ($3 at any store—clean posts thoroughly before installing new cables)
Avoid These Costly Errors
- Using pliers instead of sockets: Slips cause short circuits
- Forgetting to clean battery posts: Old corrosion causes new cables to fail prematurely
- Reconnecting in wrong order: Positive-first installation risks computer damage
Prevent Future Breakdowns with 2-Minute Checks
Monthly Terminal Inspection
Pop your hood during fuel stops. Look for:
– Moisture or crust near terminals (early corrosion signs)
– Loose clamps (wiggle cables—zero movement should occur)
– Cracked insulation (exposes copper to acid)
Time-Saver: Keep a terminal brush in your glove box. Clean minor corrosion instantly with baking soda paste (1 tbsp baking soda + 1 cup water) using an old toothbrush.
Professional-Grade Maintenance Schedule
- Every 6 months: Tighten terminal bolts (vibration loosens them)
- Annual check: Measure voltage drop across cables with a multimeter (over 0.1V indicates resistance)
- After jump-starts: Inspect cables—improper jumper cable placement damages connections
Replacing corroded battery cables takes less time than your morning coffee run but prevents the #1 cause of roadside breakdowns. Most drivers waste money replacing batteries when clean, tight cables would solve their starting issues. Now that you know how to fix car battery cables properly, you’ll never pay for avoidable service calls again. Act immediately if you spot corrosion—waiting guarantees you’ll be stranded. Keep replacement cables in your trunk alongside a terminal brush; with these tools, you’re always 20 minutes away from reliable starts. Remember: Strong cables deliver full battery power exactly when your engine needs it most.


