
Your car sputters to life only to die minutes later, or worse—you turn the key and hear nothing but silence. That dreaded battery warning light glows on your dashboard while your phone battery dies trying to call for help. When your car battery won’t charge, you’re not just dealing with a dead battery—you’re facing a charging system failure that could strand you anywhere. Most drivers immediately blame the battery, but 60% of “dead battery” cases actually stem from preventable charging issues. This guide shows you exactly how to diagnose and fix car battery not charging problems yourself—saving you hundreds in unnecessary replacements and getting you back on the road today.
Immediate Tests to Pinpoint Your Charging Failure
Skip the guesswork with these no-tool diagnostic tests that reveal your exact problem within 60 seconds. These quick checks prevent wasted effort on unnecessary battery replacements.
Headlight Brightness Tells Your Battery’s Story
Turn your headlights on with the engine off and watch their behavior when you attempt to start. Bright, steady beams mean your battery holds charge—the culprit is likely a bad starter or wiring issue. Dim lights that fade further when cranking confirm your battery isn’t charging properly. If they pulse rhythmically during startup attempts, your alternator isn’t maintaining voltage under load—a critical sign of charging system failure.
Dashboard Warning Lights That Confirm Charging Issues
Watch your instrument cluster when starting your car. A battery-shaped warning light that stays illuminated after startup means your alternator isn’t charging. If it flickers while driving, you have a loose belt or failing voltage regulator. No warning light but dead battery points to parasitic drain or disconnected charging circuit—common after recent radio installations or fuse box work.
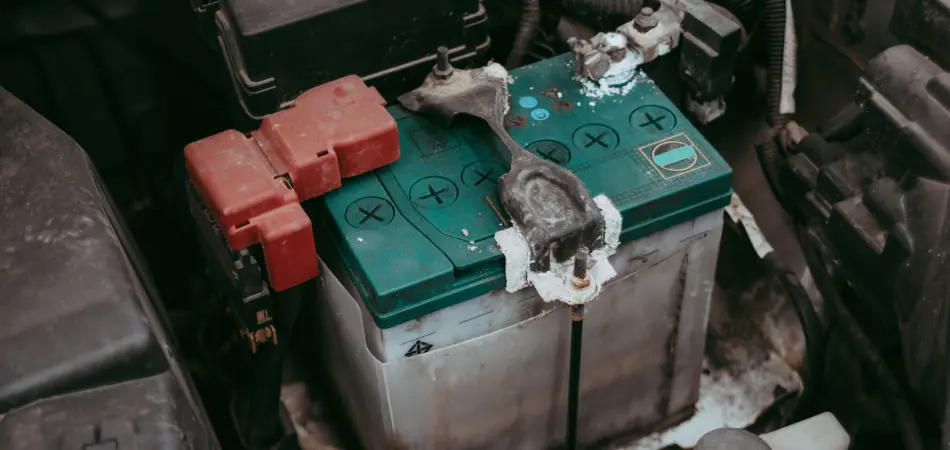
Battery Terminal Corrosion: The Silent Charging Killer

Corrosion creates invisible electrical resistance that blocks your alternator from charging your battery. That blue-white crust on terminals isn’t just dirty—it’s actively sabotaging your charging system.
Remove Corrosion in 7 Minutes Flat
Gather these tools:
– Wire brush or terminal cleaner ($3 at auto stores)
– Baking soda and water (1 tbsp per cup)
– Safety glasses and gloves
– Dielectric grease for protection
Critical cleaning sequence:
1. Disconnect negative first: Loosen cable clamp and slide off
2. Apply baking soda solution: It will fizz as it neutralizes acid
3. Scrub aggressively: Focus on where cable meets terminal post
4. Inspect cable ends: Replace if wires show green corrosion inside
5. Dry thoroughly: Moisture causes rapid re-corrosion
6. Reconnect positive first: Ensures safety during reconnection
7. Seal with dielectric grease: Creates moisture barrier
Pro tip: Spray electrical contact cleaner on terminals after greasing—it prevents future corrosion better than grease alone. Check connections monthly in coastal or winter climates.
Alternator Testing: Why Your Battery Isn’t Charging
Your alternator must output 13.8-14.2 volts while running. Anything less means your battery drains as you drive—explaining why it dies after short trips.
Test Alternator Output in 3 Steps
You need: A $15 digital multimeter (available at any auto parts store)
- Set up: Turn engine off, set multimeter to DC 20V
- Baseline test: Touch probes to battery terminals—should read 12.6V+
- Running test: Start engine, check voltage at 1500 RPM
Interpret results:
– 13.8-14.2V: Healthy charging system
– 12.6-13.7V: Weak alternator—replace soon
– Below 12.6V: Immediate alternator failure
– Over 14.5V: Dangerous overcharging—shut off engine
Warning: If voltage drops when turning on headlights, your alternator can’t handle electrical load—a belt tension or internal failure.
Kill Parasitic Drains That Murder Your Battery Overnight
A healthy car draws under 50 milliamps when parked. Anything higher creates parasitic drain that kills your battery by morning.
Find the Drain in 10 Minutes
Quick disconnect test:
1. Close all doors and turn off interior lights
2. Disconnect negative battery terminal
3. Reconnect while watching for spark
4. Large spark = major drain (faulty component)
5. No spark = normal system
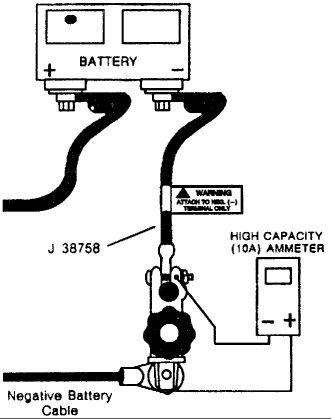
Precise multimeter diagnosis:
1. Set multimeter to 10A DC setting
2. Connect between negative terminal and cable
3. Pull fuses one by one while watching meter
4. Amp drop when pulling fuse = identifies faulty circuit
Top drain sources:
– Aftermarket stereos wired to constant power
– Glove box lights with stuck switches
– Faulty trunk release modules
– Damaged wiring harnesses rubbing metal
Fix: Install an ignition-switched power wire for accessories or replace sticking switches with OEM parts.
Battery Age: When Replacement Is Inevitable
Even perfect charging can’t revive a worn-out battery. Most fail between 3-5 years as internal plates degrade.
Spot a Dying Battery Before It Dies On You
Warning signs:
– Starts fine when warm but struggles in cold
– Requires jump-starts more frequently
– Case shows bulging or cracks
– Holds charge for only 1-2 days parked
Confirm with load test:
1. Visit any auto parts store for free testing
2. Watch voltage during simulated startup
3. Below 9.6V = immediate replacement needed
4. 9.6-10.5V = failing—replace within month
Pro tip: Mark your calendar for battery replacement at 4 years—don’t wait for failure. Always match Cold Cranking Amps (CCA) to your vehicle’s specs, especially in cold climates.
Emergency Fixes When Stranded With Dead Battery
These field solutions get you moving while you arrange permanent repairs.
Jump Start Without Another Vehicle
Required: A portable jump pack ($40-100)
1. Connect red clamp to battery positive
2. Attach black clamp to engine block (not battery)
3. Power on jump pack
4. Start your car immediately
5. Critical: Drive 30+ minutes to recharge battery
Warning: Never use phone power banks—they lack sufficient amperage and can damage electronics.
Temporary Battery Charging Solution
When you have access to power:
1. Buy a battery maintainer (not trickle charger)
2. Connect red to positive terminal
3. Connect black to negative terminal
4. Plug into wall outlet
5. Leave connected 12-24 hours
Why this works: Maintainers automatically stop charging at 100%, preventing dangerous overcharging that destroys batteries.
Professional Help: When to Call a Mechanic
Some issues require expert diagnosis—know when to stop DIY efforts.
Red Flags Needing Professional Service
- Alternator replacement requiring special tools
- Integrated voltage regulator in modern vehicles
- Persistent issues after cleaning terminals and testing alternator
- Burning smell from engine bay during operation
Cost-saving tip: Get alternators rebuilt locally ($120-200) instead of buying new ($300-500). Most auto shops install rebuilt units for half the cost of dealer replacements.
Monthly Maintenance That Prevents Charging Failures
Spend 10 minutes monthly to avoid being stranded with car battery not charging.
5-Minute Visual Inspection
- Terminals: Check for white/blue corrosion
- Belt: Look for cracks or glazing (shiny spots)
- Battery case: Feel for swelling or warmth
- Cables: Ensure no fraying near connections
Quarterly Deep Check
- Test battery voltage (should be 12.6V+)
- Check alternator output (13.8-14.2V running)
- Tighten all connections with 8-10 ft-lb torque
- Clean terminals if any corrosion appears
Pro maintenance: Apply battery terminal protector spray after cleaning—it lasts 6 months versus 2 months for grease alone.
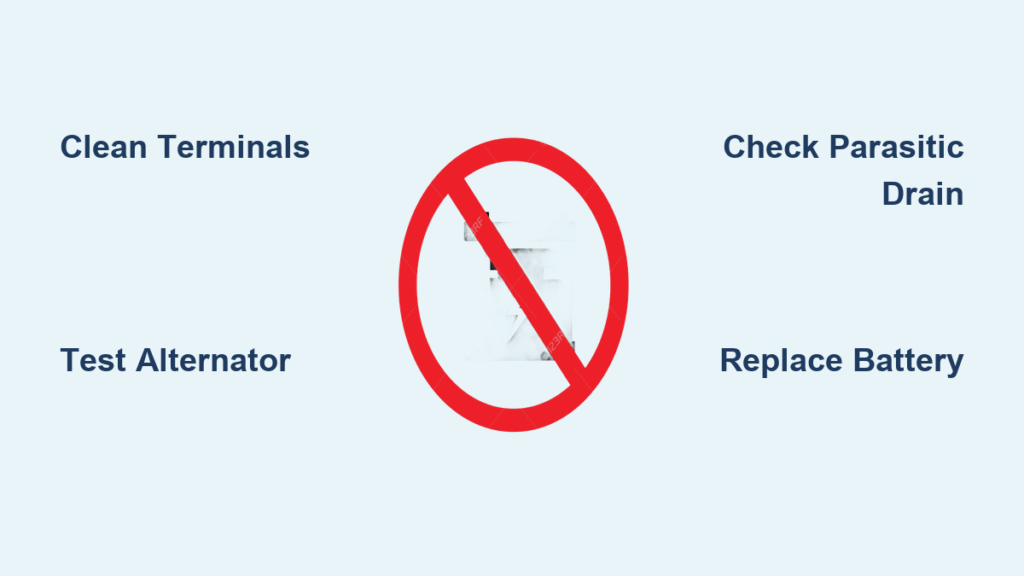
Car battery not charging almost always traces back to one of four issues: corroded terminals, failing alternator, parasitic drain, or battery age. Start with the headlight test and terminal cleaning—these fix 70% of cases for under $5 and 15 minutes. Test your alternator voltage before replacing batteries, and always check for parasitic drains if your battery dies overnight. By following this guide, you’ll avoid unnecessary replacements and keep your charging system reliable for years. Remember: a healthy charging system means your battery stays charged regardless of age—so fix the cause, not just the symptom. Keep this guide in your glovebox; the next time your battery warning light glows, you’ll know exactly how to fix it yourself.


