
You’re late for work, stranded in a grocery store parking lot, or worse—alone on a dark country road. The engine clicks but won’t turn over. That sinking realization hits: your car battery is dead. Don’t panic. Knowing how to jump a car battery properly transforms roadside emergencies into quick fixes you can handle yourself. This guide cuts through the confusion with battle-tested methods that work whether you’re using jumper cables, portable starters, or unconventional tricks for manual transmissions. You’ll learn exactly where to clamp cables for maximum safety, avoid explosive hydrogen gas risks, and recognize when your battery needs replacement—not just another jump.
Mastering this skill means never waiting hours for roadside assistance again. We’ll cover every scenario: rainy weather, hybrid vehicles, corroded terminals, and even keyless entry failures when your fob won’t unlock the door. By the end, you’ll execute safe jump-starts in under five minutes while protecting your vehicle’s sensitive electronics. Let’s turn that clicking sound into a roaring engine.
Heavy-Duty Equipment That Actually Works

Jumper Cables vs. Portable Starters: Which Saves You Faster
Flimsy discount-store cables cause most failed jump attempts. Invest in 4-gauge or 6-gauge jumper cables—thicker wires deliver the 400+ amps needed for modern engines. Avoid anything thinner than 8-gauge; they overheat and fail during critical cranking. Length matters too: 12 feet is minimum, 20 feet ideal for awkward parking situations where vehicles can’t align perfectly.
Portable jump starters eliminate dependency on other drivers. These lithium-ion power packs (like NOCO Boost or Tacklife models) fit in your glove box and deliver 600-1000 peak amps. They include USB ports for dead phone emergencies and LED flashlights for nighttime jumps. Critical limitation: You must recharge them quarterly—a dead jump starter in your trunk defeats the purpose. For reliability, carry both: cables as your primary solution and a portable unit as backup.
Non-Negotiable Safety Gear Checklist
Skipping safety gear risks acid burns or catastrophic battery explosions. Before touching clamps, gather:
- Impact-resistant safety glasses: Shields eyes from acid spray if a battery ruptures
- Rubber-coated work gloves: Prevents burns from corrosion and accidental short circuits
- Magnetic-base flashlight: Illuminates terminals without fumbling (essential for trunk-mounted batteries)
- Corrosion cleaner: Wire brush or aluminum foil to scrape white/green deposits off terminals
Pro Tip: Keep this kit in a dedicated pouch under your passenger seat—not buried in the trunk. Every second counts when you’re stranded.
Exact Cable Connection Sequence to Prevent Damage

Position Vehicles for Maximum Safety
Park assisting and dead vehicles nose-to-nose or side-by-side, close enough for cables to reach but never touching. Metal contact creates dangerous electrical pathways. Engage both parking brakes, shift into Park (automatic) or neutral (manual), and turn off all accessories—headlights, radios, and climate systems drain critical power. Remove keys to prevent accidental acceleration during connections.
Locate and Prep Terminals in 60 Seconds
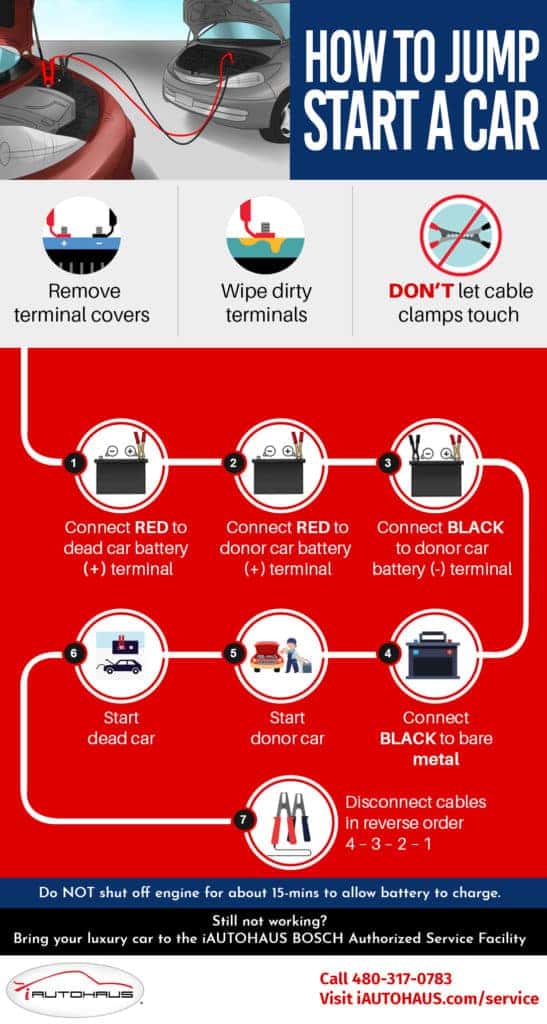
Most batteries hide under the hood, but BMWs stash them in trunks and Mercedes tuck them behind cabin panels. Never jump a cracked, swollen, or leaking battery—call a tow instead. For corroded terminals: wrap aluminum foil around your clamp teeth to scrape buildup, or use a wire brush. Visual cue: Healthy connections show shiny metal with no white/green crust. If corrosion covers the entire terminal, clean it before clamping.
Critical Connection Order: Avoid Sparks and Damage
Follow this sequence religiously. One wrong move fries electronics:
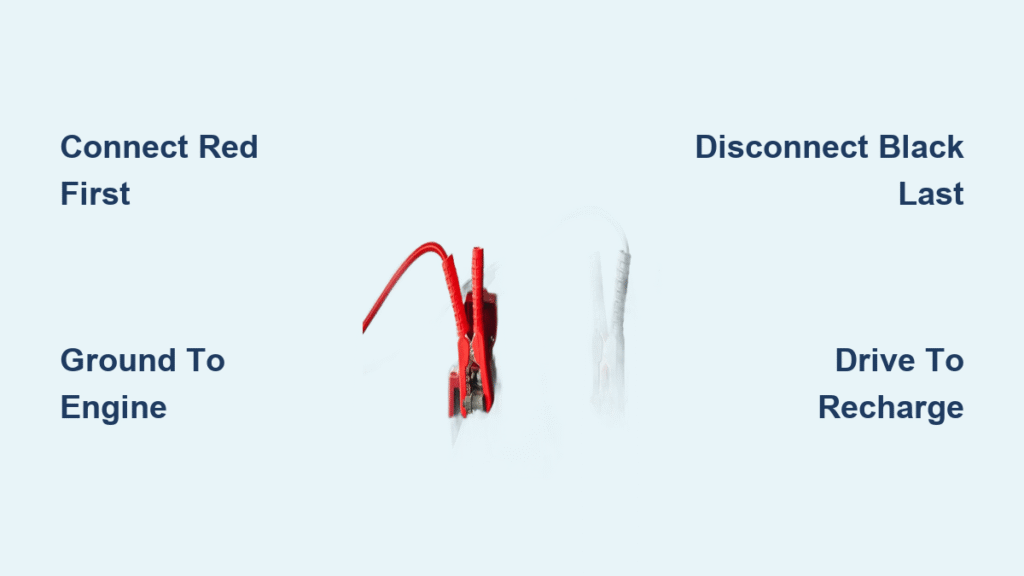
- Red clamp to dead battery’s positive (+) terminal
- Red clamp to good battery’s positive (+) terminal
- Black clamp to good battery’s negative (-) terminal
- Black clamp to unpainted engine bolt on dead car (never the dead battery’s negative!)
Why this order? Connecting the final ground away from the battery prevents sparks near explosive hydrogen gas. If you smell rotten eggs (sulfur), stop immediately—ventilate the area and call for help.
Start the Dead Vehicle Without Burning Out Systems
Run the assisting vehicle at 1,200 RPM for 3 minutes to transfer charge. Attempt starting your car. If it cranks weakly or clicks:
- Wait 2 more minutes before retrying
- Have the assisting driver gently increase RPM to 2,000
- Never floor the gas—this overloads the dead battery
If it starts, keep both engines running. If not, check for loose clamps biting through corrosion. A single loose connection causes 90% of failed jumps.
Safe Cable Removal and Post-Jump Protocol
Disconnect Cables in Reverse Order to Avoid Arcing
Removing clamps incorrectly creates dangerous sparks. Follow this sequence:
- Black clamp from dead car’s engine ground
- Black clamp from good battery’s negative (-)
- Red clamp from good battery’s positive (+)
- Red clamp from dead battery’s positive (+)
Warning: Never let clamps touch each other while connected to batteries—this causes violent arcing.
Drive Immediately to Recharge the Battery
Keep your jumped vehicle running for at least 20 minutes of driving—not idling. Highway speeds recharge faster than city driving. If the engine dies after disconnecting cables, your alternator is failing or the battery is beyond saving. Critical next step: Visit an auto parts store for free battery testing within 24 hours. Repeated jumps indicate replacement time.
Portable Jump Starter Method for Solo Drivers
When Portable Starters Beat Traditional Cables
Portable jump starters are lifesavers when no other vehicles are nearby—think remote trailheads or deserted parking lots. They’re also essential for keyless-entry failures: a dead 12V battery often prevents door unlocking. Activation trick: Most key fobs hide emergency mechanical keys; slide the fob against the door handle to trigger the sensor.
Portable Starter Connection Process in 4 Steps
- Turn off the jump starter (prevents accidental sparks)
- Connect red clamp to battery positive (+)
- Attach black clamp to unpainted engine metal (never negative terminal!)
- Turn on the starter, then crank your engine within 30 seconds
Pro Tip: Many units include reverse-polarity alarms—if clamps are reversed, it beeps instead of delivering power. This safety feature prevents costly mistakes.
Alternative Jump Methods That Actually Work
Push Starting Manual Transmissions: Step-by-Step
Requirements: Manual transmission, flat or downhill surface, 2-3 strong helpers. Automatics cannot be push-started.
- Turn ignition to “ON”
- Depress clutch fully, shift to 2nd gear
- Push vehicle to 5-10 mph
- Rapidly release clutch while turning key
- Engine catches? Press clutch immediately
Critical warning: Never attempt on wet roads—loss of traction causes accidents. If the engine doesn’t catch after 3 tries, your battery lacks minimal power for ignition.
Solar Chargers: Limited Real-World Use
Solar jump starters only work for partially discharged batteries—they deliver 1-2 amps versus the 400+ needed for cranking. Expect 6+ hours of direct sun for a meaningful charge. These are best as maintenance tools for stored vehicles, not emergency jump solutions. In true emergencies, they’re nearly useless.
Troubleshooting Failed Jumps in Under 3 Minutes
Fix These Connection Mistakes Immediately
- Clicking noise but no start: Clean terminals with foil until shiny metal appears
- No dashboard lights: Try grounding black clamp to different engine bolts
- Burnt wire smell: Replace cables—thin wires melted from insufficient gauge
Visual diagnostic: If headlights brighten when assisting vehicle revs, your connections are good but the battery is dead.
Recognize When It’s Not the Battery
| Symptom | Likely Cause | Solution |
|---|---|---|
| Starts then dies immediately | Failing alternator | Drive directly to mechanic |
| Electrical systems work but no crank | Bad starter motor | Tap starter with wrench gently |
| Repeated jumps within days | Battery >4 years old | Replace battery |
Red flag: Swollen battery case means immediate replacement—do not jump.
Non-Negotiable Safety Protocols
Hydrogen Gas Explosion Prevention
Batteries emit explosive hydrogen gas when charging. Always make the final black clamp connection to bare engine metal 18+ inches from the battery. If your battery is warm or swollen, do not jump—call a tow. One spark near gas vents can cause a 500°F explosion.
Weather-Specific Jumping Rules
- Rain: Safe to jump—car electrical systems are waterproof. Just dry your hands first.
- Freezing temps: Warm portable jump starters under your seat for 10 minutes; cold reduces lithium-ion output by 50%.
- Hybrids/EVs: Jump only the 12V battery (often in trunk). Never touch high-voltage orange cables.
Prevent Stranding With Smart Preparedness
Build a Foolproof Emergency Kit
Store these in your passenger footwell (not trunk!):
- 4-gauge jumper cables (20-foot length)
- Portable jump starter (charged quarterly)
- Wire brush + gloves
- Printed owner’s manual battery diagram
Pro Tip: Tape your roadside assistance number inside the kit. When stressed, you won’t remember it.
Monthly Battery Maintenance That Takes 60 Seconds
- Check terminal tightness (wiggle test—no movement)
- Wipe corrosion with baking soda/water paste
- Verify portable starter charge light is green
Final reminder: Jump-starting gets you home but isn’t a fix. After any jump, have your battery and alternator tested within 48 hours. Most auto stores do this free. Catching a failing alternator early saves you from being stranded next time. Keep this guide in your glove box—you’ll thank yourself when that dreaded click happens again.


