

Your engine sputters and dies with a telltale click, leaving you stranded in a deserted parking lot. No helpful drivers with jumper cables in sight. This scenario traps over 24 million drivers annually, yet most don’t realize they have multiple options to restart their vehicle solo. When you’re facing a dead battery miles from assistance, knowing how to jump a car battery without another car transforms panic into empowerment. This guide delivers proven, immediate solutions—from professional portable jump starters to last-resort improvisations—so you can regain control and hit the road within minutes. You’ll learn exactly which method fits your situation, critical safety steps, and how to avoid damaging your vehicle.
Portable Jump Starter Power-Up: Your Solo Lifeline
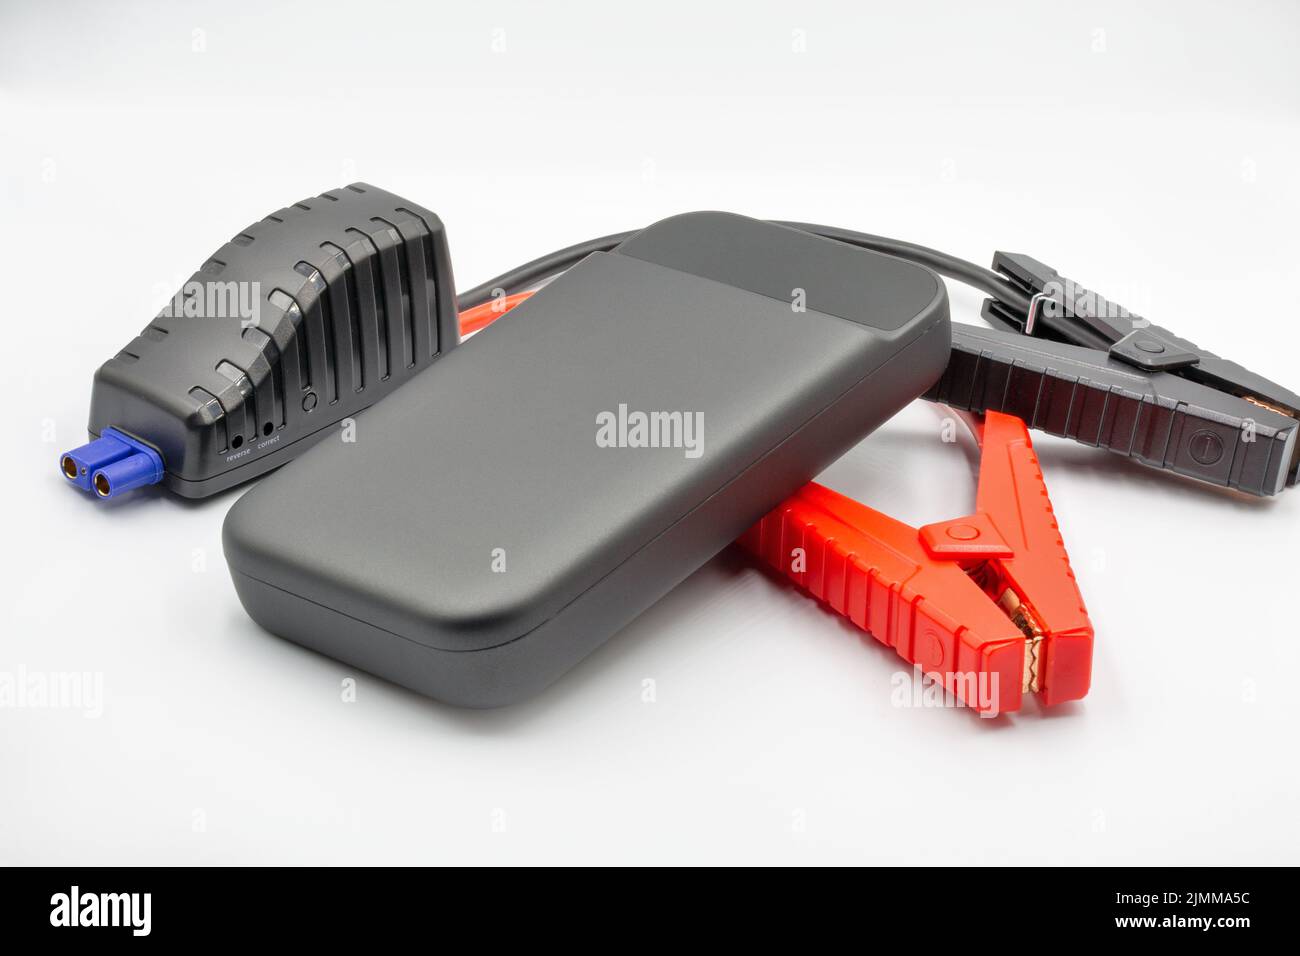
Portable jump starters are the undisputed champion for solo battery revival. These compact powerhouses deliver enough amps to start most vehicles while fitting in your glove compartment. Unlike traditional jumper cables, they eliminate the need for another driver entirely.
Choosing Your Emergency Power Source
Match power to your vehicle type:
– Compact sedans: 400-600 peak amps suffices
– SUVs and trucks: Require 800-1,000+ peak amps
– Diesel engines: Need double the amps of comparable gas vehicles
Non-negotiable safety features:
– Reverse polarity protection (prevents damage from accidental misconnection)
– Digital charge indicator (never attempt jumps with below 75% charge)
– Spark-proof technology (critical for hydrogen gas environments)
Foolproof Connection Sequence
Critical pre-connection steps:
– Remove rings and watches to prevent electrical arcing
– Position the unit away from moving engine parts
– Verify battery shows no cracks or leaks (do not proceed if damaged)
Exact clamp placement order:
1. Red clamp first → Secure firmly to positive (+) terminal
2. Black clamp second → Attach to unpainted engine bracket (never negative terminal)
3. Activate jump starter → Confirm green connection light
4. Start engine → Crank no longer than 5 seconds; wait 30 seconds between attempts
Pro Tip: Always disconnect black clamp first after successful starts to prevent dangerous sparks near the battery.
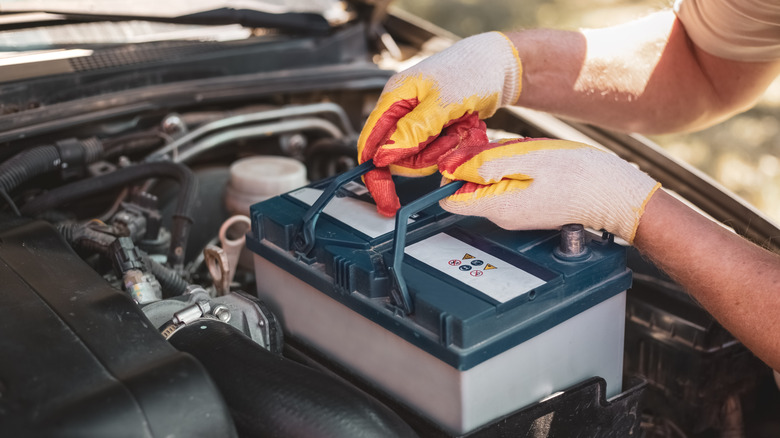
Battery Charger Revival: The Full Recovery Method
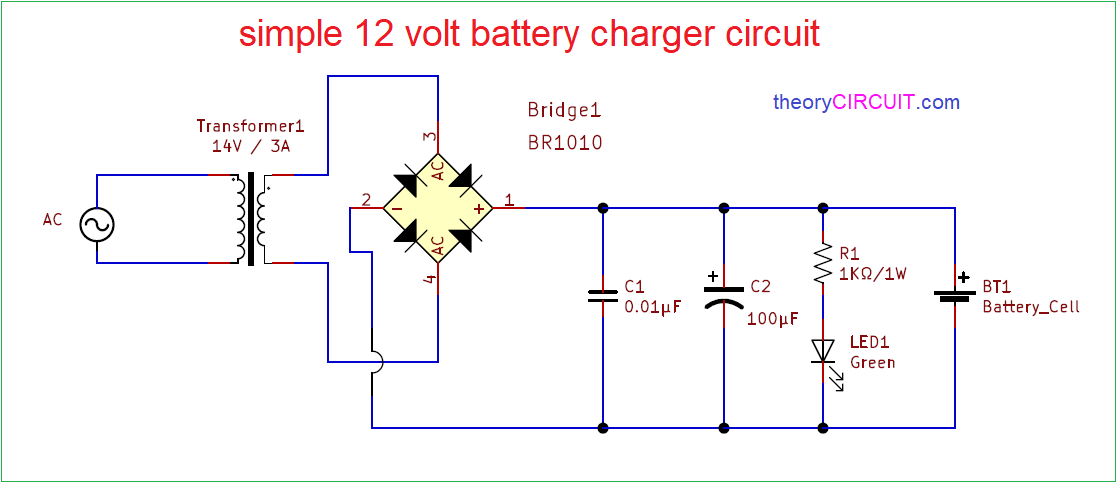
Battery chargers provide the most thorough battery restoration but require AC power access. This method excels when you’re stranded near an outlet or at home.
Standard Charger Protocol
Location requirements:
– Dry, ventilated space away from flammable materials
– Charger positioned on stable surface (never on battery)
– Minimum 6-foot cord reach to outlet
Connection sequence with critical details:
– Red cable → Positive terminal (listen for faint click confirming connection)
– Black cable → Engine block bolt (creates safe ground away from explosive gases)
– Charger settings → Use 2-4 amp “trickle” mode for deeply discharged batteries
Timing guidelines:
– Moderately dead battery: 4-6 hours
– Fully depleted battery: 12+ hours
– Check electrolyte levels hourly for serviceable batteries
Solar Trickle Charging: Off-Grid Option
When this works:
– Only effective for maintenance charging (not jump-starting)
– Requires 6+ hours of direct sunlight
– Best for mild discharges during camping trips
Critical setup steps:
– Angle solar panel perpendicular to sun rays
– Connect red to positive, black to negative terminals
– Expect 1-2 amp charging rate (insufficient for immediate starts)
Warning: Never use solar panels for emergency jump-starts—they simply can’t deliver the required 300+ amps.
Manual Transmission Push-Start: The Mechanical Solution
This technique works exclusively on manual transmission vehicles using kinetic energy to engage the starter. It requires either a downhill slope or human assistance.
Hill-Assisted Ignition
Location safety checks:
– Find gentle 5-10 degree slope with clear 50-foot path
– Avoid steep inclines where control could be lost
– Confirm parking brake releases fully
Exact execution sequence:
1. Ignition position → Turn key to “ON” (do not crank)
2. Gear selection → Second gear for optimal torque transfer
3. Clutch action → Press fully while rolling
4. Speed target → Reach 8-10 mph through gravity
5. Release point → Pop clutch at precise speed while feathering gas
Visual cue: Engine sputters violently when clutch releases correctly.
Flat-Ground Push Technique
Team coordination essentials:
– Position two pushers at rear bumper corners
– Driver holds steering wheel steady with foot on brake
– Use clear verbal cues: “Ready… Push… NOW!”
Critical timing indicators:
– Pushers build momentum over 15-20 feet
– Driver releases clutch at exactly 10 mph (watch speedometer)
– Engine catches within 2 seconds when executed perfectly
Warning: Automatic transmission vehicles cannot use this method—mechanical design prevents starter engagement.
Emergency Improvised Methods: Last Resort Options
These risky techniques should only be attempted when professional tools are unavailable. They carry significant damage risks to your battery or electrical system.
Aspirin Battery Boost (Extreme Caution)
Only attempt if:
– Battery has removable cell caps
– You’re prepared to replace the battery immediately
– It’s your absolute last option before calling a tow
Precise procedure:
1. Carefully pry open cell vents with flathead screwdriver
2. Crush 2 aspirin tablets, distributing powder equally among cells
3. Replace caps immediately to contain acid reaction
4. Attempt start within 3 minutes
Success reality check: Works on only 30% of mildly discharged wet-cell batteries. Permanently destroys battery chemistry through acid neutralization.
Laptop Charger Trickle Charge
Requirements checklist:
– Laptop charger output between 13-15V DC
– Access to AC power for 45+ minutes
– Electrical tape for secure connections
Step-by-step process:
– Connect positive to positive using stripped charger wires
– Attach negative to negative with firm contact
– Charge minimum 45 minutes before attempting start
– Expect weak cranking even when successful
Critical limitation: Modern vehicles require 300+ amps to start—laptop chargers deliver only 3-5 amps. This may barely turn the engine over for very weak batteries.
Post-Start Recovery Protocol: Avoid Getting Stranded Again
Successfully starting your engine is only step one. Proper follow-up prevents immediate re-stranding and diagnoses underlying issues.
Immediate Drive Requirements
First 20 minutes after jump-start:
– Drive at 35-55 mph continuously (no stoplights)
– Disable all electrical accessories (AC, heated seats, radio)
– Maintain 2,000+ RPM to maximize alternator output
– Head directly to auto parts store for battery testing
Warning signs requiring immediate stop:
– Engine dies within 5 minutes of starting
– Burning smell from engine compartment
– Dashboard battery light remains illuminated
Battery Health Assessment
Free professional testing options:
– Auto parts stores perform load tests in 15 minutes
– Request both battery capacity and alternator output checks
– Demand written diagnostic report (not just “good/bad”)
Replacement indicators:
– Batteries over 5 years old (replace preventively)
– Repeated jump-starts within 30 days
– Swollen battery case or visible corrosion
Troubleshooting Failed Attempts: Diagnose the Real Problem
When jump-start methods fail, systematic diagnosis prevents wasted effort and potential damage.
No-Crank Failure Analysis
Check these first:
– Clean corroded terminals with baking soda paste
– Inspect main fuses near battery (often 80-100 amp)
– Verify secure ground connections at chassis points
Critical failure indicators:
– Single loud “CLICK” → Failed starter motor
– Complete silence → Blown main fuse or dead battery
– Grinding noise → Damaged starter gear
Weather-Specific Adjustments
Cold weather protocol:
– Warm battery with interior heater for 15 minutes first
– Extend charging time by 50% below freezing
– Use engine block heater if available
Hot climate considerations:
– Check electrolyte levels in serviceable batteries
– Avoid jump-starting if battery shows bulging (heat damage)
– Test alternator immediately after starting
Prevention Strategies: Never Get Stranded Again
Monthly maintenance routine:
– Clean terminals with wire brush and baking soda solution
– Tighten loose cable connections (1/4 turn after hand-tight)
– Test voltage with multimeter (12.6V = 100% charged)
Proactive replacement schedule:
– Replace batteries at 4 years in extreme climates
– Install portable jump starter as permanent trunk fixture
– Recharge emergency devices every 3 months
Emergency kit essentials:
– Portable jump starter (500+ amps)
– Safety gloves and goggles
– Baking soda for acid spills
– Basic toolkit with wire brush
A dead battery doesn’t mean you’re helpless. Mastering how to jump a car battery without another car gives you immediate control in emergencies. While portable jump starters provide the safest, most reliable solution, understanding push-start techniques and emergency improvisations creates multiple escape routes from roadside panic. Remember that repeated jump-starts indicate deeper electrical issues requiring professional diagnosis—use these methods as temporary fixes, not permanent solutions. Keep your emergency kit stocked, your battery maintained, and you’ll transform from stranded victim to confident problem-solver on any road.


