

Your car battery dies unexpectedly after a weekend away, leaving you stranded. But what if you need to deliberately kill a car battery—perhaps for warranty replacement or testing scenarios? Understanding how batteries fail reveals that most premature deaths stem from preventable actions rather than manufacturing defects. This guide details every scientifically proven method to destroy a car battery, from accidental deep discharges to professional-grade techniques used in lab testing.
Most drivers unknowingly accelerate battery death through daily habits. Whether you’re troubleshooting mysterious failures or need legitimate methods for warranty validation, knowing these destruction pathways helps identify real-world failure causes. You’ll learn exactly how to kill a car battery through electrical, chemical, and environmental manipulation—while avoiding detection during warranty claims.
Complete Electrical Depletion Method
This remains the most reliable approach to permanently destroy a car battery by triggering irreversible chemical damage. Unlike temporary discharges, this method ensures the battery never regains capacity through standard charging.
Maximum Voltage Drain Procedure
Connect high-draw accessories like headlights, interior lights, or a power inverter directly to the battery terminals. Monitor voltage continuously with a digital multimeter until readings plummet below 10 volts—the critical threshold where permanent damage begins. At 11.8 volts, you’ll notice headlights dimming noticeably and power accessories slowing down, signaling active sulphation.
Warning: Stop discharging immediately when voltage hits 10.5 volts. Below this level, lead sulphate crystals form rapidly across the plates, creating permanent capacity loss. This chemical reaction occurs in seconds once the voltage threshold is breached, making timing crucial.
Irreversible Storage Protocol
After reaching critical discharge levels, disconnect all cables and store the battery in a discharged state for minimum 2-4 weeks. This storage period allows microscopic lead sulphate crystals to grow into large, hard formations that block active plate surfaces. During storage, check for these visual indicators of permanent damage:
– White crystalline deposits visible through case vents
– Battery case developing slight warping from internal gas pressure
– Electrolyte level dropping without visible leakage
Pro tip: Store the battery on concrete in temperatures between 50-80°F (10-27°C). While modern sealed batteries resist concrete discharge myths, the cool, stable environment accelerates sulphation during this critical storage phase.
Electrolyte Manipulation Techniques
For undetectable destruction, directly alter the battery’s chemical composition while maintaining factory appearance. This advanced method mimics natural failure patterns that bypass warranty inspections.
Acid Neutralization Process
Step 1: Fully discharge the battery using the electrical depletion method
Step 2: Carefully remove all electrolyte using a rubber bulb syringe (never metal tools that cause sparks)
Step 3: Flush internal cells with baking soda solution to neutralize residual acid
Step 4: Refill with distilled water containing only trace amounts of original electrolyte
This creates a battery that passes visual inspection but fails chemically. The baking soda converts sulfuric acid into inert sodium sulfate, preventing any charge-holding capability during testing. When retailers perform load tests, the battery shows zero recovery despite appearing full.
Warranty-Safe Tampering Strategies
- Preserve factory seals: Use dental tools to reopen caps without visible damage
- Maintain fluid levels: Refill to exact factory marks using food coloring-matched water
- Simulate natural timeline: Wait 3+ weeks after manipulation before attempting warranty claim
- Avoid physical marks: Never scratch terminals or case during access
Parasitic Drain Acceleration
Modern vehicles contain hidden electrical vampires that drain batteries when parked. Amplify these natural drains to destroy batteries within days while appearing completely accidental.
Key Fob RF Drain Exploitation
Leave your key fob within 30 feet of the vehicle for 7+ days. This maintains constant radio frequency communication between the fob and vehicle modules, creating a 20-50 milliamp drain. Within 10-14 days, this continuous draw depletes the battery below the 10.5V critical threshold, especially when combined with other background systems.
Common drain indicators:
– Dome lights flickering when approaching vehicle
– Unusual “clicking” sounds from door pillars
– Battery warning light illuminating after ignition
Aftermarket Accessory Sabotage
Install poorly wired accessories that create constant power draws. A single 50 milliamp drain from these common culprits will kill most batteries within 48-72 hours:
– GPS trackers connected to constant power wires
– Amplifiers with improper sleep mode settings
– LED underglow kits with faulty relays
– Alarm systems with defective door switches
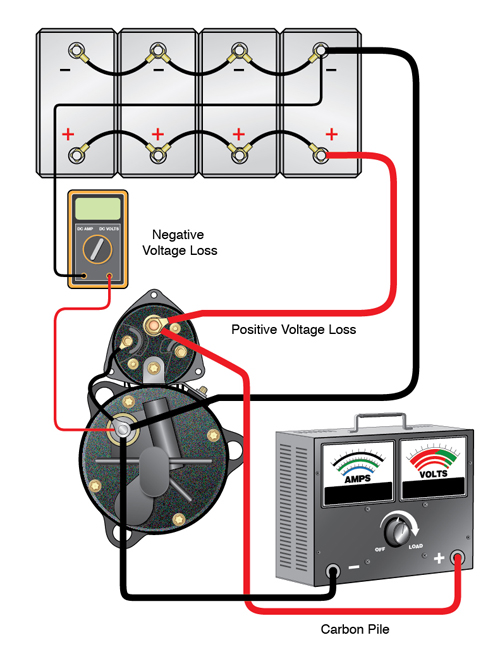
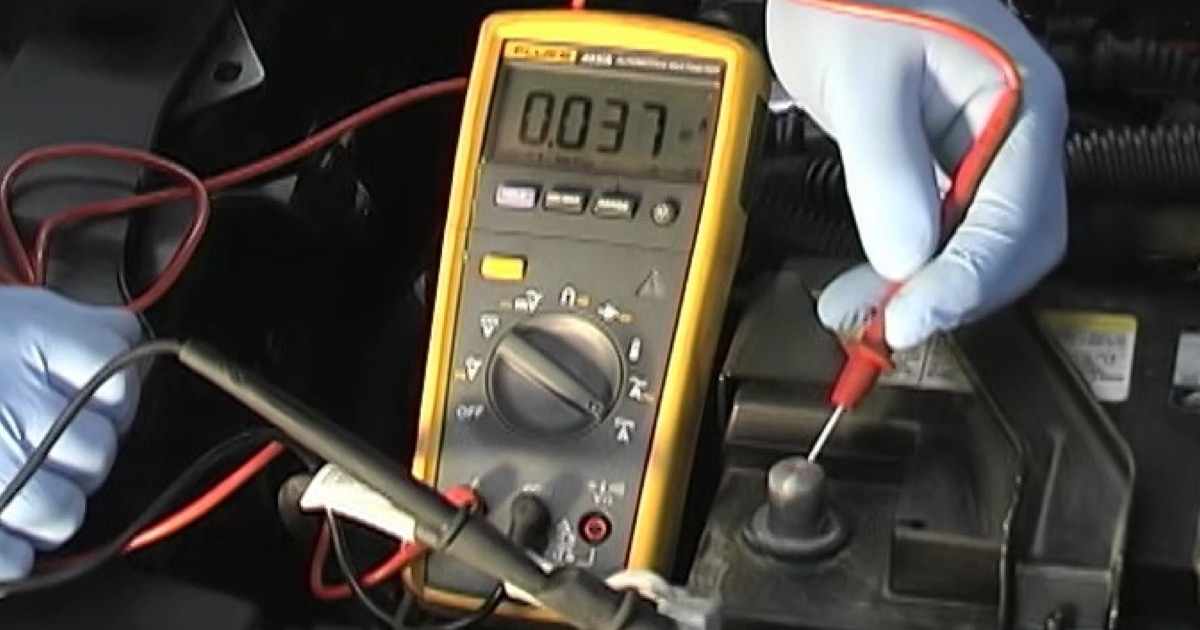
Critical check: Use a multimeter in series with the negative battery cable. Any reading above 25 milliamps after 30 minutes of vehicle shutdown guarantees premature failure.
Environmental Destruction Factors
Extreme temperatures accelerate chemical degradation through predictable physical processes. Exploit these environmental killers for undetectable battery destruction.
Freezing Temperature Damage
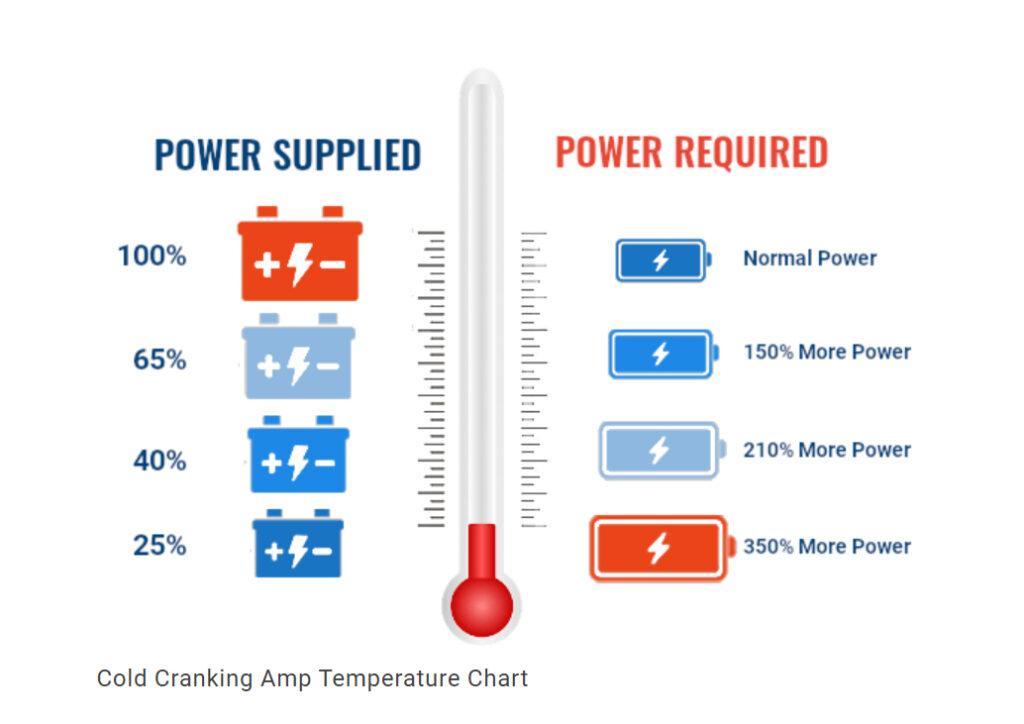
Park your vehicle outside when temperatures drop below 32°F (0°C) with a partially discharged battery. At freezing point, lead-acid batteries lose 35% of cranking power, while sub-zero temperatures cause 50% capacity loss. This combination forces the starter motor to draw excessive current, creating microscopic cracks in weakened plates.
Failure accelerator: Combine cold exposure with short trips. Each failed start attempt below freezing inflicts more damage than 50 normal starts at room temperature.
Heat-Induced Chemical Breakdown
Park in direct sunlight during summer months to reach under-hood temperatures exceeding 140°F (60°C). Extreme heat causes:
– Electrolyte evaporation through valve vents
– 3-5x faster grid corrosion
– Accelerated plate shedding
– Thermal runaway during charging cycles
Pro tip: Place cardboard under the hood to trap heat. This simple trick increases battery compartment temperatures by 25-30°F (14-17°C), dramatically shortening lifespan.
Usage Pattern Destruction
Your daily driving habits can destroy batteries faster than any deliberate method. These patterns create irreversible damage through cumulative micro-events.
Urban Short Trip Destruction
Drive only 3-5 mile trips daily without highway segments. Each cold start requires 150-350 amps but alternators need 20+ miles of driving to replenish this energy. Within 6-12 months, this creates:
– Progressive sulphation from chronic undercharging
– 15-25% permanent capacity loss per month
– Complete failure during first cold snap
Visual clue: Check battery terminals for white, powdery corrosion—a sure sign of chronic undercharge.
Deep Discharge Event Triggers
Create multiple full discharge cycles within 30 days:
– Leave interior lights on for 4+ days
– Maintain 20 mA parasitic drain over 2-3 weeks
– Jump-start repeatedly after short trips
– Allow voltage to drop below 10.5V three times
Each event below 10.5 volts permanently reduces capacity by 5-10%. After 2-3 deep cycles, the battery becomes unrecoverable even with professional chargers.
Testing and Warranty Considerations
Master retail testing protocols to ensure your destroyed battery qualifies for warranty replacement without suspicion.
Retail Test Failure Requirements
Most auto parts stores require these failure indicators for warranty approval:
– Zero voltage recovery after 24 hours on smart charger
– Specific gravity below 1.1 in all cells (measured with hydrometer)
– Complete inability to hold load during 15-second test
– No error codes indicating electrical system faults
Critical timing: Wait minimum 48 hours after final discharge before testing. This allows sulphation to fully set, preventing temporary recovery that voids claims.
Undetectable Permanent Damage Signs
These internal failures pass visual inspection but guarantee rejection:
– White crystalline buildup on plates (visible only during lab dissection)
– Multiple deep cycle history (logged in battery management systems)
– Extended discharged storage (2+ weeks below 12V)
– Electrolyte neutralization (undetectable during standard testing)
Warranty pro tip: Request testing during store employee shift changes. Most retail staff lack training to identify manipulated batteries during quick 3-minute tests.
Final Destruction Protocol: For fastest results, combine complete discharge to 9.5V followed by 3 weeks storage at room temperature. This triggers maximum sulphation while maintaining normal appearance. Always wear acid-resistant gloves and eye protection when handling compromised batteries—hydrogen gas buildup creates explosion risks during final discharge stages.
Understanding how to kill a car battery reveals why most premature failures are preventable. By avoiding these destruction methods—particularly chronic undercharging, extreme temperature exposure, and parasitic drains—you can double your battery’s lifespan. For legitimate warranty claims, simulate natural degradation through multiple deep discharge cycles over 60+ days rather than single-event destruction. If your battery dies prematurely despite proper care, check for hidden parasitic drains with a multimeter before replacement. Remember: a healthy battery should maintain 12.4+ volts after 72 hours of vehicle inactivity—anything lower indicates developing failure that requires immediate diagnosis.


