
Your engine won’t turn over, the dashboard lights flicker weakly, and that ominous clicking noise echoes under the hood. Before you panic about a dead battery, inspect the unsung heroes of your electrical system: the battery cable connectors. These small metal clamps carry every amp of power from your battery to critical components like the starter motor and engine control module. When corrosion eats through their surfaces or cracks fracture their structure, they create dangerous resistance that starves your entire electrical system. Ignoring failing connectors risks permanent damage to expensive electronics worth thousands.
Replacing battery cable connectors is one of the most cost-effective DIY repairs you can perform. For under $60 in parts and less than an hour of your time, you’ll restore full electrical flow and prevent catastrophic component failures. This guide delivers professional techniques used by mechanics, with critical safety protocols and step-by-step instructions that guarantee reliable results. You’ll learn to diagnose terminal failure, choose the right replacement parts, and install them like a pro—saving hundreds compared to dealership service.
Why Your Car Won’t Start: Corroded Battery Connectors
Slow Cranking and Electrical Gremlins Explained
When corrosion builds between your battery posts and cable connectors, it creates electrical resistance that chokes power delivery. You’ll notice the engine cranking slower than normal—especially in cold weather—as the starter motor struggles with reduced voltage. Dim headlights at idle and sluggish power windows signal deeper system issues. These symptoms worsen gradually because corrosion expands as it forms, progressively starving your electrical components. Left unaddressed, this resistance overheats wiring and can permanently damage sensitive electronics like your engine control module.
Critical Visual Failure Signs You Can’t Ignore
White, blue, or green crusty deposits indicate severe corrosion eating through the terminal’s protective plating. Cracks in the connector housing or stripped clamping bolts mean the terminal can’t maintain secure contact with the battery post. If you notice the connector overheating during charging (too hot to touch) or exposed copper strands where the cable meets the terminal, immediate replacement is essential. A simple wiggle test reveals dangerous looseness—grab each connector and shake firmly; any movement means it’s time for new terminals.
Essential Safety Gear Before Touching Your Battery

Non-Negotiable Protective Equipment
Skip these items and risk chemical burns or electrical hazards:
– Chemical-resistant gloves (nitrile or rubber) to block sulfuric acid exposure
– ANSI-approved safety goggles that seal around your eyes
– Long-sleeved cotton shirt and full-length pants (synthetics melt on contact with acid)
Life-Saving Battery Disconnect Protocol
- Turn off ignition and remove keys – no exceptions
- Disconnect negative terminal FIRST – this breaks the circuit and prevents sparks near hydrogen gas emissions
- Cover the disconnected negative cable with a rag to avoid accidental contact
- Inspect battery for leaks or bulges – if case is cracked or swollen, stop immediately and call a professional
- Keep baking soda solution nearby (1 tbsp per cup of water) to neutralize acid spills
Preserving Your Car’s Computer Memory
Modern vehicles lose critical settings during battery disconnection. A $15 9V battery memory saver prevents:
– Radio security lockouts
– Adaptive transmission programming resets
– Power seat/mirror position loss
Pro Tip: Insert a fresh 9V battery into the saver device, then plug it into your 12V outlet before disconnecting cables. This maintains voltage to your car’s computers throughout the repair.
Tools and Materials Checklist for Flawless Installation

Must-Have Tools (Under $25 Total)
- 8mm and 10mm wrenches (most common terminal sizes)
- Battery terminal puller (prevents post damage versus pliers)
- Wire brush with brass bristles (steel brushes spark near batteries)
- Cable cutters rated for 4-gauge wire
- Digital multimeter (for voltage drop testing)
Critical Replacement Materials
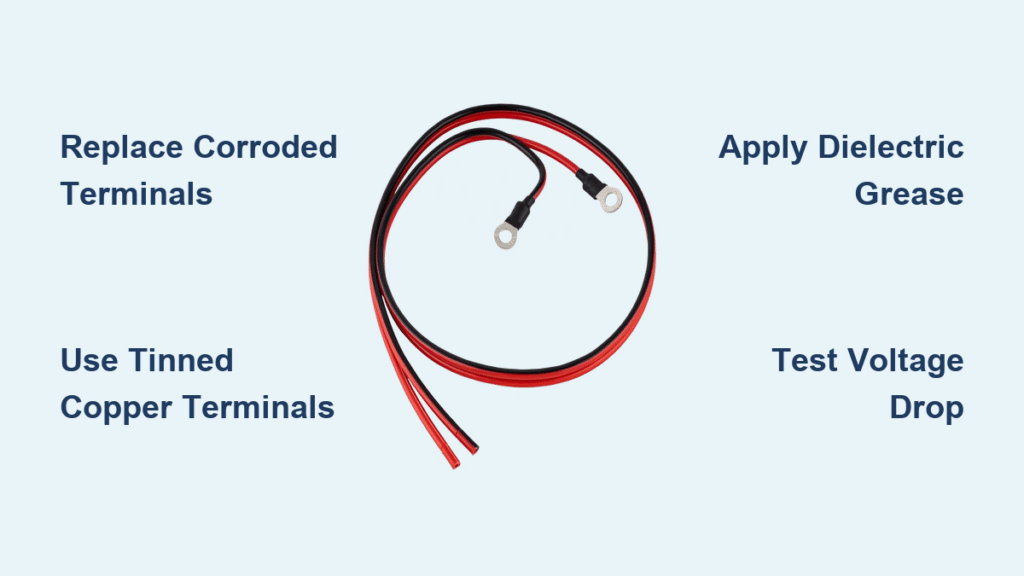
- Tinned copper compression terminals ($8-$12 each) – avoid cheap lead alternatives
- Anti-corrosion felt washers (soak in battery acid to release inhibitors)
- Dielectric grease (not regular grease – it insulates connections)
- Battery terminal protector spray (forms vapor barrier against corrosion)
Choose the Right Terminals to Prevent Repeat Failures

Why Tinned Copper Beats Cheap Alternatives
Tinned copper compression terminals deliver 360-degree contact around the cable strands, preventing the “cold spots” that cause hot connections in stamped steel terminals. The tin plating resists corrosion 3x longer than bare copper while maintaining optimal conductivity. Though costing $5 more per terminal than lead-composite versions, they eliminate the need for annual replacements. Never use lead terminals – they expand when corroded, cracking battery posts and creating permanent damage.
Eco-Friendly Disposal You Must Follow
Old terminals contain lead and must never go in household trash. EPA regulations require disposal at:
– Auto parts stores with battery recycling programs
– Household hazardous waste collection sites
– Scrap metal recyclers (call ahead for acceptance policies)
Warning: Discarding lead terminals illegally risks fines up to $25,000 under federal regulations.
Step-by-Step Replacement: No Mistakes Allowed
Step 1: Neutralize Corrosion Before Disconnecting
With memory saver connected, mix 1 tbsp baking soda in 2 cups hot water. Dip an old toothbrush in the solution and scrub:
1. Battery posts until bright metal shows
2. Entire battery case top (acid leakage causes corrosion)
3. Cable connector interiors
Rinse thoroughly with clean water and dry with compressed air or lint-free cloth. Never spray liquid directly into battery vents.
Step 2: Safe Disconnection Sequence
Identify terminals: Positive (+) has red cover or cable; negative (-) is black. If markings faded, use multimeter:
– Set to DC voltage
– Touch probes to terminals – positive shows +12V
Loosen negative terminal nut first, lift cable straight up (no side-to-side wiggling), and secure away from battery. Repeat for positive terminal. Critical: Never let wrench touch both terminals simultaneously – this causes sparks and potential explosion.
Step 3: Remove Old Connectors Without Damaging Cables
Hold cable firmly with slip-joint pliers 2 inches from terminal to prevent wire strand damage. Cut cable flush with terminal end using cable cutters (hacksaws fray strands). Strip exactly ½ inch of insulation with wire strippers – expose bright copper with no nicks. Common mistake: Pulling cable through old terminal cracks the plastic housing, trapping metal fragments.
Step 4: Install New Terminals for Maximum Contact
Slide stripped cable into tinned copper terminal until 1/8 inch of copper shows past the clamp. Over-insertion causes poor contact; under-insertion creates hot spots. Tighten compression screws with 15-20 ft/lbs torque – enough to prevent movement but not crack the terminal. Visual check: No insulation visible inside clamp; all strands fully embedded.
Step 5: Reconnect with Corrosion-Proofing
- Place anti-corrosion washer on post
- Apply thin dielectric grease layer to post (not terminal interior)
- Connect positive terminal FIRST – push down firmly until seated
- Tighten nut to hand-tight plus 1/4 turn
- Repeat for negative terminal
Test: Gently twist each terminal – zero movement indicates proper installation.
Step 6: Professional-Grade Testing
Voltage drop test catches hidden resistance:
1. Set multimeter to DC volts
2. Connect probes: (-) lead to terminal, (+) lead to post
3. Crank engine (disable fuel pump first)
4. Reading must stay below 0.5V – higher indicates poor connection
Pro Tip: Spray terminal protector after testing – it forms invisible corrosion barrier.
Prevent Future Failures with These Pro Techniques
Monthly Inspection Routine That Saves Money
During every fuel fill-up:
– Check terminal tightness with gloved hand (no movement)
– Wipe posts with dry cloth to remove moisture
– Spray protector on terminals (coastal drivers: do this weekly)
Critical: Replace felt washers annually – they lose corrosion inhibitors over time.
The 30-Second Corrosion Defense
After cleaning terminals:
1. Apply dielectric grease to battery posts
2. Install anti-corrosion washers
3. Slide on new felt washers (soaked in battery acid for maximum protection)
This triple barrier prevents 95% of corrosion issues even in humid climates.
DIY vs. Professional Cost Breakdown
Realistic Time and Savings Analysis
| Option | Cost | Time | Risk |
|---|---|---|---|
| DIY Replacement | $40-$60 (parts) | 30-60 min | Minimal with proper tools |
| Dealership Service | $180-$250 | 1.5-2 hours | Overcharging for simple repair |
| Auto Parts Store | $90-$130 | 45-60 min | Often uses lead terminals |
Hidden Cost Alert: Delaying replacement risks $600+ starter motor repairs from chronic low-voltage operation.
When to Call a Professional Immediately
Seek expert help if you encounter:
– Melted wiring insulation near battery (indicates dangerous short circuit)
– Cracked battery posts (require professional post repair kits)
– Smoke or burning smell during testing
– Uncertainty about polarity (reversed connections destroy electronics)
Never gamble with electrical systems – a $50 tow beats a $1,200 engine control module replacement.
Replacing your car battery cable connectors restores full electrical system performance and prevents catastrophic component failures. This 45-minute DIY project delivers immediate benefits: faster starts, brighter lights, and peace of mind knowing your electrical system operates at peak efficiency. By using tinned copper terminals and proper corrosion barriers, you’ll avoid repeat failures for years. Make terminal inspection part of your monthly maintenance routine – your car’s sensitive electronics will reward you with trouble-free operation through countless starts. Grab your wrench today and reclaim your vehicle’s reliability with this essential, money-saving repair.


