
That ominous click-click-click when you turn the key isn’t always a dead battery—it’s often failing clamps choking your electrical system. When corrosion builds up inside the clamp barrel or the terminals won’t tighten securely, your car struggles to start, electronics glitch, and you risk frying expensive components like the alternator. Replacing battery clamps takes less than 30 minutes, costs under $20, and instantly restores full electrical flow. This guide gives you pro-level steps to eliminate weak starts and prevent costly electrical failures—whether you’re battling crusty green corrosion or clamps that spin uselessly on the posts.
Diagnose Failing Clamps Before You’re Stranded
Clamps that won’t tighten signal immediate replacement. If your wrench spins the terminal bolt but the clamp still wiggles freely on the battery post, the lead alloy casting is cracked or stripped. Don’t waste time retightening—this connection will fail completely, leaving you stranded. Similarly, cracks in the clamp ears (the U-shaped arms that grip the post) mean the clamp can’t maintain pressure, causing dangerous arcing that melts insulation and damages posts.
Voltage-drop testing reveals hidden resistance. With a digital volt-ohm meter (DVOM), measure across the terminal-post junction while cranking the engine. Anything over 0.5 volts means your clamps are starving the starter. For context: a healthy connection should show 0.1–0.3 volts. If your headlights dim dramatically when starting or the engine cranks slower each attempt, clamp corrosion is likely the culprit—not the battery itself.
Why corrosion destroys electrical flow
Green or blue crust inside the clamp barrel acts like an insulator, forcing current through a narrow path. This creates heat that further degrades the connection. Overheating clamps (too hot to touch after driving) or melted insulation near terminals indicate critical resistance levels that can damage your vehicle’s computer modules. Don’t confuse this with normal surface corrosion—internal buildup requires clamp replacement, not just cleaning.
Essential Safety Steps Before Touching Tools
Disconnect negative first—always. Remove the black (negative) cable before the red (positive). This eliminates the risk of your wrench grounding against the chassis while loosening the positive terminal—a single spark can cause a battery explosion. If you skip this step, you’re gambling with sulfuric acid burns and shrapnel.
Critical pre-work checklist
- Wear chemical-resistant gloves and ANSI safety goggles. Battery acid causes permanent eye damage within seconds. Keep a bottle of water nearby for immediate flushing.
- Preserve your settings with a $10 9V memory saver plugged into your 12V socket before disconnecting cables. This maintains radio presets, clock, and keyless entry codes.
- Turn off the ignition and remove keys. Confirm all electronics (lights, radio) are off to prevent short circuits.
Gather the Right Tools and Clamps
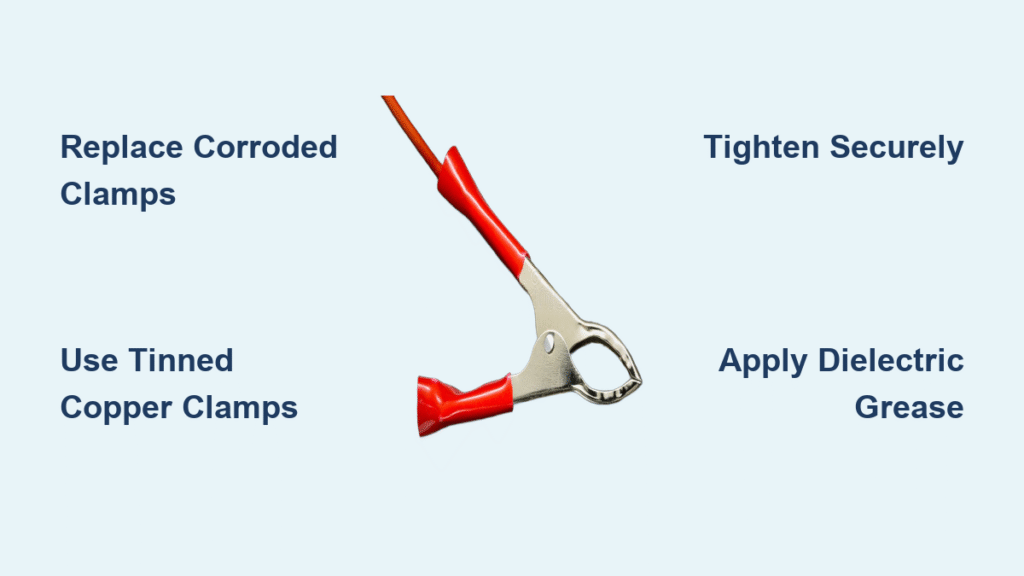
Use tinned copper compression clamps—never cheap steel. Discount-store galvanized steel clamps corrode faster and conduct poorly. Marine-grade tinned copper (like ACDelco 19402405) costs $8–$15 per clamp but lasts 3–5 times longer. Verify your battery group size (Group 24, 34, 48, etc.) to ensure correct post diameter fit—most domestic vehicles use 13mm posts, imports use 10mm.
Must-have tools checklist
- Correct wrench size: 8mm/10mm for imports, 10mm/13mm for domestics
- Wire cutters (for integral terminals)
- Heat gun (for marine-grade heat-shrink tubing)
- Wire brush and DVOM for testing
- Dielectric grease and red/black felt washers (prevents future corrosion)
Pro Tip: Skip the cheap terminal cleaner spray. A baking soda solution (1 tbsp per cup hot water) neutralizes acid corrosion more effectively and costs pennies.
Remove Old Clamps Without Damaging Cables

Negative cable first: Loosen the clamp bolt 2–3 turns, then wiggle the cable side-to-side while lifting straight off the post. Never pry—it cracks the battery case. Secure the cable away from the battery with tape or a bungee cord. Positive cable second: Repeat the process, treating the red cable as live even with the battery disconnected.
Cutting integral terminals safely
If factory clamps are crimped directly to the cable (common on newer vehicles):
1. Cut behind the old terminal with wire cutters, leaving maximum cable length
2. Strip exactly ½” of insulation to expose bright copper strands
3. Never cut while cables are connected to the battery—this causes sparks
Warning: If insulation is blackened or copper strands are green, cut back 1–2″ further. Corroded wire increases resistance and will fail prematurely.
Clean Posts and Cables Like a Pro
Neutralize corrosion with baking soda: Dip an old toothbrush in the solution and scrub posts until bright metal appears. Let it fizz for 30 seconds—this dissolves sulfate crystals. Rinse thoroughly with distilled water (tap water leaves minerals) and dry with paper towels. Repeat on cable ends until copper shines.
Critical mistake to avoid: Skipping post cleaning. Residual corrosion creates micro-gaps that cause voltage drop. If posts are pitted or uneven, replace the battery—smoothing them with a file creates weak spots.
Install New Clamps for Maximum Conductivity
Tinned copper compression clamps require precise installation:
1. Slide heat-shrink tubing and protective boot onto the cable before inserting wire
2. Insert stripped wire fully into the barrel until copper shows in the inspection window
3. Tighten the compression screw firmly—do not overtighten (soft copper deforms easily)
4. Perform a tug test: Pull the wire hard—it must not slip. This connection handles 100+ amps during cranking.
Pro Tip: Apply dielectric grease inside the clamp barrel before insertion. This prevents future corrosion while maintaining conductivity—contrary to old myths.
Reconnect Cables to Prevent Future Failures
Positive first, negative last—reverse your disconnection order. Apply dielectric grease to both the battery post and inside the new clamp. Place the red felt washer under the positive clamp and black under negative—these absorb acid vapors. Tighten clamps until snug, then give a final ¼-turn with your wrench. They should allow zero lateral movement.
Critical test: Wiggle both clamps vigorously. If they shift even slightly, retighten. Loose connections cause arcing that melts posts and destroys clamps within weeks.
Verify Your Work with Voltage Testing
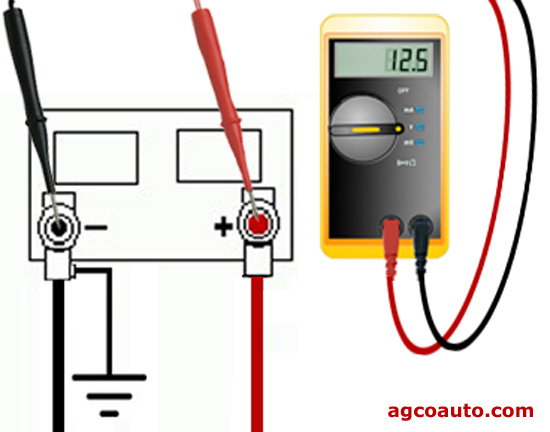
Static voltage check: With the engine off, DVOM across battery posts should read 12.4–12.7 volts. Lower indicates a weak battery or charging issue.
Voltage-drop test (crucial for diagnosis):
1. Disable ignition/fuel (pull fuse)
2. Connect DVOM positive lead to battery post, negative to terminal clamp
3. Crank 3–5 seconds—reading must stay below 0.5 volts
4. Repeat on negative side
If readings exceed 0.5V, re-clean posts or re-crimp the clamp. This test catches 90% of “ghost” electrical problems.
Prevent Corrosion for Years: Pro Maintenance
Coat every connection after installation: Smear dielectric grease on posts, clamps, and exposed cable ends. Install red/black protective boots—they block acid vapor and physical damage. Schedule inspections every 6 months: Disconnect negative, check for white/blue deposits, and reapply grease if needed.
Pro Tip: Felt washers under clamps extend life 300%. They’re $3 on Amazon but prevent the green crust that destroys connections. Never skip this step—it’s the #1 reason DIY replacements fail prematurely.
Troubleshoot Common Clamp Replacement Failures

Clamp won’t tighten on post? Post diameter mismatch is likely. Verify your battery group size (stamped on case). For temporary fixes, wrap lead shim tape around the post. Permanent solution: Buy correct-size clamps.
Cable too short after cutting? Previous improper repairs shortened the wire. Use a universal cable extension kit ($12) or replace the entire cable assembly.
Clamp overheating? High resistance in the crimp connection. Re-strip the wire, clean copper strands, and re-crimp. Upgrade to tinned copper if using cheap steel clamps.
When to Call a Professional
DIY is safe for bolt-on or compression clamps with adequate cable length. But seek a mechanic if:
– Your vehicle has integrated harness cables (e.g., 2014+ Toyota RAV4 with branched positive cable)
– Corrosion extends more than 1″ up the cable (internal wire damage)
– You drive a hybrid or stop/start vehicle requiring scan-tool resets
– Voltage drops persist after replacement (indicates deeper electrical issues)
Final Installation Checklist
✓ Terminals rock-solid—zero wiggle when tugged
✓ Static battery voltage 12.4–12.7V
✓ Dielectric grease on all metal surfaces
✓ Red/black felt washers installed under clamps
✓ Next inspection scheduled in 6 months
Replacing battery clamps isn’t just about fixing a slow crank—it’s preventing cascading electrical failures that cost hundreds in repairs. With tinned copper clamps properly installed and corrosion protection applied, your starting system will deliver full power for years. The difference is immediate: faster cranking, brighter lights, and no more electrical gremlins. Spend 30 minutes today to avoid a stranded tomorrow—your car’s entire electrical system depends on these two small connections.


