
Picture this: You’re ready to drive your classic car after winter storage, but the engine won’t crank. That $200 battery you stored “safely” is now a sulfated paperweight. Car batteries cost $100-$300 to replace, yet improper storage ruins thousands annually through preventable sulfation – a crystal buildup that permanently cripples charging capacity. When voltage drops below 12.4V during storage, lead sulfate hardens on internal plates, slashing your battery’s lifespan by up to 50%. Whether storing a spare or preserving your current battery for seasonal vehicle downtime, proper how to store a car battery techniques save money and headaches.
The storage clock starts ticking the moment you disconnect. New batteries lose 3% charge monthly and can last up to two years in ideal conditions, but manufacturers urge use within 6-9 months for peak performance. Used batteries? They typically survive just one year with meticulous care. The difference between a ready-to-install battery and a sulfated replacement hinges on four critical factors: pre-storage prep, temperature control, charge maintenance, and reconnection protocol. Follow this guide to avoid costly mistakes and ensure your battery fires up when you need it.
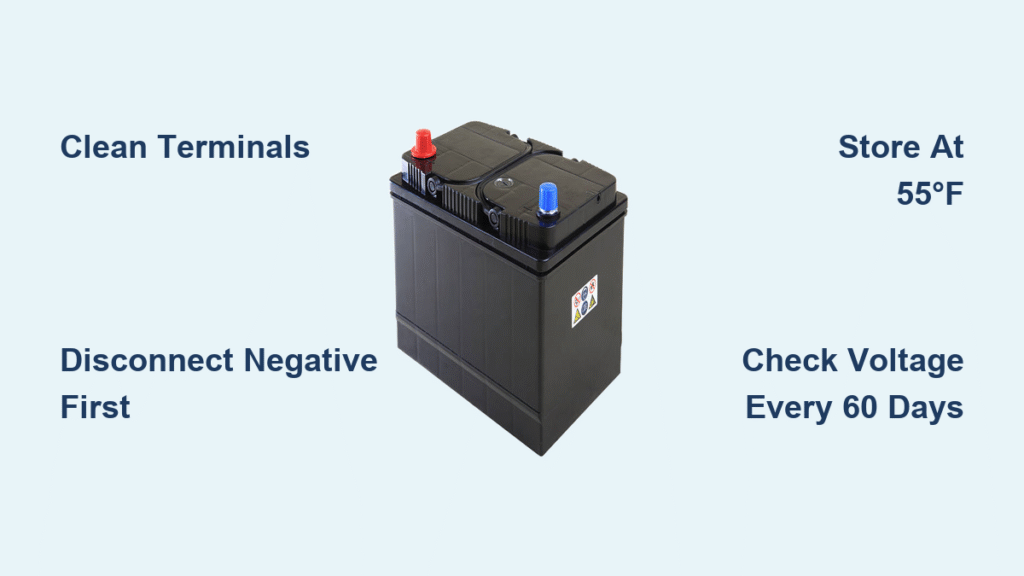
Remove Corrosion Before Storing Your Car Battery
Dirty terminals sabotage storage efforts by accelerating self-discharge. Corrosion acts like a mini-circuit, draining power even when disconnected. Mix 1 tablespoon of baking soda with 1 cup of water to create a safe, effective cleaning solution. Dip an old toothbrush into the mixture and scrub terminals until corrosion lifts – you’ll see bubbling as the reaction neutralizes acid residue. For stubborn buildup, commercial terminal cleaners work faster but require proper ventilation.
Why terminal grease matters after cleaning: Bare metal exposed to air invites rapid re-corrosion. Apply a dime-sized amount of corrosion-resistant terminal grease or petroleum jelly to both positive and negative posts. This creates a moisture barrier that prevents new corrosion during storage. Skip this step, and you’ll battle crystallized sulfate when reinstalling. While cleaning, inspect the entire battery case for hairline cracks or leaks – any damage means the battery can’t be safely stored and needs replacement.
Disconnect Your Car Battery Without Sparking Hazards
Using the wrong disconnection sequence risks dangerous sparks or electrical damage. Grab these essential tools first: 10mm wrench (standard for most terminal bolts), safety goggles, insulated gloves, and a socket wrench for the hold-down bracket. Never skip eye protection – battery acid can cause permanent vision damage.
Critical Disconnection Sequence for Safety
- Kill all power: Turn off ignition, remove keys, and disable alarms
- Negative terminal first: Loosen the black cable clamp – this breaks the circuit safely
- Positive terminal second: Only disconnect the red cable after negative is secure
- Release hold-down: Remove the bracket securing the battery to the tray
- Lift correctly: Slide hands under battery edges (not cables) to avoid strain
Common mistake: Disconnecting positive first creates a path for sparks if tools touch metal surfaces. Always start with negative to eliminate this risk. If terminals are corroded, wrap them in electrical tape after removal to prevent accidental contact.
Store at 55°F: The Perfect Temperature for Car Batteries
Temperature extremes are the #1 storage killer. Store between 50-60°F (10-15°C) – your basement wine cellar or climate-controlled garage is ideal. At 80°F, self-discharge doubles to 6% monthly; below 32°F, electrolyte can freeze in discharged batteries. Concrete floors aren’t the villain they once were (modern plastic cases prevent discharge), but never store near furnaces, water heaters, or direct sunlight.
Build a Battery Storage Station in 4 Steps
- Choose low shelving: Store batteries below waist height to prevent dangerous falls
- Add ventilation: Place near a window or fan – lead-acid batteries emit hydrogen gas when charging
- Control humidity: Use silica gel packs if storing in damp areas like basements
- Contain spills: Place battery inside a plastic storage tub with a lid (not sealed)
Pro tip: Tape a digital thermometer to your storage spot. Fluctuations above 70°F or below 40°F require immediate relocation to prevent irreversible damage.
Check Voltage Every 60 Days to Stop Sulfation

Lead-acid batteries silently die during storage through gradual discharge. Test voltage with a multimeter every 2 months – here’s your action guide:
– 12.6V+: Healthy (fully charged)
– 12.4V: Time to recharge immediately
– Below 12.0V: Sulfation has likely begun
Recharge correctly using these steps:
1. Use a smart charger with “maintenance mode” (trickle chargers risk overcharging)
2. Connect positive (red) clamp first, then negative (black)
3. Charge at 2 amps max for 8-12 hours
4. Disconnect negative clamp first when done
Critical mistake: Letting voltage drop below 12.4V for weeks. Sulfation starts within hours of discharge and becomes permanent in 30 days. For effortless maintenance, use a battery tender – these $30 devices automatically top up charge without overcharging.
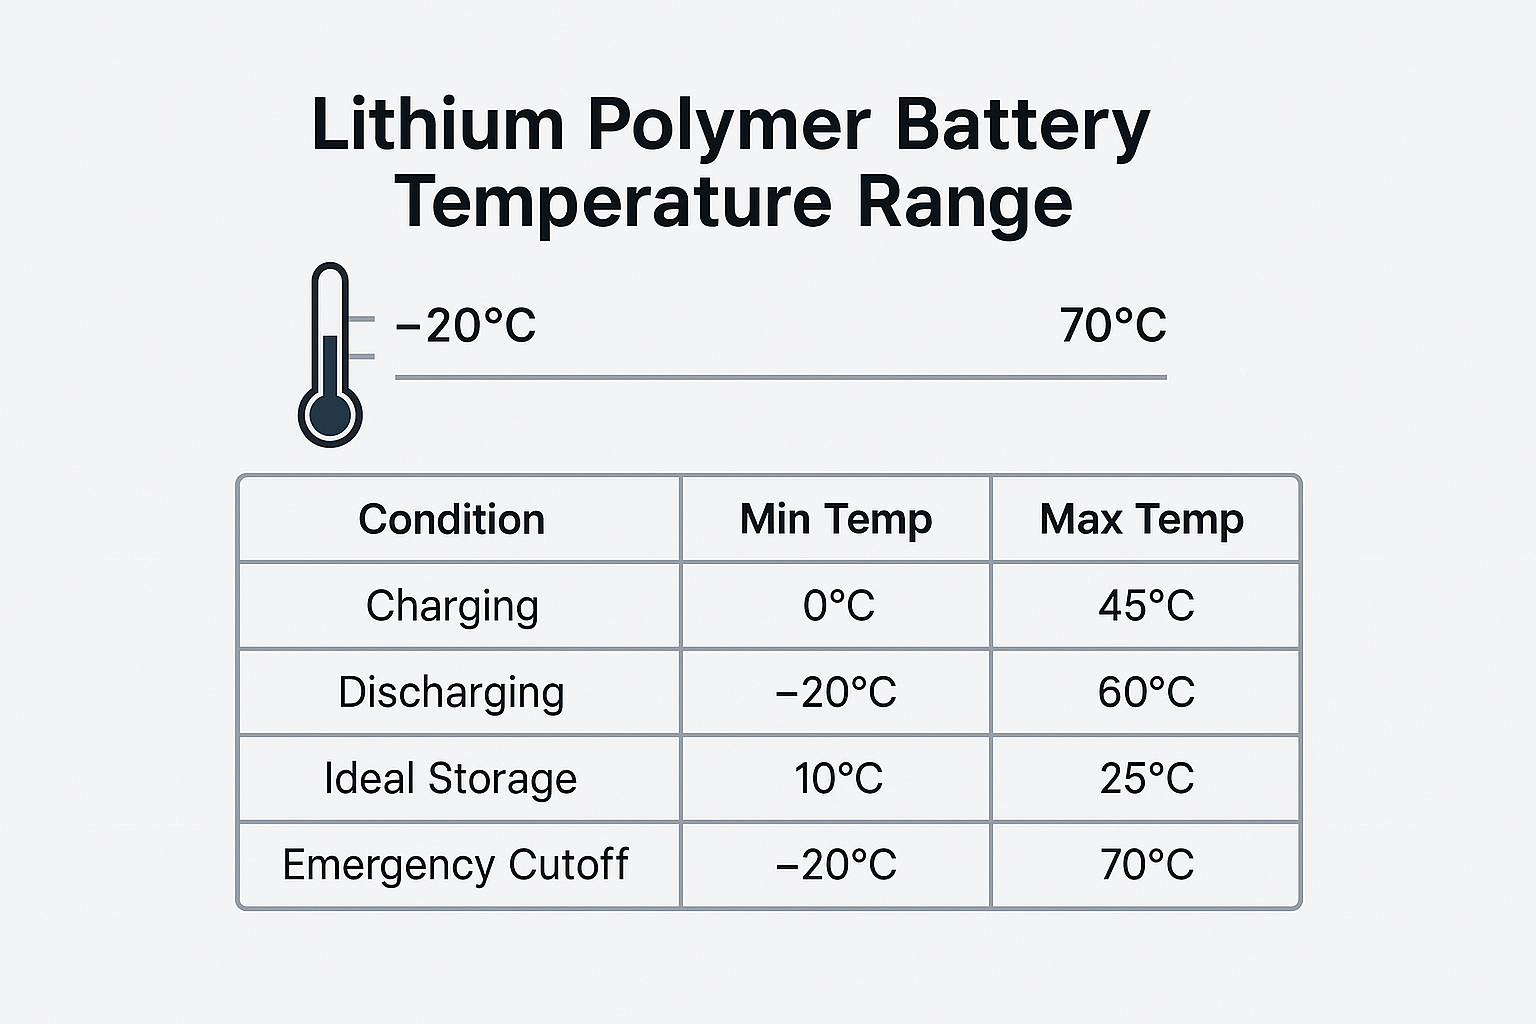
Store Lithium-Ion vs. Lead-Acid Batteries Differently
Most cars use lead-acid, but hybrids and EVs increasingly use lithium-ion. Storing them identically destroys lithium batteries. Lead-acid types must sit at 100% charge – any discharge invites sulfation. Lithium-ion? Store at 50% charge (13.2V for 12V systems). Full charge stresses lithium cells, accelerating degradation.
Why the difference matters: Lead-acid relies on liquid electrolyte that stratifies when discharged, while lithium-ion uses solid-state chemistry damaged by constant full charge. Check your battery label – “AGM,” “Flooded,” or “EFB” means lead-acid; “LiFePO4” indicates lithium. When in doubt, assume lead-acid and store fully charged.
Reconnect Your Stored Battery Without Resetting Issues

A poorly reconnected battery triggers electrical gremlins. Test readiness before installation:
– Voltage must read 12.6V+ (recharge if lower)
– Terminals should be clean and grease-coated
– Case must show zero cracks or leaks
Proper Reconnection Sequence
- Positive first: Attach red cable to battery positive terminal
- Negative second: Connect black cable to chassis ground (not battery post)
- Tighten securely: Prevent voltage drops from loose connections
- Reset systems: Reprogram radio presets, clock, and seat memory
Avoid this error: Connecting negative directly to battery post. Grounding to chassis prevents sparks near the battery where hydrogen gas may accumulate. If your car has trouble codes after storage, disconnect both terminals for 15 minutes to reset the computer.
Debunk 4 Deadly Car Battery Storage Myths
Myths cause more battery failures than neglect. Let’s set the record straight:
Myth 1: “Batteries die faster on concrete floors”
Truth: Modern polypropylene cases prevent discharge – concrete is safe if clean and dry
Myth 2: “New batteries store indefinitely”
Truth: All batteries self-discharge; new units lose 3% monthly charge even unused
Myth 3: “Deep cycling extends battery life”
Truth: Deep discharges cause immediate sulfation in lead-acid batteries
Myth 4: “Just disconnecting negative terminal stops drain”
Truth: Parasitic drains still occur – always remove both terminals for storage
Quick-Reference Car Battery Storage Checklist
Before Storage
☐ Clean terminals with baking soda solution
☐ Apply terminal grease to posts
☐ Charge lead-acid to 100% (lithium to 50%)
☐ Disconnect negative FIRST, then positive
During Storage
☐ Store upright between 50-60°F
☐ Check voltage every 60 days
☐ Recharge at 12.4V or below
☐ Label with storage date (e.g., “STORED 09/01”)
Before Reinstallation
☐ Verify 12.6V+ voltage
☐ Inspect for case damage
☐ Reset vehicle electronics after reconnecting
Pro tip: Stick a “LAST CHECK” date on your calendar when storing. Set phone reminders every 60 days – this simple habit prevents 90% of storage failures. Proper how to store a car battery practices transform a $200 liability into reliable power when you need it most. By controlling temperature, maintaining charge, and following type-specific protocols, you’ll avoid sulfation damage and extend battery life by up to 40%. Your future self will thank you when that stored battery fires up instantly after six months in the garage.


