
A dead battery always seems to happen at the worst possible moment. Whether you’re heading to work on a freezing morning or trying to leave a parking lot after shopping, that slow crank or clicking sound means it’s time for a replacement. The good news is that changing your Subaru Outback battery is a straightforward DIY project that saves you money and gets you back on the road quickly.
This guide walks you through battery replacement for every major Outback generation, from 2009 models to the latest releases. You’ll learn exactly which tools to gather, how to safely disconnect the old battery, and the model-specific quirks that trip up first-time DIYers. We’ll also cover how to preserve your radio presets, seat memory, and other electronic settings during the swap.
Locate Your Subaru Outback Battery
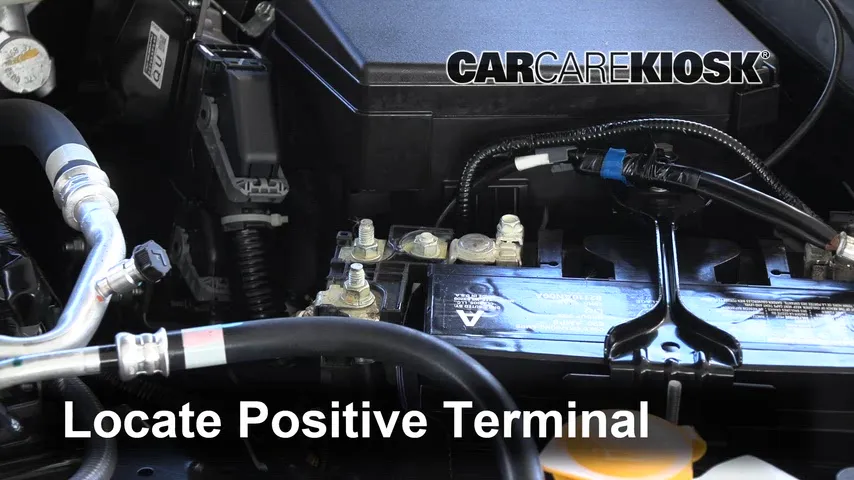
Battery Position by Generation
Every Subaru Outback places the battery on the driver’s side of the engine bay, though surrounding components vary significantly across generations.
- 2009–2014 models: The battery sits near the front of the engine bay, secured by a metal bracket and wrapped in a plastic jacket.
- 2015–2019 models: A wiring harness crosses the top of the battery, and a plastic hold-down bracket keeps it in place.
- 2020–present models: You’ll find a battery sensor connector near the negative terminal and a heat shield protecting the unit.
Open the hood using the interior release lever. On 2009–2014 models, press the secondary latch near the Subaru emblem before lifting.
Key Components to Identify First
Before touching anything, locate these parts:
- Negative (black) and positive (red) terminals
- Hold-down bracket (metal or plastic depending on year)
- Battery sensor connector (2020 and newer)
- Heat shield (2020 and newer)
These components directly affect how you remove and reinstall the battery.
Gather Your Tools and Safety Equipment

Essential Tools for All Generations
You’ll need these basics regardless of model year:
- 10 mm wrench or socket for terminal nuts and bracket bolts
- 10 mm deep socket for tight spaces
- Flathead screwdriver for loosening stuck terminals
- Battery terminal brush for cleaning corrosion
- Battery puller tool to lift the heavy battery safely
Safety Gear You Shouldn’t Skip
Protect yourself and your vehicle with these items:
- Safety glasses to shield against acid splash
- Baking soda mixed with water (1 tablespoon per cup) for neutralizing acid
- Sponge for cleaning the battery tray
Optional Items Worth Considering
These extras make the job easier and protect your settings:
- Battery memory saver that plugs into the OBD2 port
- Dielectric grease for preventing future corrosion
- Anti-seize lubricant for mounting studs on 2015–2019 models
Disconnect the Old Battery Safely
Remove the Negative Terminal First
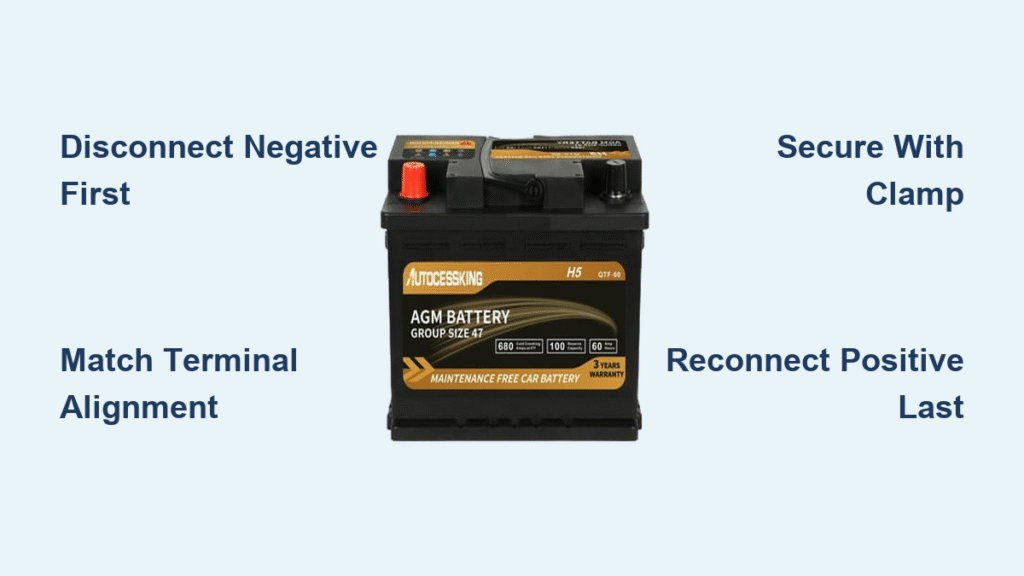
Always follow this rule: disconnect the dead (negative), connect the red (positive). Start by loosening the 10 mm nut on the black terminal just enough to slide the cable off. Pull the cable away and secure it where it cannot touch any metal surface.
On 2020 and newer models, disconnect the battery sensor connector near the negative terminal before removing the cable. Take off the plastic cable holder as well.
Disconnect the Positive Terminal Next
Lift the rubber cover off the red terminal and loosen the 10 mm nut. Slide the cable off carefully.
If the cable feels stuck (common on 2009–2014 models), insert a flathead screwdriver into the terminal’s side groove and gently twist to pry it open. Never force the cable.
On 2020 and newer models, wrap the positive cable in a shop towel to prevent accidental contact with metal parts.
Remove the Hold-Down Bracket

2009–2014: Metal Hook Bracket
Loosen both 10 mm nuts securing the metal bracket, then wiggle each hook end out of its mounting hole. Remove the bracket completely once both hooks are free.
2015–2019: Plastic Bracket with Studs
Carefully move the wiring harness aside. Remove both 10 mm nuts from the mounting studs and lift off the plastic bracket. Note that the plastic clip is often broken on these models, which is normal and doesn’t prevent removal.
2020 and Newer: J-Bolt Bracket
Remove the hold-down fasteners with your 10 mm wrench, then lift out the bracket and J-bolts together.
Extract the Old Battery
Lift with Care
Grip the battery firmly and lift straight up without tilting. Tilting can cause acid to leak. A battery puller tool prevents strain and makes this step safer.
Batteries weigh between 30 and 40 pounds, so lift with your legs to avoid back injury.
Check for Acid Leaks
If the top of the battery appears wet or corroded, it has been leaking. Clean any residue with your baking soda solution while wearing gloves. Dispose of the old battery at an auto parts store for proper recycling.
Remove the Heat Shield (2020 and Newer)
Take the heat shield out along with the old battery. You’ll reinstall it on the new battery.
Clean the Tray and Terminals Thoroughly
Neutralize Acid Residue
Dip a sponge in your baking soda solution and scrub the battery tray. Rinse with clean water and dry completely. On 2015–2019 models, acid stains on the tray are a clear sign the old battery needed replacement.
Clean Terminals and Connectors
Use your battery terminal brush on the positive and negative posts as well as the inside of each cable connector. Continue brushing until shiny metal appears, then wipe dry.
Apply Corrosion Protection
Skip the red terminal spray because it has strong fumes. Instead, apply a thin layer of dielectric grease after reconnecting the battery. This prevents future corrosion without any odor.
Install the New Battery
Choose the Correct Battery
Match the specifications for your generation:
- 2009–2014: Must be Group 25 size
- 2015–2019: Standard flooded lead-acid battery works well
- 2020 and newer: Check your owner’s manual for specifications
Align the Battery Properly
On 2009–2014 models, the plastic base has two dimples and an arrow. Match the dimples to the holes and point the arrow toward the front of the car. Press down until the battery clicks into place.
On 2015–2019 models, position the battery handle under the hold-down bracket.
On 2020 and newer models, reinstall the heat shield over the new battery before securing it.
Reattach the Hold-Down Bracket
For 2009–2014 models, insert the hook ends into the holes and hand-tighten the nuts before finishing with a socket.
For 2015–2019 models, apply anti-seize lubricant to the stud threads, then snug both nuts.
For 2020 and newer models, reinstall the J-bolt bracket and fasteners.
Place the bracket under the battery’s carrying strap, not over it, to ensure proper clamping pressure.
Reconnect the Battery Terminals
Connect the Positive Terminal First
Slide the red cable onto the positive post and tighten the 10 mm nut until secure but not over-tightened. Replace the red protective cover.
On 2020 and newer models, reinstall the terminal clamp and tighten its fastener.
Connect the Negative Terminal Last
Attach the black cable and tighten the nut securely. On 2009–2014 models, reinstall the plastic clip to hold the cable in place. On 2020 and newer models, reattach the plastic cable holder and firmly reconnect the battery sensor connector.
Never reverse this order because connecting the negative first can cause short circuits.
Perform Final Checks and Testing
Verify All Connections
Shake the battery gently. If it doesn’t move, the hold-down is secure. Check that cables aren’t pinched or touching moving parts. Route the wiring harness over the hold-down bracket on 2015–2019 models. Remove the memory saver if you used one.
Start the Engine and Test Systems
Close the hood firmly and turn the key or press the start button. No warning lights should appear. Test your radio, Bluetooth, climate control, power windows, and adaptive cruise control if equipped.
If you used a memory saver, your clock time, seat positions, navigation destinations, and radio presets should remain intact. Without one, these settings may reset, which is completely normal.
Avoid These Common Mistakes

Over-Tightening Terminals
Excessive force can crack the battery case or damage internal components. Tighten until snug, applying no more than 5 to 7 foot-pounds of torque.
Using Red Terminal Spray
The strong fumes and lingering odor make this product unpleasant to use. Dielectric grease works better without any smell.
Placing the Bracket Over the Strap
When the hold-down bracket sits over the battery carrying strap instead of under it, clamping pressure drops significantly. Always position it underneath for full contact.
Skipping the Memory Saver
Without one, your ECU may reset and affect fuel trims and idle quality. Adaptive systems might need to relearn their positions. A memory saver costs under $20 and prevents significant frustration.
Maintain Your New Battery for Long Life
Prevent Corrosion
Apply dielectric grease after cleaning and inspect terminals every six months for buildup.
Use a Battery Tender
If your vehicle sits unused for more than two weeks, a battery tender prevents deep discharge and extends lifespan.
Install a Battery Sleeve
When the original cover doesn’t fit the new battery, an insulated sleeve shields against engine heat and adds years to your battery’s life.
Protect Hold-Down Studs
On 2015–2019 models, apply anti-seize lubricant during reinstallation to prevent rust and simplify future battery changes.
Model-Specific Quick Reference
2009–2014 Outback
Align the dimples and arrow with the base. Wiggle the metal hook bracket free when removing. Reinstall the plastic jacket after replacement.
2015–2019 Outback
Move the wiring harness aside before working. Expect a broken plastic clip on the harness and replace it if needed. Apply anti-seize to the studs.
2020 and Newer Outback
Disconnect the battery sensor before removing the negative terminal. Use a shop towel on the positive cable. Reconnect the sensor firmly after installation.
Know When Replacement Is Necessary
Warning Signs
Watch for these symptoms indicating battery failure:
- Slow engine crank when starting
- Dim headlights while idling
- Clock or radio resetting frequently
- Visible corrosion buildup on terminals
- Battery age exceeding four to five years
Recommended Replacement Schedule
Replace your battery every four to six years under normal driving conditions. In extreme heat or cold climates, plan to replace it every three years instead.
Frequently Asked Questions About Subaru Outback Battery Replacement
How long does it take to change a Subaru Outback battery?
Most DIYers complete the job in 20 to 30 minutes. 2009–2014 models typically take under 20 minutes, while 2015–2019 models can take up to an hour depending on the wiring harness situation.
What size battery does a Subaru Outback need?
The 2009–2014 Outback requires a Group 25 battery. For 2015–2019 models, a standard flooded lead-acid battery like the Super Start Extreme 25EXT works well. Check your owner’s manual for 2020 and newer models.
Will I lose my radio presets and seat memory?
Only if you skip the memory saver. Plugging a memory saver into your OBD2 port before disconnecting the battery preserves clock time, radio presets, Bluetooth pairings, navigation destinations, and seat memory settings.
Do I need to reset anything after replacing the battery?
Without a memory saver, you may need to reset your clock, radio presets, and power window auto-up features. Some vehicles also require the adaptive systems to relearn, which happens naturally during normal driving.
Can I use an AGM battery in my Outback?
AGM batteries work fine but aren’t necessary unless your vehicle has start-stop technology. The 2018 Outback doesn’t have this feature, so a standard flooded lead-acid battery is sufficient.
How do I know if my battery is leaking?
Look for a wet or corroded top, white or blue powdery residue around the terminals, or acid stains on the battery tray. Any of these signs mean the battery needs immediate replacement.
Key Takeaways for Changing Your Subaru Outback Battery
Changing your Subaru Outback battery is a simple, cost-effective repair that anyone can handle with basic tools. The entire process takes 20 to 30 minutes and saves you the cost of a mechanic visit. Remember the critical sequence: disconnect the negative terminal first and reconnect it last to avoid short circuits.
Use a memory saver to preserve your vehicle’s electronic settings, and clean the terminals thoroughly before installing the new battery. Apply dielectric grease rather than red spray for long-lasting corrosion protection.
Your next step is gathering your tools and a memory saver, then scheduling 30 minutes in your driveway to complete the job. Once you’re done, you’ll have the confidence to handle this maintenance task whenever your battery reaches the end of its life.


