
Your Volkswagen won’t start, the dashboard lights flicker weakly, and you’re staring at a dead battery that’s ruining your morning. Before you panic or call for expensive roadside assistance, knowing how to charge Volkswagen battery properly could save you hundreds of dollars and get you back on the road within hours. This critical skill applies whether you drive a vintage Beetle with its battery hidden under the rear seat or a modern Tiguan with battery access under the hood.
Understanding how to charge Volkswagen battery safely is especially important given Volkswagen’s unique electrical systems that can trigger warning lights or computer errors if mishandled. This guide delivers the exact steps technicians use to revive your VW’s power source without damaging sensitive electronics. You’ll learn which charger settings prevent computer glitches, how to identify when your battery needs replacement instead of recharging, and special considerations for both classic and modern Volkswagen models.
Locate Your Volkswagen Battery Correctly
Classic VW Models Under Rear Seat
For vintage Volkswagens manufactured before 1990, your battery hides behind the passenger-side kick panel under the rear seat cushion. This distinctive placement protected batteries from engine heat but requires careful access—slide the seat cushion forward to expose the compartment. Remember that pre-1967 models used 6-volt systems (now requiring specialty sourcing), while all post-1966 VWs operate on standard 12-volt systems.
Modern Engine Bay Placement
Contemporary Volkswagen models position the battery under the hood near the front of the engine compartment. Look for a black rectangular box with two top posts—one marked positive (+) with a red cover, the other negative (-) connected to the vehicle’s chassis. Some newer VWs, particularly European models, house batteries in the trunk area, requiring you to use under-hood metal as your negative connection point during charging.
Quick Visual Identification
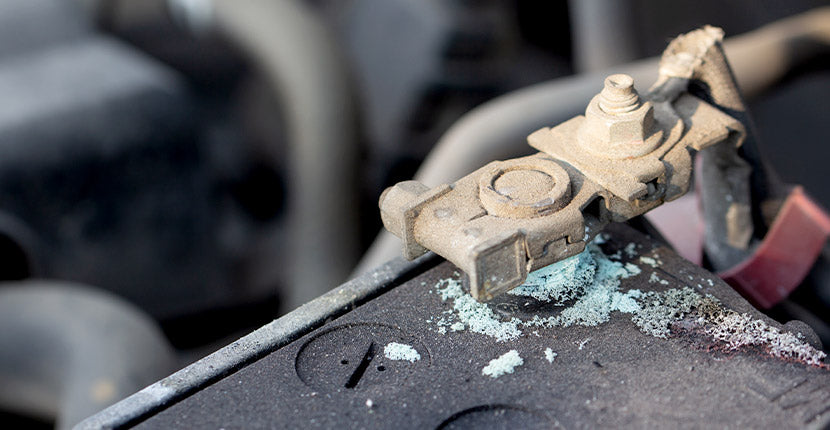
Your Volkswagen battery will have two thick cables connecting to the top posts. If you notice white or bluish crystalline buildup on terminals, that’s corrosion requiring immediate cleaning before charging. This buildup creates electrical resistance that prevents proper charging and can damage your vehicle’s electrical system if ignored.
Essential Safety Equipment Checklist
Protective Gear Requirements
Never attempt how to charge Volkswagen battery without safety glasses and chemical-resistant gloves. Battery acid causes permanent eye damage and severe skin burns. Always work in a well-ventilated area—hydrogen gas accumulates during charging and can explode from sparks. Turn off all electrical systems including ignition, lights, and accessories before beginning.
Required Tools and Supplies
- Quality battery charger with automatic shutoff and multiple amperage settings
- 13mm wrench for cable removal (essential for classic VW models)
- Wire brush and baking soda-water mixture for terminal cleaning
- Petroleum jelly for terminal protection
- Multimeter to verify proper voltage levels
- Shop towels for acid spill cleanup
Pre-Charging Safety Inspection
Before connecting any charger, inspect the battery case for cracks, leaks, or swelling. Any visible damage means replacement—not charging—is required. Check for corrosion on terminals and clean with a wire brush and baking soda solution if present. Never charge a battery that shows physical damage as this creates explosion hazards.
Connect Charger Using Proper Sequence
Correct Terminal Connection Steps
Start with the charger unplugged and turned off. Connect the positive (red) clamp to the battery’s positive terminal (+). Then attach the negative (black) clamp to the negative terminal (-). For in-car charging on modern VWs, you can connect the negative clamp to any unpainted metal part of the engine block or car body instead of the terminal itself.
Classic VW Special Considerations
When charging a classic Volkswagen battery under the rear seat, ensure adequate ventilation by opening doors or windows. The confined space increases hydrogen gas concentration risks. Never smoke or create sparks near the charging area—hydrogen gas is highly flammable. Pre-1967 6-volt systems require specialty chargers set to the correct voltage.
Critical Disconnection Order
When charging completes, turn off the charger first before removing clamps. Remove the negative clamp first, then the positive. This sequence prevents dangerous sparks that could ignite hydrogen gas. If you removed the battery, reinstall positive cable first, then negative cable to avoid short circuits.
Select Optimal Charging Method for VW Systems
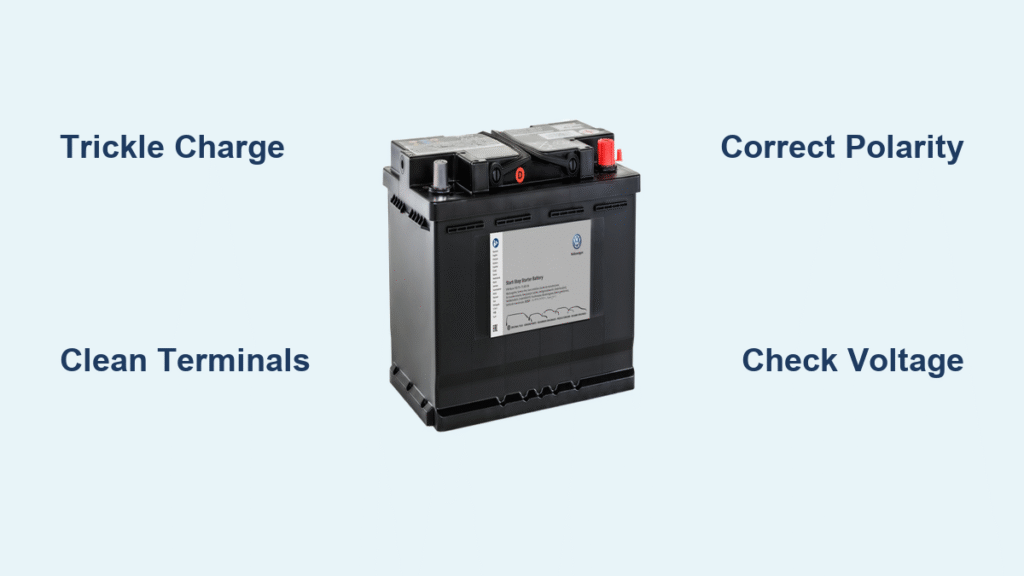
Trickle Charging Recommended
Set your charger to 6-12 amps initially—this drops to 3-4 amps within minutes. The final trickle rate of 1-2 amps for 4-8 hours provides the safest, most thorough charge. This slow process allows complete chemical reaction reversal without heat buildup or excessive gas formation. Modern VWs with sensitive electronics particularly benefit from this gentle approach.
Quick Charging Risks
High amperage charging (12-15+ amps) might seem faster but dramatically shortens battery life. The excessive heat causes plate warping, increases explosion risks from gas formation, and creates dangerous internal pressure. Many shops use this method for customer convenience at your battery’s expense—avoid it for Volkswagen models.
Smart Charger Benefits
Modern smart chargers automatically detect battery type (AGM, flooded, lithium-ion) and adjust accordingly. They precisely measure voltage and current, shutting off automatically when charging completes. This prevents overcharging that can boil electrolyte and destroy the battery—a critical feature for Volkswagen’s computer-dependent systems.
Determine Exact Charging Duration
Time-Based Charging Estimates
- Moderately discharged battery: 4-8 hours at standard rates
- Severely discharged battery: 10-24 hours for complete recovery
- Trickle charge: Overnight to 2 days for full capacity
- 2-amp charger: 25 hours for dead battery
- 20-amp charger: 2.5 hours (not recommended for regular use)
Voltage Monitoring Guidelines
A healthy charging system shows 14 volts when measured with the engine running. During charging, your battery should reach 13-14 volts maximum. If voltage remains below 12.6 volts after extended charging, replacement is likely needed. Use a multimeter to verify these readings.
Early Charging Indicators
Within 10 minutes of connecting the charger, watch for the amperage reading to drop significantly. This indicates the battery is accepting charge properly. Constant high amperage means internal damage and replacement necessity. If your charger maintains 12-15 amp reading regardless of duration, your battery has failed.
Clean Corroded Terminals Before Charging

Corrosion Removal Process
Mix baking soda with water to create a paste. Apply with a wire brush, scrubbing until metal appears shiny. Rinse with clean water and dry thoroughly. Corrosion prevents proper charging by creating electrical resistance between clamps and terminals—this is especially problematic in classic VWs where acid leaks often damage floor pans.
Terminal Protection Application
After cleaning, coat terminals with petroleum jelly before reconnecting cables. This prevents future corrosion and ensures solid electrical connections. Battery mat products also protect surrounding areas from acid damage—a common issue in classic VW battery compartments requiring parts from specialists like WOLFSBURG WEST.
Diagnose When Replacement Is Necessary
Failed Battery Indicators
Your Volkswagen battery needs replacement—not charging—when:
– Charger maintains constant 12-15 amp reading regardless of duration
– Battery won’t hold charge for even 30 minutes
– Visible damage appears (cracks, leaks, swelling)
– Sulfation creates white crystals on lead plates
Professional Assessment Signs
Seek professional help when experiencing multiple failed charging attempts, persistent charge loss, or electrical system malfunctions beyond battery issues. POWERTRON BATTERY in Santa Ana specializes in Volkswagen batteries and provides expert diagnosis for problematic charging scenarios.
Troubleshoot Post-Charging Problems
Non-Starting After Successful Charge
If your Volkswagen still won’t start after proper charging:
1. Inspect cable connections for tightness and corrosion
2. Test alternator output while engine runs (should show 14+ volts)
3. Check for parasitic draws that discharge the battery overnight
4. Verify starter operation—clicking sounds indicate starter issues
Electrical System Assessment
Use a multimeter to test voltage while the engine runs. Readings below 13.8 volts indicate alternator charging problems. Above 15 volts suggests voltage regulator failure, which can damage your newly charged battery. Persistent electrical issues after successful charging often require professional diagnosis.
Key Takeaway: Proper how to charge Volkswagen battery technique requires patience and precision. Use trickle charging at 1-2 amps for 4-8 hours, maintain clean terminals, and replace batteries showing signs of permanent failure. Whether you drive a vintage Beetle or modern Atlas, following these specific procedures prevents damage to sensitive electronics while maximizing battery lifespan. Remember that when multiple charging attempts fail or visible damage appears, professional replacement becomes necessary—don’t risk damaging your Volkswagen’s sophisticated electrical system with repeated charging attempts on a failed battery.


