
Your engine won’t turn over, dashboard lights flicker weakly, and you realize it’s time to learn how to charge a car battery properly. Most “dead” batteries aren’t actually dead—they’re just deeply discharged and can be revived with the right technique. Whether you’re dealing with a classic flooded battery or a modern AGM unit, this guide delivers the exact steps to restore your battery safely. Skip critical precautions, and you risk explosions, acid burns, or permanent battery damage. Follow these protocols, and you’ll have your car running reliably again—often in under 12 hours.
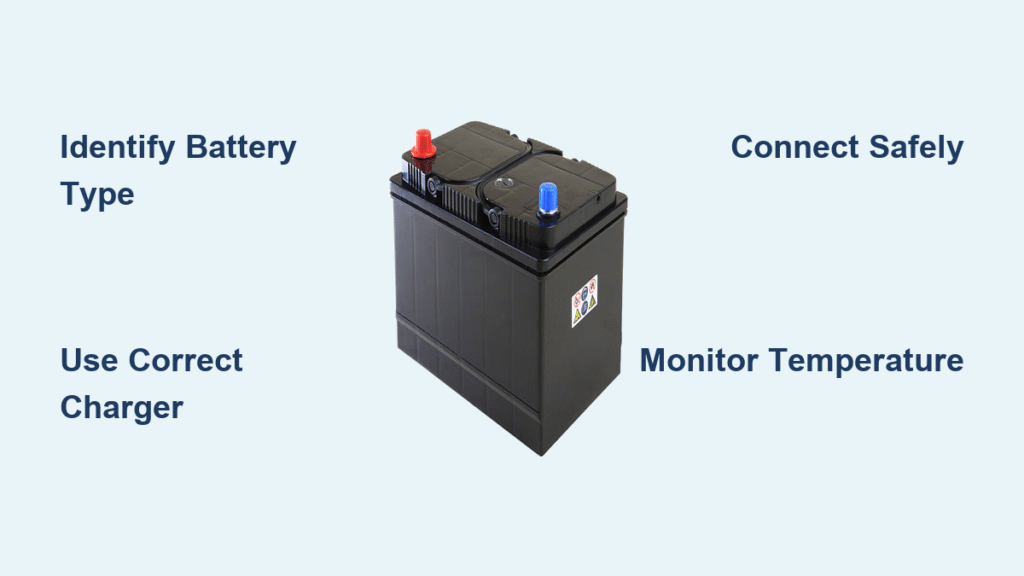
Identify Your Battery Type Before Connecting Anything
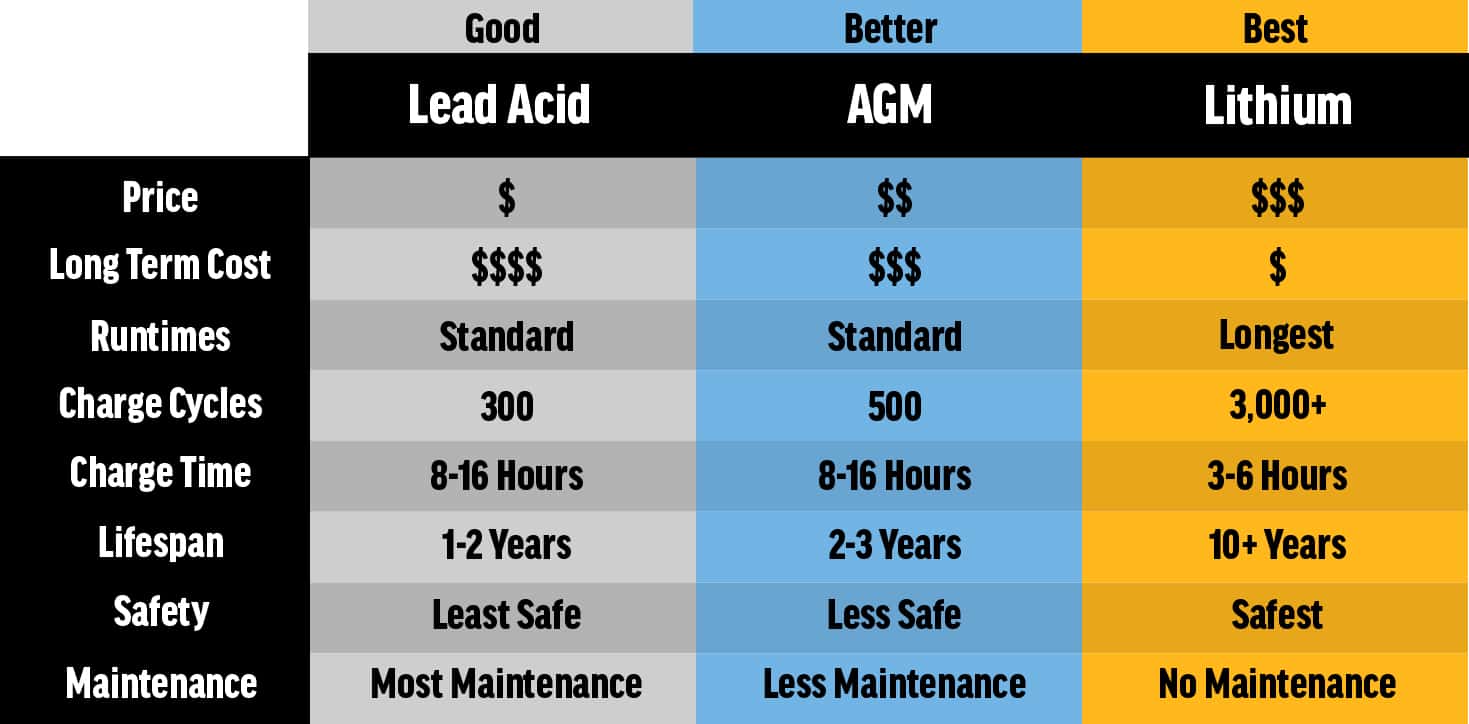
Connecting the wrong charger to your battery can cause catastrophic failure. Modern vehicles use four distinct chemistries, each requiring specific charging protocols. Never assume your battery type—check the physical labels. Flooded batteries show no AGM/EFB markings and have removable caps for fluid checks. AGM units prominently display “AGM” on the case with a completely sealed top. EFB (Enhanced Flooded Battery) types power stop-start vehicles and label accordingly. Lithium 12V batteries—rare in standard cars but growing in accessories—carry a LiFePO₄ designation.
Critical Chemistry-Specific Warnings
- Flooded batteries require standard 14.4V chargers but need periodic water top-ups
- AGM/EFB batteries demand voltage-regulated chargers set to “AGM” mode to prevent overcharging
- Lithium batteries absolutely require lithium-specific chargers—using 14.4V on LiFePO₄ risks fire
- Never interchange chargers—a 15.5V AGM setting on a flooded battery boils electrolyte dry
Essential Safety Gear Checklist You Can’t Skip

Hydrogen gas from charging ignites at just 4% concentration in air. One spark near the battery could cause an explosion. Always wear nitrile gloves and ANSI-rated safety goggles before touching terminals. Keep a baking soda/water paste (3:1 ratio) nearby to instantly neutralize acid spills. Work outdoors or in a fully ventilated garage with doors wide open—never in enclosed spaces. Confirm the ignition is off, keys removed, and parking brake engaged. If removing the battery, place it on wood or plastic—never metal surfaces.
Temperature Danger Zones to Avoid
- Below 32°F (0°C): Charging efficiency plummets; use a winter-mode charger
- Above 104°F (40°C): Accelerates water loss in flooded batteries
- Hot to touch (>120°F): Immediately stop charging—indicates internal short circuit
Terminal Cleaning: The 5-Minute Step That Solves 70% of Charging Failures
Corroded terminals block current flow, making charging impossible. Before connecting a charger, inspect for white/green crusty buildup. Use a wire brush dipped in baking soda paste to scrub terminals until shiny metal appears. For severe corrosion, disconnect cables (negative first!), soak terminals in paste for 2 minutes, then brush again. Rinse thoroughly with clean water and dry completely. Apply petroleum jelly to clean terminals to prevent future corrosion. Never skip voltage testing: a multimeter reading below 10.5V indicates deep discharge requiring “recovery” mode on smart chargers.
Charger Selection: Match Amps to Your Battery’s Capacity
Using excessive amps is the fastest way to destroy your battery. Calculate your ideal setting: 10% of your battery’s Ah rating. For a standard 60Ah battery, use a 6-amp charger. Higher amps (10A+) generate dangerous heat in standard batteries. Smart chargers auto-detect chemistry and adjust voltage—critical for AGM/EFB units. Trickle chargers (2-4A) suit long-term storage but take 24+ hours for full recharge. Manual chargers require constant monitoring—avoid unless experienced.
Charging Time Formula You Must Use
Hours = (Battery Ah ÷ Charger Amps) × 1.2
– 48Ah battery at 4A = 14.4 hours
– 70Ah battery at 10A = 8.4 hours
– Never exceed 10A for standard automotive batteries
Connection Order That Prevents Explosive Sparks
The sequence matters more than the charger itself. Always follow this exact order:
1. Ensure charger is OFF and unplugged
2. Attach red clamp to positive (+) battery post
3. Attach black clamp to negative (-) post OR chassis ground (use unpainted metal away from battery)
4. Plug charger into outlet, then switch ON
Connecting black to chassis ground keeps sparks away from hydrogen gas vents. Reverse this order, and a spark near the battery could trigger an explosion. When disconnecting, reverse the process: unplug charger → remove black clamp first → remove red clamp.
Monitoring During Charging: What to Watch Every 30 Minutes
Smart chargers auto-manage stages (Bulk → Absorption → Float), but manual units require vigilance. Check these critical indicators hourly:
– Temperature: Case should feel warm (not hot) to the touch
– Voltage: Should steadily climb toward 12.6V+
– Smell: Rotten egg odor means stop immediately—hydrogen sulfide gas indicates failure
– Bubbling: Light bubbling in flooded batteries is normal; violent gassing means overcharge
Stop charging instantly if the battery exceeds 120°F, voltage stalls for 2+ hours, or you detect sulfur smells. These signal internal damage.
Post-Charge Verification: Don’t Assume It’s Fixed
A full voltage reading doesn’t guarantee a healthy battery. After disconnecting the charger, let the battery rest 20 minutes. A true full charge reads 12.6-12.8V. Next, start the engine: voltage should jump to 13.8-14.7V, confirming a working alternator. If voltage stays below 12.4V after charging, your battery likely has sulfated plates and needs replacement. For definitive testing, visit an auto parts store—they’ll perform free load tests. A healthy battery maintains above 9.6V under cranking load.
Emergency Charging Without Wall Power
When stranded, jump starters provide temporary relief but don’t fully recharge your battery. Ensure your lithium jump pack has ≥75% charge. Connect red to positive, black to negative (or chassis), then crank in 5-second bursts max. After starting, drive 30-60 minutes at highway speeds to rebuild charge—shorter trips won’t replenish energy. For jumper cables, connect in this exact sequence:
1. Dead battery (+) → donor battery (+)
2. Donor battery (-) → dead car chassis (not battery)
3. Start donor car, idle 1 minute
4. Start dead car, idle 2 minutes
5. Remove cables in reverse order
Critical: Jump starts only provide enough power to start the engine—they don’t replace proper charging.
Off-Grid Solutions for Campers and Overlanders
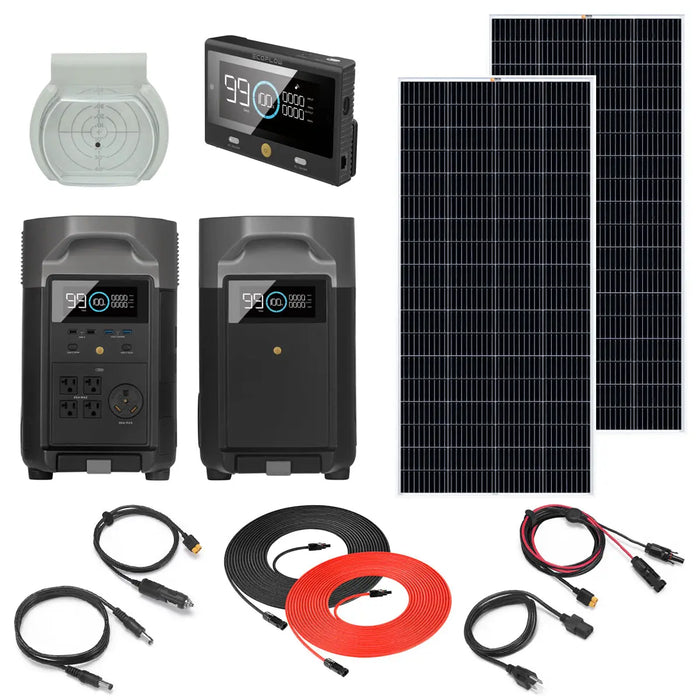
Portable power stations like the EcoFlow DELTA Pro (3.6kWh) can fully recharge car batteries off-grid. Plug your standard charger into the station’s AC outlet, or use DC-to-clips cables for direct 12V charging. For 60Ah batteries, you’ll need ~850Wh capacity (accounting for 15% efficiency loss). Pair with 400W solar panels to recharge the power station while charging your battery—ideal for remote locations. Always verify the station supports 12V automotive charging; some require special adapters.
Maintenance Habits That Double Battery Life
Extend your battery beyond the typical 4-5 year lifespan with these habits:
– Drive 20+ minutes weekly at highway speeds to complete charging cycles
– Apply dielectric grease after cleaning terminals to block corrosion
– Use a float charger during storage—never leave disconnected for months
– Check voltage monthly; below 12.4V indicates need for recharging
– Park in shade during summer—under-hood temps above 140°F cook batteries
Replace immediately if you notice slow cranking in cold weather, recurring corrosion, or dashboard battery lights. These signal imminent failure.
Troubleshooting: When Charging Doesn’t Work
| Symptom | Immediate Action |
|---|---|
| Charger clicks off instantly | Check polarity; if correct, battery likely has dead cell |
| Battery overheats during charge | Stop immediately—indicates internal short circuit |
| Voltage won’t rise above 12.2V | Perform load test—sulfation may require replacement |
| Alternator reads >15V running | Seek professional repair—faulty voltage regulator |
If your battery is over 5 years old, fails load tests below 9.6V, or shows physical damage (bulges/cracks), replacement is safer than repeated charging.
Final Safety Imperatives
Charging car batteries demands respect for explosive gases and corrosive acid. Always work in ventilated areas with eye protection and chemical gloves. Never smoke or use open flames nearby. If your battery leaks, cracks, or smells strongly of sulfur during charging, stop immediately—these indicate dangerous failure. Remember: frequent charging signals deeper issues like parasitic drains or alternator problems. A healthy battery shouldn’t need monthly recharging. When in doubt, get free professional testing at auto parts stores—they’ll diagnose issues in minutes. Master these protocols, and you’ll never pay for unnecessary jump services or premature battery replacements again.


