
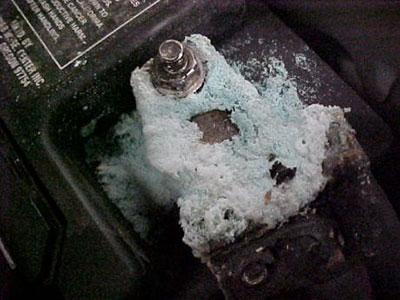
That stubborn blue-green crust smothering your battery terminals isn’t just an eyesore—it’s actively strangling your car’s electrical system. This copper sulfate buildup creates dangerous resistance that can leave you stranded with a dead battery on a cold morning. The good news? You can completely eliminate this corrosion using $5 worth of household supplies and restore full electrical flow to your vehicle in under 30 minutes. By following this precise method, you’ll not only fix the immediate problem but also implement critical prevention steps to stop the blue fuzz from returning next month.
Essential Safety Gear for Battery Corrosion Removal
Skipping proper protection when cleaning battery corrosion risks chemical burns and dangerous sparks. Battery acid contains sulfuric acid that can permanently damage skin and eyes within seconds. Always gear up before touching any terminal.
Non-Negotiable Safety Equipment Checklist
- Chemical-resistant nitrile gloves (latex won’t protect against acid)
- Safety goggles or full-face shield (acid splashes can cause blindness)
- Long-sleeved cotton shirt and full-length pants
- Zero metal jewelry—remove watches, rings, and bracelets immediately
- Well-ventilated workspace—never work in enclosed garages without cross-ventilation
Correct Battery Disconnection Sequence to Prevent Sparks

Disconnecting cables in the wrong order can cause catastrophic short circuits that melt tools and ignite hydrogen gas. This sequence prevents dangerous electrical arcs.
Step-by-Step Disconnection Protocol
- Kill all power—Turn off ignition and remove keys (verify radio is silent)
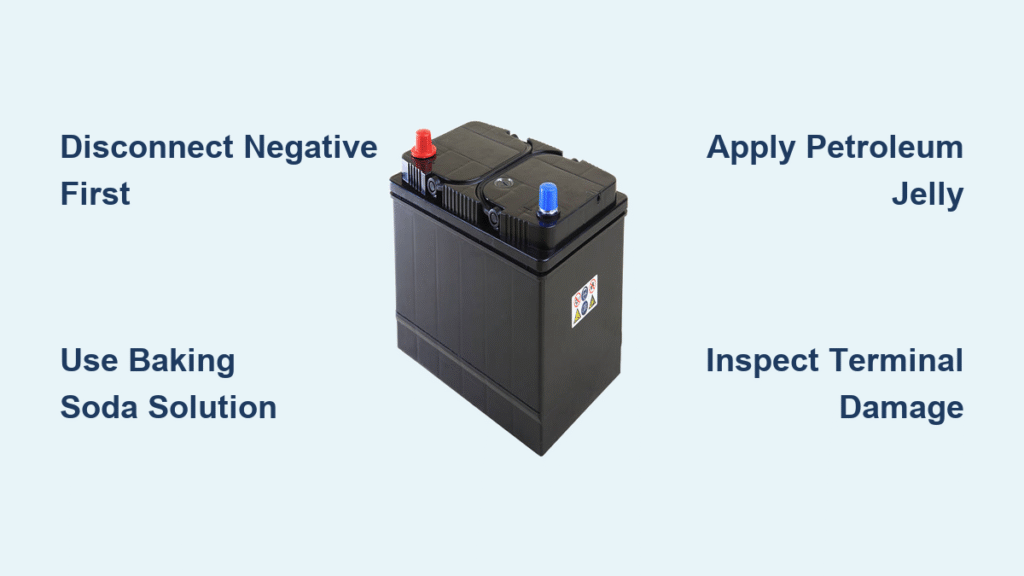
- Negative terminal first—Loosen the black (-) cable clamp with an 8mm or 10mm wrench. Lift it straight off and secure it at least 6 inches from the battery
- Positive terminal second—Only now remove the red (+) cable clamp. Never let metal tools touch both terminals simultaneously
- Critical inspection—Check cables for green corrosion creeping into insulation. If you see green beyond 2 inches into the wire, replacement is mandatory
Immediate Dry Cleaning for Heavy Blue Corrosion Buildup
Start with mechanical removal before introducing liquids—this prevents acid splatter and makes chemical neutralization more effective. Heavy crystalline deposits must be physically broken up first.
Dry Removal Techniques That Won’t Damage Terminals
- Plastic scraper method: Use an old credit card at 45-degree angle to lift crusty deposits without scratching lead terminals
- Brass wire brush action: Scrub terminal posts with vigorous circular motions (brass won’t spark like steel brushes)
- Terminal cleaner brush: Insert the cone-shaped brush into cable clamps and rotate to dislodge hidden corrosion
- Pro tip: Tap cable clamps gently with a screwdriver handle to shake loose internal crystals before brushing
Baking Soda Neutralization Process for Acid Residue
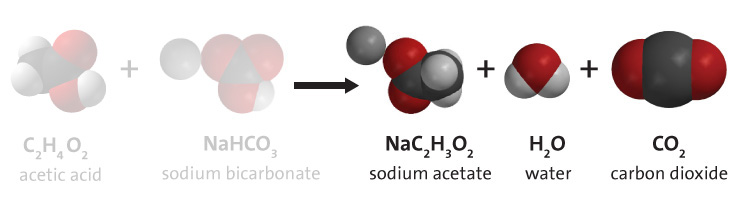
The blue corrosion indicates active sulfuric acid exposure. Baking soda’s alkaline properties instantly neutralize this acid through a safe chemical reaction—watch for the dramatic fizzing action.
Precise Neutralization Steps
- Mix solution: Combine 1 tablespoon baking soda with 1 cup distilled water in a plastic container (tap water minerals interfere with neutralization)
- Apply with toothbrush: Dip an old toothbrush in solution and scrub all corroded areas—expect vigorous bubbling as acid neutralizes
- Focus on hidden zones: Work solution between terminal posts and cable clamps where corrosion hides
- Rinse smartly: Dampen a cloth with distilled water only—never pour water directly onto battery to avoid diluting electrolyte
- Complete drying: Wipe all surfaces with microfiber cloth until bone-dry (any moisture accelerates new corrosion)
Critical Post-Cleaning Terminal Assessment Checklist
Many DIYers skip this step and reinstall damaged components, guaranteeing rapid corrosion return. Spend 2 minutes inspecting to avoid future breakdowns.
Must-Check Terminal Conditions
- Pitting depth: If terminal posts feel rough or show deep craters (more than 25% material loss), replacement is required
- Cable integrity: Squeeze insulation near terminals—if it feels gritty, copper strands are corroded inside
- Battery case damage: Look for cracks, bulges, or acid leaks around terminal bases
- Warning: Severely damaged terminals can overheat and melt during operation—never reinstall compromised parts
Proper Reconnection Sequence and Corrosion Prevention
Reconnecting in reverse order or skipping protection guarantees weeks—not months—before corrosion returns. This method creates a moisture barrier that outlasts cheap sprays.
Foolproof Reconnection Protocol
- Positive terminal first—Slide red (+) clamp onto post and tighten to just snug (50-70 inch-pounds—about as tight as you can get with a 6-inch wrench)
- Negative terminal second—Reattach black (-) clamp with same torque specification
- Test connection security: Grab each cable and twist—zero movement should occur
- Petroleum jelly application: Coat entire terminal and clamp with thick layer (dielectric grease works but petroleum jelly lasts longer)
- Felt washer upgrade: Insert red/blue anti-corrosion washers between clamp and terminal for coastal climates
When Household Methods Fail: Commercial Solutions
For chronic corrosion cases or severely damaged terminals, these specialized products deliver professional results. They’re worth the $10 investment if baking soda isn’t cutting it.
Top-Performing Alternatives
- Battery terminal protector spray: Creates invisible ceramic barrier that lasts 12+ months (CRC 05015 is industry standard)
- Corrosion neutralizing wipes: Pre-soaked pads with pH-balanced cleaner for quick roadside fixes
- Copper-infused terminal protectors: Replace standard clamps with corrosion-resistant models (OEM part #BT-500)
Environmental Factors Accelerating Blue Corrosion
Your location dramatically impacts corrosion speed. Adjust your maintenance schedule based on these environmental triggers to prevent surprise breakdowns.
Regional Maintenance Adjustments
- Coastal zones: Clean every 3 months due to salt air (apply petroleum jelly twice as thick)
- Winter climates: Flush terminals with baking soda solution after every major snowstorm
- High-heat areas: Replace standard batteries with AGM types above 90°F (32°C)
- Critical warning: If corrosion returns within 30 days, your alternator is overcharging—get voltage tested immediately (should read 13.8-14.4V when running)
Proven Maintenance Schedule to Stop Corrosion Forever
Most corrosion occurs because owners wait until terminals are completely covered. Implement this seasonal ritual to keep connections pristine.
Your Corrosion Prevention Calendar
- Monthly: Quick visual check during fuel stops (look for white powder indicating early corrosion)
- Every 3 months: Apply fresh petroleum jelly layer without full disassembly
- Biannually: Full cleaning and terminal inspection (spring and fall)
- After jump-starts: Always clean terminals—the surge accelerates corrosion
- Pro tip: Keep a battery terminal brush in your glovebox for emergency cleanups
When to Call a Professional Immediately
Certain conditions require expert attention—attempting DIY fixes could cause fire or permanent electrical damage. Recognize these critical warning signs.
Non-Negotiable Professional Scenarios
- Swollen battery case (indicates thermal runaway risk)
- Corrosion spreading to hold-down hardware
- Voltage above 14.8V when engine running (confirms overcharging)
- Terminals leaking electrolyte (visible fluid around posts)
- Cracked battery casing (immediate replacement required)
Final Note: That blue corrosion is your battery screaming for help—ignore it once, and you’ll get stranded; fix it properly with this method, and you’ll enjoy reliable starts for years. The single most effective prevention? Apply petroleum jelly every time you clean—it costs pennies but blocks moisture better than any commercial spray. Keep this guide in your glovebox, and you’ll never pay $100 for a roadside jump-start again. Mark your calendar for battery check-ups every spring and fall—the 20 minutes you invest now saves hours of frustration later.


