
Your Honda Accord’s dashboard suddenly flickers with warning lights after a dead battery ruined your morning commute. Maybe you’re hunting a parasitic drain draining your charge overnight, installing a new stereo, or preparing for winter storage. Whatever the reason, incorrectly disconnecting your Honda Accord battery risks frying sensitive electronics, triggering anti-theft locks, or worse—causing acid burns from a short circuit. This guide delivers the exact steps mechanics use to safely cut power on any Accord from 1998 through 2024 model years. You’ll avoid resetting your ECU unnecessarily, prevent radio code nightmares, and complete the job in under 10 minutes with basic tools.
Why does sequence matter so much? Honda’s integrated electrical systems mean reversing the disconnection order can send voltage spikes through your car’s brain. I’ve seen DIYers accidentally brick their infotainment units by yanking the positive terminal first. Stick with me—we’ll cover critical details like why 2018+ turbo models need extra caution and how to preserve your window auto-up function. By the end, you’ll confidently disconnect your Accord battery without triggering a single error code.
Essential Safety Gear You Must Wear
Skipping insulated gloves and safety goggles risks chemical burns or electrical shock—period. Modern Honda batteries vent hydrogen gas during operation, and a stray spark from metal tools can ignite it. Battery acid (sulfuric acid solution) sprays violently if terminals short, eating through clothing and skin. Always work in open air; never inside a closed garage. Remove all metal jewelry before touching anything—it turns into a superheated conductor if it bridges terminals. One technician lost a wedding ring to molten metal when his wrench slipped across posts.
Non-Negotiable Tool Checklist
- Two 8–10 mm wrenches (or adjustable pliers): One stabilizes the terminal bolt while the other turns the nut
- Zip ties or Velcro straps: To anchor loose cables away from the battery tray
- Wire brush coated in baking soda solution: Neutralizes corrosion during cleaning
- Electrical tape or terminal boots: Immediately insulates the positive clamp after removal
Park and Prep Your Accord Properly
Park on level ground with parking brake fully engaged—a rolling car shifts battery weight, risking acid spills. Turn off the ignition and verify all accessories are dead: headlights, dome lights, radio, and climate control. If you drove recently, wait 10 minutes for engine bay components to cool; alternators and exhaust manifolds exceed 200°F and can melt gloves. Open the hood securely using the interior lever, then prop it with the metal stay rod. Never rely on the hydraulic struts alone—they fail unexpectedly.
Critical mistake to avoid: Leaving key fobs inside the cabin. Modern Accords drain power through “always-on” modules like the keyless entry receiver. Remove all keys and fobs from the vehicle before disconnecting.
Locate Your Accord’s 12-Volt Battery
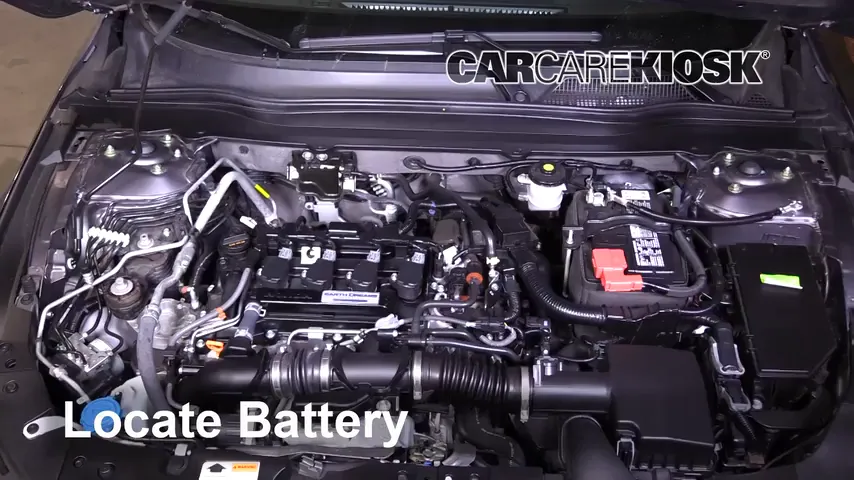
Pop the hood and look front-right corner behind the passenger headlight—that’s where 95% of Accords (1998–2024) hide the battery under a black plastic cover. Lift the cover’s retention clips to expose terminals:
– Black cap or “–” symbol = Negative (ground) terminal
– Red cap or “+” symbol = Positive (hot) terminal
2018–2024 turbo models (1.5L/2.0L): Check for a second small battery under the fuse box lid labeled “Auxiliary.” Disconnect the main battery first—ignoring this risks frying the turbocharger’s electronic wastegate control.
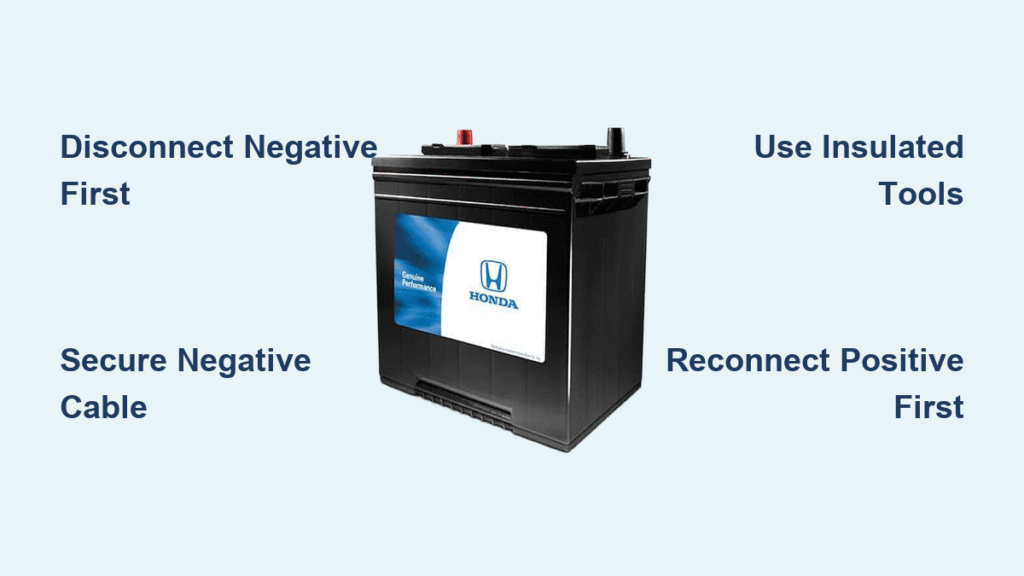
Remove Negative Terminal Before Anything Else
Always break the negative connection first—it severs the ground path, preventing accidental shorts. Place an 8 mm wrench on the negative terminal nut and turn counter-clockwise while holding the bolt steady with your other hand. Once loose, gently wiggle the clamp upward; corrosion often welds it to the post. Immediately zip-tie the cable to the strut tower or bracket—never let it dangle near metal surfaces. If the clamp resists, tap it sideways with a plastic hammer; prying with screwdrivers cracks battery cases.
Pro tip: Spray terminal with baking soda/water mix before loosening if you see blue-white corrosion. It neutralizes acid and prevents sparks.
Disconnect Positive Terminal Only After Securing Negative
With the negative cable safely anchored, attack the red positive terminal. Use the same counter-clockwise motion with your wrenches. As soon as it’s free, wrap the clamp end in electrical tape or slide on a terminal boot. Leaving it exposed risks catastrophic shorts—touching it to any grounded metal (like the fender) melts tools and fries fuses.
Why this order is non-negotiable: Honda’s ECU shares ground paths with the chassis. Removing positive first leaves the negative connected, so any tool touching positive and metal simultaneously creates a direct short circuit.
Free the Battery Hold-Down Bracket
Spot the flat metal bar or plastic wedge clamping the battery base—it’s usually secured by a single 10–12 mm bolt. Remove the bolt completely and lift the bracket straight out. Never skip this step: a loose battery shifts during removal, tipping acid onto paint or engine components. Factory batteries weigh 30–45 lbs; their liquid electrolyte sloshes violently if tilted.
Warning: If the hold-down bolt is rusted, spray it with penetrating oil and wait 5 minutes. Forcing it strips threads in the tray, requiring costly repairs.
Lift Battery Straight Up Without Tilting
Grip the battery with both hands under its base tray—never lift by the terminals. Keep it perfectly level as you pull straight up. Place it on concrete or an acid-resistant mat; never on carpet, wood, or painted surfaces where leaks cause permanent damage. If your Accord uses Group 51R batteries (common in 2013+ models), note the taller profile—they’re heavier and tip easier than older Group 24F units.
Time-saver: Set a towel in the battery tray before removal. It catches residual acid drips and speeds cleanup.
Reset What Your Accord Forgets After Disconnecting

Your Honda erases critical memory when battery power cuts:
– Adaptive idle settings (causing rough starts)
– Radio presets and anti-theft codes
– Power window auto-up/down programming
– HVAC recalibration
Have your 5-digit radio code ready—check the owner’s manual card or Honda’s online portal using your VIN. After reconnecting, idle the engine 10 minutes with all accessories off so the ECU relearns fuel trims. Skip this, and your Accord will run poorly for days.
Clean Terminals Before Reconnecting
Scrub both cable clamps and battery posts with a baking soda solution (1 tbsp per cup water) and wire brush. Corrosion (blue-white crust) increases electrical resistance, causing slow cranks. Rinse with clean water and dry thoroughly—moisture invites new corrosion. Check for cracks or bulging on the battery case; these mean internal damage requiring replacement. Never reinstall a swollen battery—it’s a fire hazard.
Reinstall in Strict Reverse Order
Mistake #1: Connecting negative first. Always follow this sequence:
1. Position battery correctly (positive terminal faces front on most Accords)
2. Reinstall hold-down bracket; hand-tighten bolt plus ¼ turn (5–7 ft-lbs)
3. Connect positive terminal first, then negative
4. Coat terminals with dielectric grease to block moisture
Why positive first during reconnection? It prevents sparks if your wrench touches metal while tightening negative.
Fix Stuck Clamps Without Damaging Posts
Corrosion often welds clamps to posts. Never pry with screwdrivers—you’ll snap lead terminals. Instead:
1. Spray penetrating oil between clamp and post
2. Tap clamp edges sideways with a plastic hammer
3. Use a battery terminal puller ($8 tool) to wiggle it free
No-puller hack: Loosen the nut 2 turns, then drive the car slowly over speed bumps—the vibration often breaks the bond.
Hybrid Accord High-Voltage Warning
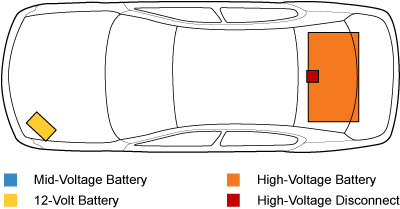
2014–2022 Accord Hybrids add a critical danger zone: While the 12-volt battery disconnection process is identical, never touch the orange high-voltage cables under the rear seat. Those carry 250+ volts—enough to kill instantly. The 12-volt system powers the hybrid’s safety interlocks; messing with HV components without Honda certification risks electrocution. Leave orange cables to dealership technicians.
Final Takeaway: Your Honda Accord demands negative-first disconnection every single time—no exceptions. Secure that cable immediately with zip ties, and you’ll avoid 90% of DIY disasters. For long-term storage, add a battery tender to maintain charge without draining electronics. If your radio locks after reconnecting, enter the code within 10 minutes or the system resets completely. Now that you’ve mastered this fundamental skill, you’re ready to tackle bigger projects like diagnosing parasitic drains—just remember to reconnect everything before testing!


