
Your car won’t start, the battery terminal clamp is corroded, and that stubborn bolt refuses to budge. You’re sweating in the driveway knowing that if you can’t free the battery bolt, you’re stranded. Most DIYers waste time with WD-40 and rounded wrenches when the right approach could have you back on the road in 15 minutes. This guide delivers field-tested methods for freeing seized battery hardware—whether you’re dealing with corroded top-post bolts, spinning side-terminal studs, or fused terminals. You’ll discover exactly which penetrating oil works fastest, the proper sequence to avoid damaging your battery, and professional tricks for even the most rusted hardware.
Don’t risk sparks or acid burns with guesswork. Battery terminals fail in predictable ways, and knowing your specific bolt type determines whether you’ll succeed or strip hardware. Hydrogen gas from the battery creates explosion hazards, while lead-acid corrosion eats through steel bolts. But with the right tools and technique—applied in the correct order—you’ll overcome even the worst-seized connections. Skip the YouTube hacks that damage posts and follow these proven steps based on thousands of successful repairs.
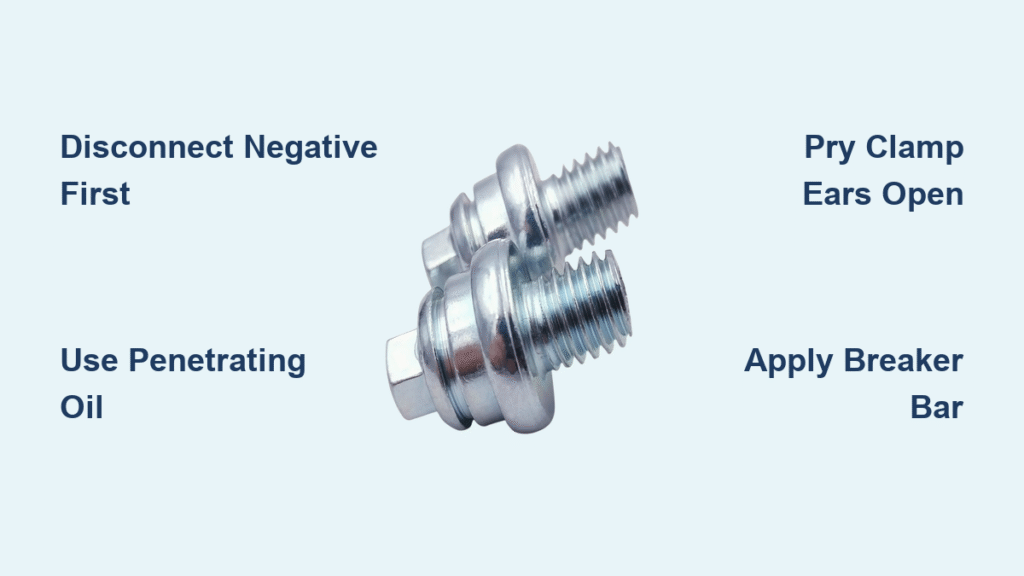
Essential Safety Steps Before Touching Any Tool
Disconnect the negative terminal first—this simple sequence prevents dangerous sparks that could ignite hydrogen gas. One accidental short between your wrench and chassis metal while the battery remains connected could cause an explosion. Always remove the black negative cable before the red positive one, and keep them separated during your work.
Gear up properly: Safety glasses and nitrile gloves aren’t optional when working with battery acid. Heavy corrosion requires a face shield—you never know when a crumbling terminal might release acidic residue. Work in a well-ventilated area away from ignition sources, and never use heat while the battery remains connected.
Prepare your workspace: Cover nearby metal surfaces with cardboard to prevent accidental shorts. Keep a baking-soda/water solution (1 tablespoon per cup) nearby to neutralize any acid spills immediately. This preparation takes 60 seconds but prevents trips to the emergency room when corrosion starts dripping.
Why Standard Wrenches Fail on Battery Hardware
Open-end wrenches and adjustable pliers round battery bolt heads instantly because zinc-plated hardware softens from acid exposure. The thin walls of standard sockets collapse under pressure in tight engine compartments. Instead, use thin-wall 6-point sockets that grip the full hex face without slipping. Pair them with a breaker bar for controlled torque rather than an impact wrench that might shock-seize the bolt further.
Critical Mistake That Causes Battery Explosions
Never attempt to loosen battery hardware while both terminals remain connected. That moment when your wrench bridges the positive terminal and grounded metal creates a direct short circuit capable of melting tools and igniting hydrogen gas. Always verify the negative cable is disconnected and isolated before applying any force to the positive side.
Identify Your Stuck Bolt Type Before Proceeding
Top-post batteries use ¼-20 or 5⁄16-18 steel bolts captured in soft-lead clamp ears that corrode and bind the hardware. When you try to turn the bolt, the lead deforms instead of releasing—this requires relieving clamp pressure before bolt removal. Side-post systems feature brass nuts on short studs where the entire stud spins in the lead terminal, making nut removal impossible without stabilizing the base.
Post-Clamp Bolt Failure Signs
If the clamp ears have visibly collapsed inward, your previous attempts (or someone else’s) over-torqued the soft lead. This deformation creates mechanical binding that no amount of penetrating oil will fix alone. You’ll need to pry the ears apart before the bolt can rotate freely. Look for shiny metal where the screwdriver has already been jammed in previous attempts.
Cable-End Stud Problems
When the nut spins but the stud turns with it, you’re dealing with a spinning terminal stud—a common issue on side-post batteries. The knurled base has lost grip in the soft lead terminal. Your only solution is to clamp the square base with locking pliers while turning the nut. If the stud pulls completely out, your battery requires professional repair or replacement.
Best Penetrants That Actually Free Seized Battery Hardware

Kroil (Aerokroil) outperforms all competitors with its synthetic formula that creeps into microscopic gaps within 5-30 minutes. Field tests show it works twice as fast as PB Blaster on zinc-plated hardware. For severe corrosion, soak overnight—don’t rush this critical step. Skip WD-40 entirely; it displaces water but lacks penetrating capability.
Household Alternatives That Work in a Pinch
When you’re stranded without proper penetrants, Coca-Cola’s phosphoric acid dissolves oxide layers effectively. Pour it over the joint and let it fizz for 10 minutes before wiping clean. 50/50 automatic transmission fluid and acetone creates a penetrating mix that beats store-bought options when applied repeatedly every 15 minutes.
How to Apply Penetrant for Maximum Effect
Spray liberally where the bolt shank meets the clamp ear—not just on the visible head. Use a thin straw attachment to inject oil into the seam between the nut and terminal. Wait at least 30 minutes (overnight for heavy corrosion) before attempting removal. Reapply after each failed attempt—patience here prevents stripped hardware.
Step-by-Step: Freeing a Seized Top-Post Clamp Bolt
Relieve Clamp Pressure Before Turning the Bolt
Remove the nut completely, then insert a large flat screwdriver between the clamp ears. Twist gently 5-10 degrees to open the slot and relieve thread binding—this simple step solves 70% of “stuck bolt” cases. You should feel the clamp expand slightly under pressure. Never skip this; forcing the bolt while the clamp remains compressed guarantees rounding.
Back Out the Bolt Using Proper Technique
For square shoulder bolts, lock vice-grips on the exposed shoulder and apply gentle counter-clockwise rocking motion—¼ turn one way, ⅛ turn back to break corrosion bonds. Hex head bolts require a 6-point socket with breaker bar while stabilizing the clamp with your screwdriver. Always start with downward pressure before rotation to seat the socket fully.
Emergency Fixes When the Bolt Snaps
If the bolt shears off, drill the shank with a ¼” bit and retap the clamp ear to ¼-20 threads. Better yet, replace the entire clamp with a crimp-on or compression-style unit from NAPA (part #784-1211). Never reuse damaged hardware—replacement bolts cost less than $2 and prevent future failures.
Solutions for Spinning Side-Post Studs and Nuts

Stop the Stud from Rotating
Clamp vice-grips firmly on the square or knurled base of the stud—this requires removing the cable from the battery first to eliminate spark risk. Position your locking pliers vertically to maximize grip on the limited surface area. If the base is too rounded, use needle-nose pliers in the staking grooves of the nut.
Breaking Free a Galled Nut
Apply steady pressure with a 6-point socket on a breaker bar. If the nut starts to gall (binding mid-rotation), stop immediately—forcing it will weld the nut to the stud. Instead, cut the nut with a Dremel cut-off wheel or Lisle nut-cracker. Replace with a new M6×1.0 stainless bolt and nyloc nut coated with anti-seize compound.
Terminal Stuck on Post? Try This Extraction Sequence
Even with the clamp bolt removed, corrosion can fuse the terminal to the battery post. First, clean visible corrosion with a brass wire brush and baking-soda paste. Then spray penetrating oil between the post and clamp throat, waiting 20 minutes for capillary action. Place a terminal puller under the clamp base and apply gradual upward force while tapping the clamp ear with a rubber mallet—this combination of tension and vibration breaks the bond without damaging the post.
Long-Term Prevention: Never Struggle With Battery Bolts Again
Apply nickel-based anti-seize compound to all bolt threads during reassembly—this prevents galvanic corrosion between dissimilar metals. Coat the entire terminal with dielectric grease or petroleum jelly before reconnection. Torque top-post clamps to 45-55 in-lb (snug plus ¼ turn); side-posts require 80 in-lb. Every oil change, inspect for green or white deposits and reapply protectant.
When to Abandon DIY and Call a Professional
Stop immediately if you see a swollen or cracked battery post—this indicates internal damage requiring replacement. If the clamp stud pulls completely out of the lead body, the battery needs professional repair. Vehicles with Intelligent Battery Sensors (IBS) risk $200+ sensor damage from improper removal; these systems demand OEM procedures.
Critical Mistakes That Damage Batteries During Bolt Removal
Using open-end wrenches rounds zinc-plated hardware instantly—always use 6-point sockets. Pulling straight up without rocking tears battery posts; apply gradual upward force while wiggling the terminal. Heating connected hardware risks explosion—never use torches near live batteries. Over-torquing during reassembly guarantees future seizure; follow manufacturer specs precisely.
Quick Reference Card
Negative off first, eye protection on.
Penetrating oil → wait 30 min minimum.
6-point socket, breaker bar, gentle rocking motion.
Pry clamp ears open 5° with screwdriver.
Still stuck? → Dremel slot, nut-cracker, or replace clamp.
Re-assemble with anti-seize + dielectric grease—never reuse corroded bolts.


