
Your car won’t start again, and the auto shop just quoted $120 for a new battery. Before you pay up, know this: most “dead” car batteries aren’t truly dead—they’re suffering from sulfation, a reversible condition where lead sulfate crystals coat the internal plates. Proper reconditioning can revive 60-80% of moderately sulfated batteries for under $50 in materials, potentially extending their life by 1-3 years while keeping toxic lead out of landfills. This guide delivers the exact professional method to safely restore your sealed lead-acid battery—no vague theory, just actionable steps that work on 10-12.6V batteries showing no physical damage.
Identify if Your Battery Is Worth Reconditioning
Spot Immediate Replacement Red Flags
Stop the process now if you see any of these irreversible damage signs:
– Bulging or twisted battery case indicating internal pressure buildup
– Cracks in the plastic casing allowing acid leakage
– Terminals eaten through by heavy corrosion (white/blue crust exceeding 1/8 inch)
– Visible plate exposure through cell vents
Batteries with these issues have compromised structural integrity—reconditioning won’t fix them and risks acid spills during handling.
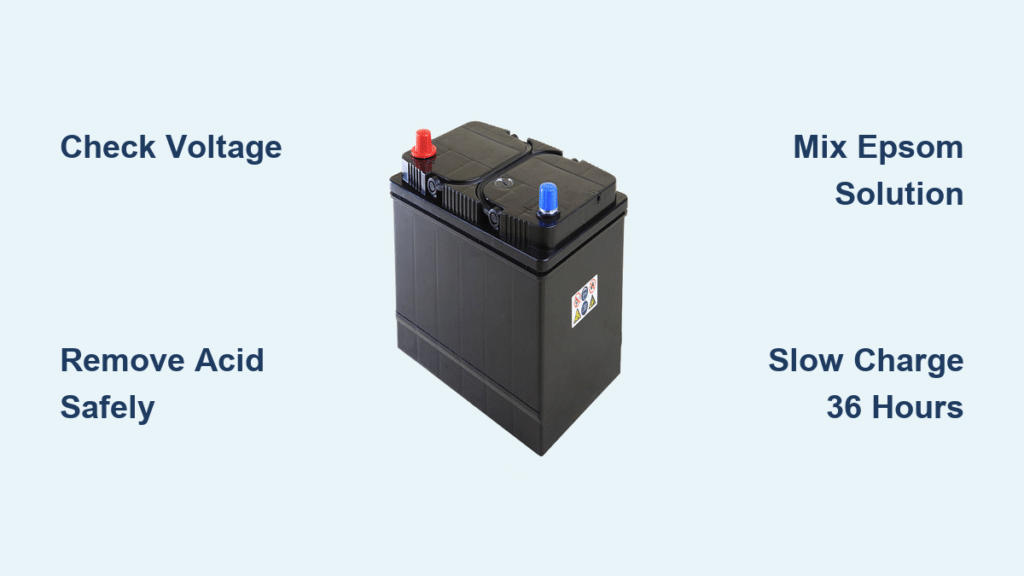
Decode Your Multimeter Voltage Reading
Test your disconnected battery after it’s rested overnight (no charging/discharging for 12+ hours):
| Voltage Range | Diagnosis | Action |
|---|---|---|
| 12.6V+ | Healthy battery | Perform routine maintenance only |
| 10.0-12.6V | Reversible sulfation | Proceed with reconditioning |
| Below 10.0V | Permanent plate damage | Recycle immediately |
A 10.8V reading typically indicates recoverable sulfation, while 8.5V suggests melted plates from deep discharge. Never attempt reconditioning on batteries below 10V—success rates drop below 20%.
Evaluate Age and Environmental Damage
Even strong voltage readings don’t guarantee reconditioning success if:
– The battery is over 5 years old (or 3 years in hot climates like Arizona/Florida)
– Plates show visible erosion through cell caps (pitted gray surface instead of smooth lead)
– You’ve jump-started the vehicle more than 5 times in the past year
Trunk-mounted batteries often last 6+ years and respond better than under-hood units exposed to engine heat. If your battery fails two or more of these checks, replacement is more cost-effective.
Assemble Critical Safety Gear Before Starting
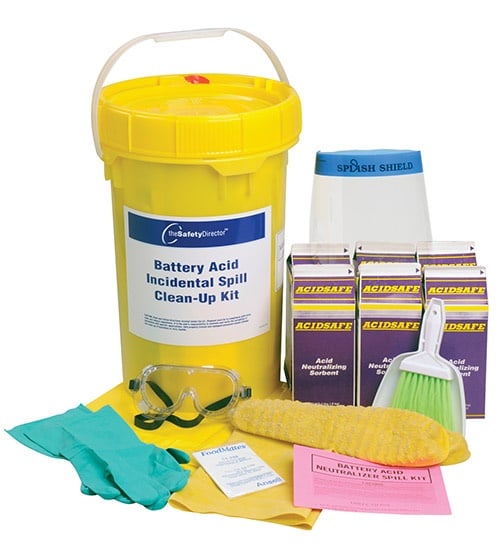
Non-Negotiable Acid Protection Kit
Skip any single item and risk chemical burns:
– Chemical splash goggles (safety glasses won’t protect against acid splashes)
– Nitrile gloves (latex dissolves on contact with sulfuric acid)
– Rubber apron (or old clothes you’ll discard afterward)
– Baking soda stockpile (1 lb minimum for emergency neutralization)
Work exclusively in a garage with doors fully open—never indoors. Keep a hose or bucket of water within arm’s reach for immediate rinsing if acid contacts skin.
Precision Tools for Successful Revival
Gather these exact items before touching your battery:
– Digital multimeter (analog won’t show precise voltage drops)
– Smart charger with 2-amp setting (CTEK or NOCO models work best)
– Plastic cell caps removal tool (flathead screwdriver wrapped in electrical tape)
– 3 separate 5-gallon buckets (labeled: “Draining Acid,” “Neutralizing,” “Rinse Water”)
– Pharmacy-grade Epsom salts (magnesium sulfate USP—$3 vs $15 “battery” versions)
Pro tip: Buy Epsom salts from the medicine aisle—identical chemical composition at 90% lower cost than auto store “battery additives.”
Neutralize Terminal Corrosion Before Testing
Create Acid-Neutralizing Paste
Mix 2 tablespoons baking soda with 1 tablespoon distilled water in a glass bowl until it forms a thick paste. This creates sodium carbonate that safely converts sulfuric acid residue into harmless salts.
Execute Safe Terminal Cleaning
- Disconnect cables (negative terminal first—loosen nut with 10mm wrench)
- Apply paste liberally to corroded areas using an old toothbrush
- Scrub vigorously until metal glows silver (30-60 seconds per terminal)
- Wipe clean with microfiber cloth dampened in distilled water
- Dry completely with heat gun or hair dryer on low setting
Critical warning: Never mix baking soda directly with battery acid—it creates explosive hydrogen gas. Always apply paste to terminals only after disconnecting cables.
Drain and Neutralize Battery Acid Safely
Remove Battery Without Spills
- Loosen hold-down clamp (typically 13mm bolts)
- Lift straight up using leg muscles (batteries weigh 35-50 lbs)
- Place on plastic sheet over concrete (never metal surfaces)
Neutralize Hazardous Electrolyte
- Pry off cell caps with taped screwdriver (wear goggles!)
- Pour acid slowly into “Draining Acid” bucket (tilt battery 45°)
- Add 1 cup baking soda per gallon of acid until fizzing stops
- Transport neutralized acid to hazardous waste facility within 24 hours
Never pour acid down drains or onto soil—just 1 gallon can contaminate 1 million gallons of groundwater. Auto parts stores like AutoZone accept used batteries but not loose acid.
Flush Sulfation Crystals From Cells
Deep-Clean Cell Compartments
- Mix neutralizing solution: 1 cup baking soda per gallon warm water
- Fill cells to top level using plastic funnel
- Replace caps and shake for 3 minutes (wear gloves!)
- Pour solution into “Neutralizing” bucket
- Repeat rinse until effluent runs clear (usually 2-3 times)
This dissolves embedded lead sulfate crystals that block plate surfaces. You’ll see gray sludge draining out—this is the sulfation being removed.
Prepare and Install Revitalizing Electrolyte
Mix Exact Epsom Salt Solution
Combine in glass container:
– 4 cups distilled water (heated to 150°F speeds dissolving)
– 4 ounces Epsom salts (113g by weight—not volume)
– Stir 5 minutes until solution turns crystal clear
Cold water won’t dissolve salts completely, leaving harmful residues on plates.
Refill Cells Without Overflows
- Pour slowly through funnel into each cell
- Fill to “MAX” line (just covering lead plates by 1/8 inch)
- Leave caps loose during charging (prevents pressure buildup)
- Wipe spills immediately with baking soda-dampened cloth
Overfilling causes acid expulsion during charging—measure carefully using the funnel’s markings.
Desulfate Plates With Precision Charging
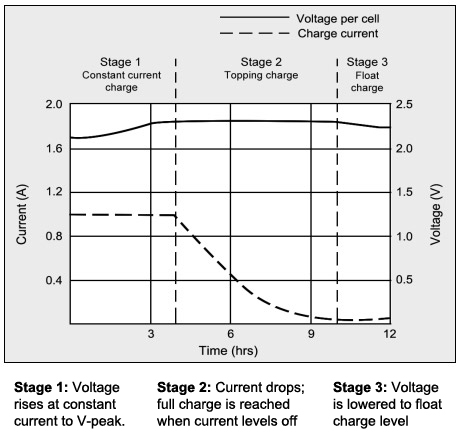
Set Up Critical Slow-Charge Cycle
- Connect charger clips (red to positive, black to negative)
- Set to 12V/2A mode (never exceed 2 amps)
- Position battery outdoors during charging (hydrogen gas risk)
- Charge uninterrupted for 36 hours minimum
Fast charging (5+ amps) generates heat that warps plates—this is why 75% of DIY attempts fail. The slow 2-amp rate gently breaks sulfate bonds without damage.
Monitor Charging Milestones
- Hour 0-6: Voltage climbs to 12.0V (normal warming occurs)
- Hour 12: Current drops to 1.5A as battery accepts charge
- Hour 24: Voltage reaches 12.4V (sulfation breaking down)
- Hour 36: Charger shows “FULL” or current drops below 0.5A
If voltage stalls below 12.2V after 24 hours, add 12 more charging hours before testing.
Validate Battery Restoration Success
Conduct Final Voltage Test
- Disconnect charger and rest battery 30 minutes
- Measure voltage with multimeter
- Accept if 12.4V+ (12.6V = optimal)
- Recharge 12 more hours if below 12.4V
A properly reconditioned battery holds voltage steadily—fluctuations indicate residual sulfation.
Perform Real-World Load Test
- Reinstall battery and connect cables
- Turn key to “ON” (don’t start engine)
- Activate high beams + AC max for 2 minutes
- Observe headlights: Steady brightness = success
Failing signs: Dimming lights, slow cranking, or voltage dropping below 10V under load means plates remain sulfated—repeat charging cycle.
Prevent Future Sulfation With Smart Habits
Monthly Maintenance Protocol
- Clean terminals with baking soda paste every 30 days
- Check fluid levels monthly (add distilled water only to “MAX” line)
- Apply dielectric grease after cleaning to prevent corrosion
- Use battery maintainer for vehicles driven less than 50 miles/week
Climate-Specific Protection
- Hot climates: Install heat shield over battery (reduces degradation by 30%)
- Cold climates: Remove battery during sub-0°F periods
- All climates: Park in shade to reduce under-hood temperatures by 25°F
Reconditioned batteries last longest when kept at 75-80% charge. A $25 Battery Tender maintainer pays for itself in one extended battery life.
Decide: Recondition or Replace? The Cost Reality
When Reconditioning Wins
- Learning experience for DIY enthusiasts
- Environmental priority (reduces lead waste)
- Fleet vehicles with multiple identical batteries
- Emergency roadside repair when stranded
Total cost: $32 (Epsom salts $5 + baking soda $3 + distilled water $4 + time investment)
When Replacement Makes Sense
- Batteries over 5 years old (even if revived)
- Voltage below 10V (success rate under 20%)
- Visible plate damage through cell caps
- Urgent need (reconditioning takes 36+ hours)
New battery cost: $75-150 with 3-year warranty vs. unknown reliability of reconditioned unit.
Reconditioning delivers real value for moderately sulfated batteries (10-12.6V) with no physical damage—but it’s not magic for dead cells. Focus your efforts where success rates exceed 70%: batteries under 4 years old showing voltage between 10.5-12.2V. Always prioritize safety with acid handling, and never skip the 36-hour slow charge that makes desulfation work. When done correctly, this process extends battery life by 1-3 years while saving significant money and reducing environmental impact. For batteries beyond saving, recycle responsibly—most auto stores pay $5-10 for cores and handle hazardous materials properly.


