
That sickening click when you turn the key. Dim headlights that barely cut through darkness. These aren’t just annoyances—they’re your car’s final warning that its battery is dead. Learning how to replace battery in car is one of the most valuable DIY skills you can master, saving £100-£250 in labor costs while putting you back in control. Most replacements take under 25 minutes with basic tools, and this guide walks you through every critical step—from recognizing failure symptoms to recycling the old unit safely.
Modern lead-acid batteries typically last 3-5 years, but extreme heat, frequent short trips, or leaving accessories on can slash that lifespan. When you notice sluggish cranking or electrical glitches, don’t wait for total failure. By following this guide, you’ll avoid common pitfalls like reversed connections or acid spills while ensuring your new battery delivers maximum performance. You’ll gain the confidence to handle this essential maintenance task safely—whether your battery hides under the hood or lurks in your trunk.
Why Your Engine Won’t Start: Critical Failure Signs
That slow, labored cranking isn’t just inconvenient—it’s your battery screaming for help. Recognize these urgent red flags before you’re stranded:
- Slow engine turnover that sounds “lazy” or strained
- Headlights dimming significantly while idling
- Electrical resets (radio presets, clock, or seat memory lost)
- Visible damage like swollen cases, cracks, or warping
- Corrosion buildup (white, blue, or green crust) on terminals
- Battery age exceeding 3 years in hot climates or 5 years in moderate zones
Pro Tip: Flip your battery to find the date code stamped on the case. A “12/21” code means December 2021—replace it immediately if approaching the 3-year mark in regions with summer temperatures above 32°C (90°F).
Select Your Exact Replacement Battery

Grabbing the wrong battery wastes money and risks electrical damage. Match these specifications precisely:
Physical fit is non-negotiable:
– Group size (e.g., Group 24F, 48H6) from your manual or parts store chart
– Terminal position (positive/negative orientation)
– Height clearance to avoid hood contact
Performance must meet or exceed:
– CCA (Cold Cranking Amps) for cold climates (never go lower than OEM spec)
– CA (Cranking Amps) for standard conditions
– Maintenance type (maintenance-free batteries cost more but eliminate fluid checks)
Budget Reality: Conventional 12V batteries cost £80-£250. Premium AGM batteries for start-stop systems run £200-£400—verify your vehicle requires one before overpaying.
Gather These Safety-Critical Tools
Skipping proper gear risks acid burns or dangerous sparks. Before opening the hood, collect:
- Essential: Insulated gloves, safety goggles, 8mm/10mm wrench or socket set
- Must-haves: Baking soda, wire brush, clean rags, zip ties
- Smart additions: Anti-corrosion spray, magnetized parts tray, terminal puller
Critical Warning: Remove all metal jewelry. A wedding ring touching both terminals creates instant 500-amp short circuits capable of melting metal against your skin.
Execute These Non-Negotiable Safety Steps
Batteries contain explosive hydrogen gas and sulfuric acid—neglecting precautions risks fire or chemical burns:
- Park safely: Level surface, parking brake engaged, transmission in Park
- Power down: Ignition off, keys removed, wait 5 minutes for electrical discharge
- Gear up: Gloves and goggles on before approaching the battery
- Fireproof zone: Zero smoking, sparks, or flames within 6 meters (20 feet)
- Acid check: Ensure vent caps are tight to prevent leaks during handling
Locate Hidden Battery Positions
Don’t assume it’s under the hood—European cars hide batteries in tricky spots:
- Engine bay: Usually passenger-side (common in US/Japanese models)
- Trunk: Under floor mats in BMWs/Mercedes (follow red positive cable from alternator)
- Rear seat: Some Cadillacs/Chryslers require seat removal
- Wheel well: Certain Audis need wheel removal
Quick Find Method: Trace the thick red positive cable from the alternator—it always leads to your battery.
Remove Old Battery: Follow This Sequence

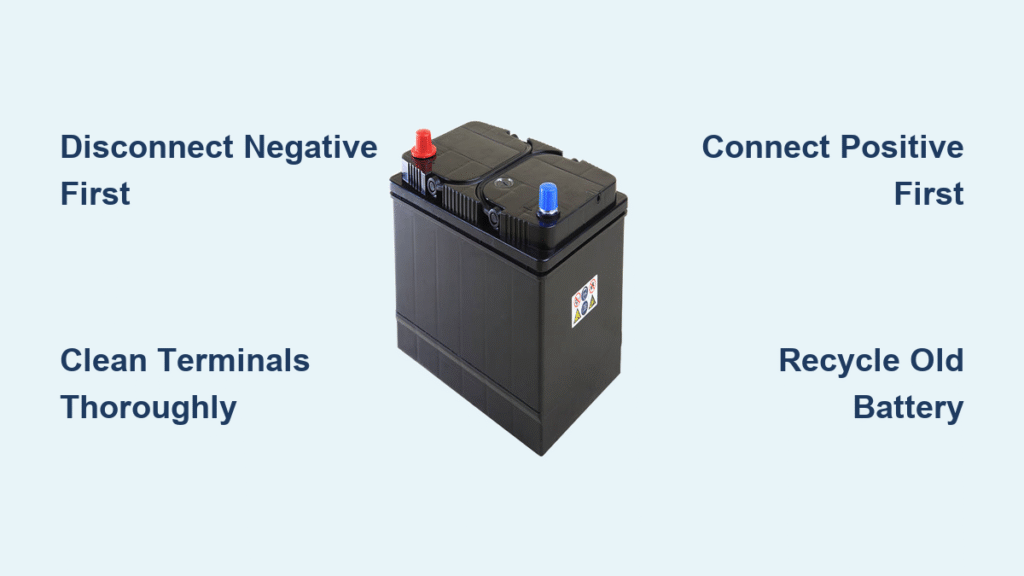
One mistake here can fry your electronics. Always disconnect in this order:
| Step | Critical Action | Pro Insight |
|---|---|---|
| 1. Negative terminal | Loosen black (-) clamp nut, lift off, secure cable away with zip tie | Never touch wrench to chassis while loosening—creates sparks |
| 2. Positive terminal | Remove red (+) cable after negative is isolated | Pop off red plastic cover first if present |
| 3. Hold-down hardware | Remove bracket bolts; note 3-piece assemblies | Place bolts in magnetized tray to avoid loss |
| 4. Lift battery | Grip base handles; keep upright at all times | 40-60 lb weight—ask for help; tilting >45° risks acid leaks |
Clean Corrosion Before Installing New Battery
Leftover corrosion causes voltage drops and mysterious electrical faults:
- Neutralize acid: Apply baking soda/water paste (1 tbsp per cup) to terminals
- Scrub aggressively: Use wire brush until metal shines bright silver
- Inspect cables: Replace frayed or cracked insulation immediately
- Dry thoroughly: Air-dry or use compressed air—no moisture allowed
Pro Move: Coat clean terminals with dielectric grease before installing new battery to prevent future corrosion.
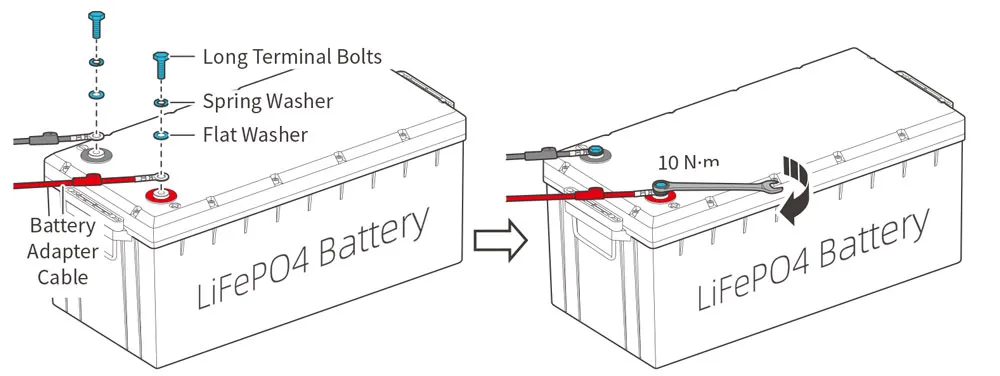
Install New Battery: Reverse Sequence Saves Electronics
Reconnect in reverse order—getting this wrong destroys computers:
| Step | Critical Detail |
|---|---|
| Position battery | Match terminal orientation exactly; ensure level seating |
| Secure hold-down | Tighten bolts evenly—battery must not shift when pushed |
| Connect positive first | Red cable to (+) terminal; snug but never overtighten |
| Connect negative last | Black cable to (-) terminal; final connection prevents sparks |
Double-Check: Positive cable ONLY on positive terminal. Reversing polarity melts wiring harnesses instantly.
Verify Success With These Tests
Don’t drive away until confirming:
- Engine starts within 2-3 seconds with strong cranking
- Headlights maintain full brightness at idle
- Dashboard warning lights extinguish completely
- Voltage check: 12.6V engine-off, 13.8-14.4V running
Critical Reset: Reprogram radio presets, clock, and power window auto-up/down features—your car’s memory resets during battery removal.
Recycle Old Battery: Free & Environmentally Essential
Never trash batteries—they contain 21 lbs of lead and toxic acid:
- Free drop-off: AutoZone, Halfords, or most tire centers accept old batteries
- Process: Lead plates melted for new batteries; acid neutralized safely
- Recycling rate: 99% of components get reused—your old unit becomes new batteries
Legal Note: Landfill disposal violates environmental laws in most countries—recycle it properly.
Fix Common Post-Replacement Problems
Even perfect installations reveal hidden issues—diagnose fast:
| Symptom | Likely Cause | Fix |
|---|---|---|
| No start/clicking | Loose terminals or reversed polarity | Recheck connections with multimeter |
| Battery light on | Failing alternator (not battery) | Test charging voltage at 14.4V running |
| Rapid battery drain | Parasitic draw (e.g., trunk light left on) | Disconnect negative terminal—current draw should be <50mA |
Pro Tip: If problems persist after replacement, test your alternator—failing ones kill new batteries in weeks.
Know When to Call Professionals
DIY isn’t worth the risk for these scenarios:
- Complex locations: Wheel well batteries requiring tire removal
- Start-stop systems: BMW/Mercedes needing battery registration tools
- Severely corroded terminals: Where connections won’t budge
- Hybrid vehicles: High-voltage battery systems require special training
Free Solution: Most auto parts stores install batteries purchased from them at no charge—including old battery disposal.
You’ve just conquered one of auto maintenance’s most empowering tasks. A properly installed battery should deliver 3-5 years of trouble-free starts when maintained correctly. Keep terminals clean, avoid frequent short trips, and your vehicle will reward you with instant starts every time. Remember: the next time that dreaded click happens, you won’t need a tow truck—you’ll have the skills to fix it yourself in under half an hour.


