
You pop your hood to jump-start your car, only to find a crusty white or blue-green substance covering your battery terminals. That’s battery acid corrosion—the silent killer of your vehicle’s electrical system. Left unaddressed, this corrosive buildup creates resistance that prevents proper power flow, leading to frustrating starting issues and potential electrical damage throughout your car.
This guide gives you the exact steps to safely remove battery acid corrosion like a professional mechanic. You’ll learn how to neutralize dangerous acids, clean terminals thoroughly, and apply protective measures that prevent future corrosion. Most importantly, you’ll discover the critical safety precautions that protect you from chemical burns and dangerous battery gases during the cleaning process.
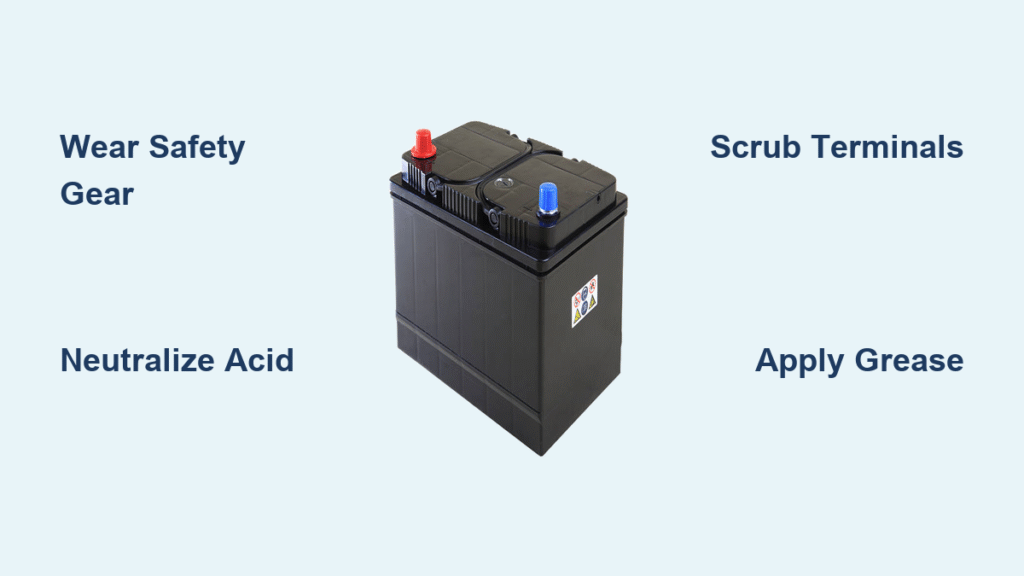
Identify Battery Corrosion Types
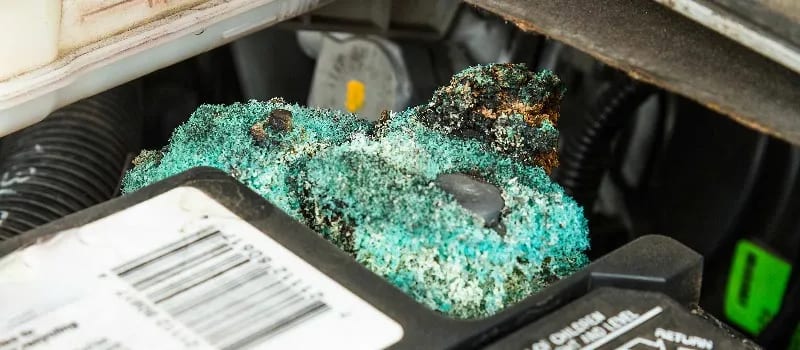
White, powdery deposits form when sulfuric acid vapor escapes your battery and reacts with air and metal components. These ashy residues typically appear first on the positive terminal where hydrogen gas concentration is highest. Blue-green crusts indicate copper sulfate formation—a sign that leaking acid has contacted copper clamps, creating a highly conductive but damaging compound.
Greenish fuzz signals advanced corrosion where battery age allows increased acid seepage. Check both terminals carefully, as corrosion often starts internally before becoming visible. Side-post batteries may show corrosion inside connection ports rather than on visible surfaces. Never attempt to clean wet, oily residue on your battery tray—this indicates active acid leakage requiring professional inspection before proceeding.
Essential Safety Equipment Checklist

Battery acid causes severe chemical burns within seconds of skin contact and can permanently damage your eyes. Safety goggles and chemical-resistant gloves aren’t optional—they’re absolute necessities for this task. Always work in a well-ventilated area since battery gases are both toxic and explosive, capable of igniting from sparks or open flames.
Never smoke or use electronic devices near your battery during cleaning. Remove all metal jewelry that could accidentally bridge terminals and create dangerous sparks. Keep clean water immediately accessible for flushing acid contact—skin exposure requires continuous flushing for at least 30 minutes. Eye exposure demands immediate medical attention regardless of how minor the contact seems.
Required Cleaning Supplies
For corrosion removal:
– Stainless steel wire brush (resists corrosion better than brass)
– Battery terminal brush with dual cleaning ends
– Stiff-bristled toothbrush for detailed work
– Microfiber cloths for complete drying
For acid neutralization:
– Baking soda solution (1 tablespoon per cup water)
– Commercial battery cleaner spray (for heavy buildup)
– Small brush for detailed neutralization
For protection:
– Silicone-based battery terminal grease (withstands high temperatures)
– Chemically-treated felt washers (absorbs acid vapors)
– Replacement terminals (for severely damaged connections)
Disconnect Battery Safely
Always remove the negative cable first—this prevents dangerous electrical shorts through your vehicle’s chassis. The negative terminal features a “-” symbol, “NEG” marking, or black-colored cable. Use the correct wrench size to avoid rounding bolt heads; forcing frozen connections can crack battery posts.
Remove the positive cable second (red cable with “+” marking). Inspect cables during removal for frayed or cracked insulation—these damaged components require immediate replacement. For newer vehicles with sensitive electronics, connect a battery tender before disconnecting to maintain computer memory settings during cleaning.
Neutralize Battery Acid Effectively
Your baking soda solution neutralizes battery acid on contact through an immediate chemical reaction. The vigorous fizzing you see represents dangerous sulfuric acid being converted to harmless salt water and carbon dioxide—not just surface cleaning. Apply the solution liberally to all corroded areas, allowing it to bubble for 2-3 minutes before scrubbing.
For heavy corrosion, repeat applications until the fizzing stops completely. Use your wire brush to scrub while the solution works—this mechanical action combined with chemical neutralization provides thorough cleaning. Rinse all areas thoroughly with clean water to eliminate any residual neutralized acid before proceeding to terminal cleaning.
Clean Battery Terminals Thoroughly
Scrub terminal posts with your wire brush until shiny metal appears—this ensures proper electrical conductivity. Clean battery cable ends internally using a specialized terminal brush or small wire brush to reach all contact surfaces. Side-post connections require careful cleaning inside the bolt hole—use a small wire brush or pipe cleaner to access these hidden areas.
Inspect terminals after cleaning for severe pitting or damage that prevents solid contact. Check cable ends for internal corrosion extending up the wire—green or white deposits inside the cable require complete replacement, not just terminal cleaning. Damaged components will cause immediate re-corrosion despite proper cleaning.
Dry and Protect Cleaned Areas

Complete drying prevents immediate re-corrosion and ensures protective products adhere properly. Use lint-free microfiber cloths to absorb all moisture from posts, terminals, and surrounding areas. Allow 5-10 minutes of air drying in a well-ventilated space to eliminate any hidden moisture in crevices.
Apply silicone grease immediately after drying while surfaces remain clean and dry. Coat the entire terminal including cable connection points to create a moisture barrier. For side-post batteries, apply grease inside the connection cavity and on bolt threads to prevent acid leaks and seizing during future maintenance.
Install Corrosion Prevention
Felt washers provide your first line of defense by absorbing acid vapors before they reach metal surfaces. Place these chemically-treated washers directly on battery posts before reconnecting terminals—they typically last the battery’s entire lifespan without replacement. These washers turn blue when saturated, signaling they’ve absorbed maximum acid vapor.
Apply terminal grease as your secondary barrier—a thin, even coating over all metal surfaces including washer tops. Avoid excessive grease that attracts dirt and interferes with electrical connections. For side-post batteries, apply grease directly to terminals and inside bolt holes to prevent acid leaks and seizing during future maintenance.
Reconnect Battery Correctly
Connect the positive cable first when reinstalling—this follows the opposite order of removal for safety. Snug connections firmly but avoid over-tightening that can crack fragile battery posts. Connect the negative cable last, ensuring solid metal-to-metal contact without movement.
Test connections by gently wiggling cables—any movement indicates loose terminals requiring re-tightening. Start your engine immediately to verify successful cleaning and proper electrical flow. Listen for smooth cranking and check dashboard warning lights to confirm the electrical system functions correctly.
Maintain Clean Battery Terminals
Inspect terminals every six months—more frequently in extreme climates or high-humidity environments. Clean minor buildup immediately using the same process to prevent major corrosion requiring terminal replacement. Reapply protective grease whenever cleaning reveals bare metal surfaces.
Monitor your battery’s age closely—corrosion increases dramatically as batteries approach their five-year lifespan. Consider preventive replacement for batteries showing persistent corrosion despite proper maintenance, as this often signals end-of-life deterioration.
When to Replace vs. Clean
Replace terminals when corrosion has eaten through metal or caused significant pitting that prevents solid electrical contact. Replace cables showing internal corrosion extending beyond the terminal end—green or white deposits inside the wire require complete replacement. Replace the entire battery if case damage allows continuous acid leakage despite cleaning efforts.
Seek professional inspection for batteries with wet acid pooling in the tray—this indicates case failure requiring immediate replacement for safety reasons. Persistent corrosion despite proper cleaning and protection often signals an underlying charging system issue that needs professional diagnosis.
Final Note: Regular battery maintenance prevents 90% of starting problems related to corrosion. By following these steps every six months, you’ll extend your battery’s life significantly while avoiding those frustrating moments when your car won’t start. Keep your cleaning supplies in your garage so you can address minor corrosion before it becomes a major problem—your future self will thank you when you’re not stranded with a dead battery in extreme weather.


