
That frustrating click instead of a crank. Dim headlights that barely illuminate the road. These telltale signs often point to one preventable culprit: corroded battery terminals. Learning how to clean a car battery properly isn’t just routine maintenance—it’s your frontline defense against being stranded with a dead electrical system. This white, crusty buildup silently chokes electrical flow, draining power even when your vehicle sits idle. The good news? Restoring full starting power takes just 15 minutes and costs less than $2 with household supplies. In this guide, you’ll master the exact cleaning techniques mechanics use, recognize dangerous corrosion patterns before they strand you, and implement foolproof prevention strategies that extend battery life by years.
Diagnose Corrosion Before It Strands You
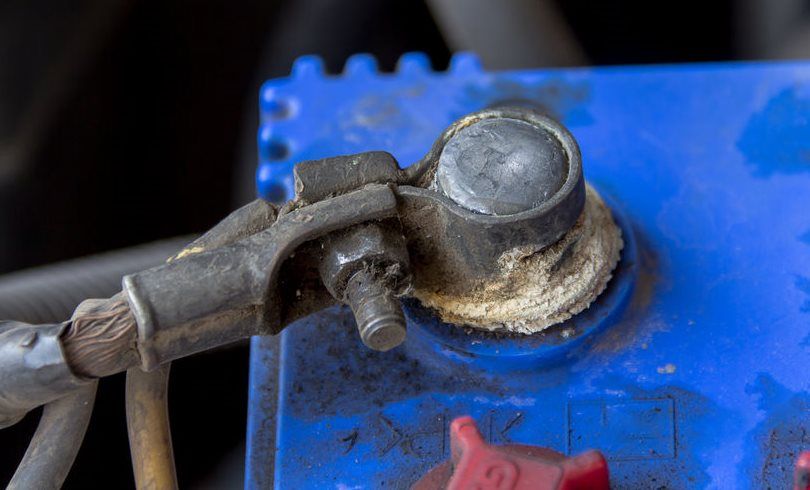
Identify Dangerous Terminal Buildup Patterns
White, powdery residue is your first warning sign, but the real threat hides in the details. Corrosion typically starts as a light dusting on the negative terminal (marked with a “-“) before spreading like mold to the positive side. Watch for blue-green or light green crystalline formations—that’s sulfuric acid crystals reacting with terminal metal. Severe cases create thick, fuzzy deposits that completely obscure the metal posts, creating conductive bridges that drain power 24/7. If you see crust extending beyond the cable clamps onto the battery case, immediate cleaning is critical to prevent permanent post damage.
Recognize the Silent Performance Red Flags
Corrosion doesn’t announce itself with alarms—it murders your electrical system quietly. Notice slow cranking that worsens over days? That’s resistance from corrosion stealing amperage. Dim headlights that brighten when you rev the engine? Classic symptom of poor conductivity. The most urgent warning is rapid clicking when turning the key with no engine turnover—a sure sign corrosion has severed the critical power path to your starter. Never ignore these gradual declines; by the time your car won’t start at all, corrosion has likely damaged terminal posts beyond cleaning.
Understand Why Corrosion Kills Batteries Faster
Hydrogen gas escapes naturally from your battery’s sulfuric acid electrolyte. When this gas meets oxygen and metal terminals, it forms conductive sulfuric acid crystals. These crystals absorb atmospheric moisture, creating an electrochemical highway that drains your battery even when parked. This isn’t just surface gunk—it actively disintegrates lead posts through electrochemical corrosion. Left unchecked, it can reduce a healthy 5-year battery’s lifespan by 50%, turning what should be routine maintenance into an emergency replacement costing $150+.
Assemble Your Corrosion-Fighting Toolkit

Build a $1 Emergency Baking Soda Kit
You don’t need professional gear—just three household items:
– 1 tablespoon baking soda (neutralizes acid on contact)
– 1 cup hot water (activates cleaning power)
– Stiff-bristled brush (dedicated toothbrush or wire brush—never reuse for food!)
Add safety glasses and rubber gloves (essential for acid protection), plus an adjustable wrench for terminal removal. This kit costs pennies but handles 90% of corrosion cases. Pro tip: Keep a pre-mixed baking soda paste in a sealed container in your glovebox for roadside emergencies.
Choose Commercial Cleaners for Severe Cases
For heavy, crusty buildup, auto store sprays like CRC Battery Terminal Cleaner work faster. These foaming formulas penetrate deep into terminal crevices where brushes can’t reach. Spray directly onto corrosion, wait 30 seconds for the chemical reaction to bubble away deposits, then wipe clean with a rag. While more expensive ($5-$8), they’re worth it for neglected batteries where DIY methods would take multiple applications. Avoid acid-based cleaners—they damage terminals long-term.
Master the Coca-Cola Emergency Fix
Stranded without supplies? Pour regular Coca-Cola (not diet) over corroded terminals. The phosphoric acid dissolves corrosion in 2 minutes. Swish it around with a brush, then immediately rinse with water—Coke leaves sticky residue that attracts more corrosion if not fully removed. Never use this as routine maintenance; it’s strictly a roadside bailout when baking soda isn’t available.
Execute Critical Safety Protocols Before Touching Terminals
Follow the Engine Shutdown Sequence
Never work on a hot battery. Turn off the ignition and wait 10 minutes minimum—residual heat pressurizes battery acid, risking explosive steam if disturbed. Open the hood in daylight for clear visibility of terminal markings. If your engine was recently running, feel the battery case; if warm to the touch, wait another 5 minutes. Skipping this risks acid burns from sudden thermal expansion.
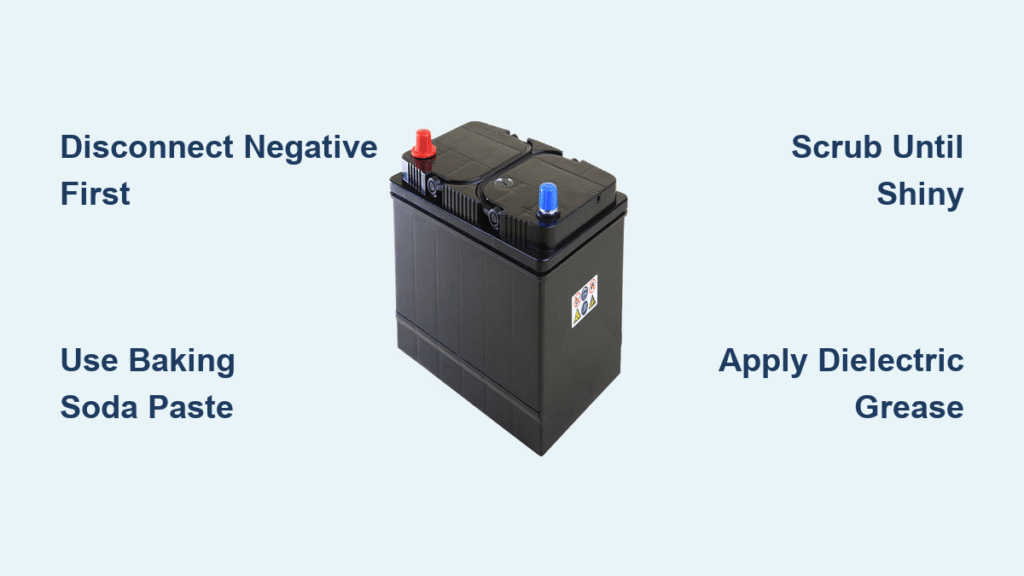
Disconnect Terminals in the Correct Order
Always remove the negative cable first (black terminal marked “-“). This breaks the circuit to your vehicle’s computer systems, preventing catastrophic electrical shorts. Use your wrench to loosen the nut just enough to wiggle the clamp free—never force it. Only after negative is disconnected should you remove the positive cable (red terminal “+”). Reversing this order risks sparks near flammable hydrogen gas emitted by batteries.
Gear Up with Non-Negotiable Protection
Battery acid causes chemical burns that eat through clothing in seconds. Mandatory gear: Chemical-resistant nitrile gloves (latex won’t protect you) and ANSI Z87.1-rated safety glasses. Work in a well-ventilated area—battery gases are explosive. Keep a box of baking soda nearby to neutralize accidental spills; water alone won’t stop acid burns. If acid contacts skin, flush immediately with water for 15 minutes.
Perform Professional-Grade Terminal Cleaning in 4 Steps
Neutralize Acid With Baking Soda Paste
Mix 1 tbsp baking soda with 1 cup hot water until fizzy. Dip your brush into the solution and coat all corroded areas. The instant bubbling is the acid neutralization reaction—this is critical for safe cleaning. For severe buildup, apply dry baking soda directly to terminals first, then add water to activate. Never use vinegar or other acids; they worsen corrosion long-term.
Scour Until Metal Shines Like New
Scrub in circular motions focusing on:
– Terminal post grooves where corrosion hides
– Inside cable clamps (pry open if needed)
– Battery tray edges where acid drips
Continue until all metal surfaces reflect light uniformly. Stubborn spots? Use a brass battery terminal brush (softer than steel to avoid scratching). Warning: Never sandblast terminals—that removes protective plating, accelerating future corrosion.
Rinse and Dry With Zero Moisture Left Behind
Flush every surface with clean water from a spray bottle—never a hose (water can short internal cells). Wipe with microfiber towels, then use compressed air to blast moisture from crevices. If no air compressor, wait 20 minutes for full evaporation. Any remaining dampness triggers instant re-corrosion. Test dryness by pressing a paper towel against terminals—it should show zero moisture.
Reconnect Cables to Prevent Electrical Damage
Reverse your disconnection order: positive terminal first, then negative. Tighten clamps until they can’t rotate on the post (1/4 turn past snug). Loose connections cause micro-arcing that melts terminals. Finally, apply a corrosion inhibitor—see next section—before closing the hood.
Verify Your Cleaning Success Before Driving
Test Starting Performance Immediately
Start the engine within 5 minutes of reconnection. Success means:
– Normal cranking speed (no sluggish turning)
– Instant ignition without repeated attempts
– Steady idle within 3 seconds
If problems persist, corrosion wasn’t the only issue—your battery may be failing. Check voltage with a multimeter; below 12.4V indicates replacement is needed regardless of clean terminals.
Confirm Full Electrical System Recovery
With the engine running, test:
– Headlights at full brightness (no dimming when AC kicks on)
– Radio volume consistent at all RPMs
– Power windows operating at normal speed
Dim or fluctuating accessories mean residual resistance—recheck terminal tightness and re-clean if needed.
Monitor for Recurrence in the First Week
Check terminals daily for 7 days. A light haze forming on clean metal means your inhibitor coating failed. Re-clean and reapply protection. Healthy terminals should stay mirror-bright for 3+ months after proper treatment.
Stop Corrosion Before It Starts With Proven Prevention
Apply Terminal Protector Like a Mechanic
After cleaning, coat every metal surface with:
– Dielectric grease (best option—non-conductive, heat-resistant)
– Petroleum jelly (budget alternative but melts in extreme heat)
Apply a thick layer that completely seals metal from air. This creates a moisture barrier that prevents the hydrogen-oxygen reaction causing corrosion. Reapply every oil change or when grease looks dry.
Implement the 30-Second Monthly Inspection
Make this part of your fuel fill-up routine:
1. Pop the hood while pumping gas
2. Visually inspect terminals for white/blue residue
3. Wipe away dust with a dry cloth
Catching light buildup early takes 30 seconds versus 30 minutes for severe cases. Keep a terminal brush in your trunk for instant cleanup.
Replace Aging Batteries Before They Fail
Corrosion protection can’t save a dying battery. Replace units older than 4 years regardless of terminal condition—even clean batteries lose capacity over time. When installing new batteries, coat terminals with protector immediately. New batteries emit more hydrogen gas during break-in, making early protection critical.
A properly cleaned car battery delivers instant starts and flawless electrical performance for months. By dedicating 15 minutes every 6 months to this essential maintenance, you’ll eliminate 80% of no-start emergencies and add 1-2 years to your battery’s life. The next time you see that first hint of white powder on your terminals, grab your baking soda—not your jumper cables. Your reliable starts and wallet will thank you every time you turn the key. Keep this guide in your glovebox, and never face a corrosion-stranded morning again.


