
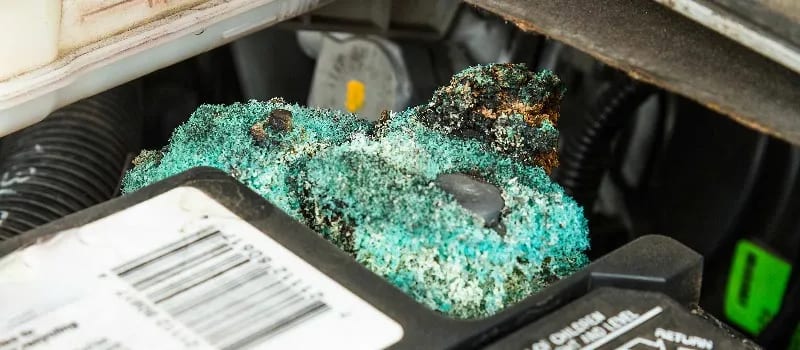
Your car won’t start. The headlights dim when you turn the key. You lift the hood and spot that unmistakable white or blue-green crust choking your battery terminals—classic corrosion. This isn’t just cosmetic grime; it’s a silent electrical thief stealing power from your vehicle’s entire system. The good news? You can eliminate this problem in under 45 minutes using household items, restoring reliable starts and preventing costly roadside assistance calls.
This guide delivers the exact steps to safely remove corrosive buildup, protect your terminals, and extend your battery’s lifespan. Forget confusing jargon—we’ll focus on actionable techniques that work for any vehicle, from daily commuters to weekend project cars. By the end, you’ll diagnose corrosion levels like a pro, apply the right cleaning solutions, and implement foolproof prevention strategies.
Spot Battery Corrosion Before It Strands You
That powdery white or blue-green substance isn’t dirt—it’s a chemical reaction actively sabotaging your electrical system. Corrosion forms when hydrogen gas from the battery acid mixes with metal terminals, creating conductive barriers that block power flow. Ignoring this buildup causes progressively worse symptoms until your vehicle won’t start at all.
Immediate visual red flags:
– White, ashy residue coating battery posts
– Blue or green crystalline formations on cable ends
– Swollen battery casing near terminal bases
– Wet spots or crusty trails leading from terminals
Performance warnings requiring action:
– Engine cranks slowly despite fresh battery
– Dashboard lights flicker during startup
– Radio presets reset after each drive
– Power accessories (windows, locks) operate sluggishly
– Check engine light displays low-voltage codes like P0562
Gear Up for Safe Battery Corrosion Removal

Battery acid causes chemical burns and permanent eye damage within seconds. Never skip these safety essentials before touching your battery:
Non-negotiable protective equipment:
– Nitrile gloves (latex dissolves in acid)
– Safety goggles with side shields
– Long-sleeved cotton shirt (synthetics melt on contact)
– Closed-toe shoes with rubber soles
Critical pre-work setup:
– Park on level ground with parking brake engaged
– Work in open-air or fully ventilated garage
– Keep ignition keys in your pocket (never leave in car)
– Place bucket of clean water nearby for emergency rinsing
Gather Corrosion-Cleaning Supplies Under $10

You don’t need expensive specialty products. Most items are already in your kitchen or available for less than $5 at any auto store.
Effective DIY cleaning solution:
– 1 tablespoon baking soda + 1 cup warm water (stir until dissolved)
– For severe buildup: 3 parts baking soda to 1 part water paste
Essential toolkit:
– Stiff-bristled wire brush (dedicated battery brush preferred)
– 8-10mm adjustable wrench (check your vehicle’s specs)
– Clean microfiber rags (paper towels leave lint)
– Small bowl for mixing solution
– Petroleum jelly or silicone dielectric grease
– Replacement felt washers (optional but recommended)
Disconnect Battery Terminals Without Sparking
Never skip this sequence: Removing the negative terminal first prevents dangerous electrical arcs if your wrench touches metal.
Safe disconnection steps:
1. Identify negative terminal (black cable with “-” marking)
2. Loosen nut with wrench—counter-clockwise only
3. Wiggle cable free (never pry or force)
4. Repeat for positive terminal (red cable with “+” marking)
5. Secure cables away from battery posts using zip ties
If terminals won’t budge:
– Apply penetrating oil to bolt threads
– Wait 5 minutes before reattempting
– Never hammer or twist aggressively—replace terminals instead
Assess Corrosion Damage Before Cleaning
With cables disconnected, inspect the severity to determine if cleaning suffices or replacement is needed:
Cleanable corrosion levels:
– Light: Thin white film, no metal pitting (90% of cases)
– Moderate: Thick crust covering posts, minor surface pitting
Replace terminals immediately if you see:
– Stripped or rounded terminal bolts
– Visible copper wires inside corroded cables
– Cracks or swelling in battery casing
– Corrosion extending >1 inch up cables
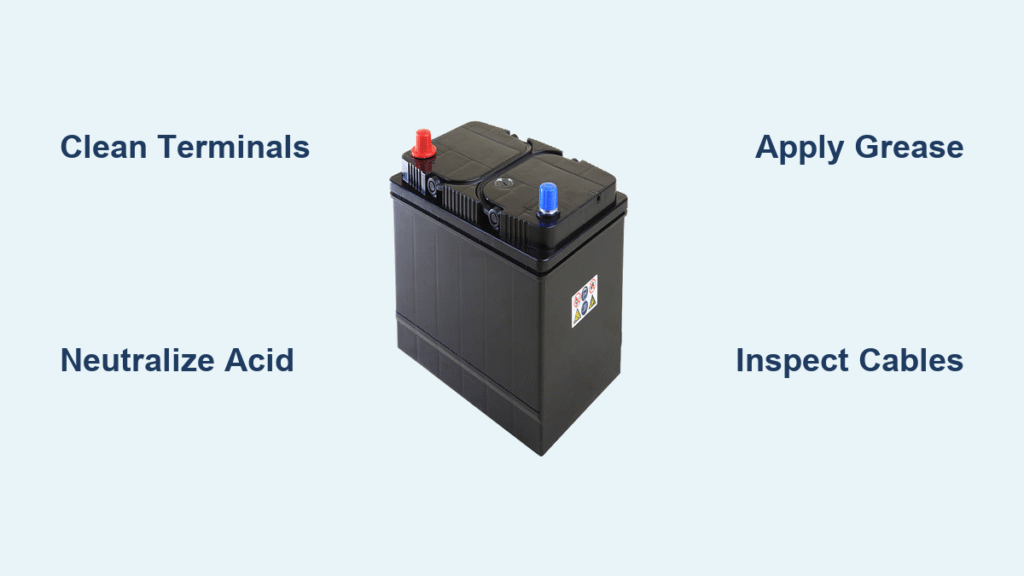
Neutralize Acid With Baking Soda Solution

Proper application technique:
1. Dip brush in baking soda solution
2. Apply liberally to terminals, posts, and cable ends
3. Watch for bubbling—this neutralizes battery acid
4. Let sit 2-3 minutes for chemical reaction
For stubborn buildup:
– Apply baking soda paste directly to crust
– Wait 5 minutes before scrubbing
– Use wire brush on cable interiors and bolt threads
– Never use vinegar on lead-acid batteries—it accelerates corrosion
Scrub and Rinse to Prevent Re-Corrosion
Effective scrubbing protocol:
– Use circular motions on terminal posts
– Insert brush into cable ends to clean interior surfaces
– Scrub battery tray if residue has spread
– Continue until all white/green residue disappears
Critical rinsing/drying steps:
1. Flush with clean water until runoff is clear
2. Wipe with dry microfiber rags
3. Air-dry 10 minutes minimum (corrosion returns if damp)
4. Use compressed air to remove hidden moisture in crevices
Seal Terminals Against Future Corrosion
Felt washer installation (best defense):
1. Slide chemically-treated washer over each post base
2. Press firmly against battery casing
3. These absorb acid vapors before they reach terminals
Grease application method:
– Coat entire terminal and post with silicone dielectric grease
– Cover felt washers completely
– Avoid petroleum jelly—it melts and attracts dirt in high heat
Reconnect and Verify Electrical Restoration
Connection sequence is critical: Positive terminal first, then negative—reversing this risks sparks.
Reconnection checklist:
1. Slide positive cable onto post
2. Tighten nut to snug (over-torquing cracks terminals)
3. Repeat for negative cable
4. Gently tug cables to confirm secure fit
Post-cleaning validation:
– Start engine—should crank instantly without hesitation
– Test headlights—they’ll be noticeably brighter
– Check power windows and radio functionality
– Drive 15 minutes to confirm charging system works
Stop Corrosion Before It Starts
Monthly maintenance routine:
– Visually inspect terminals for early white residue
– Tighten loose connections (corrosion forms faster in gaps)
– Reapply dielectric grease if coating looks thin
Seasonal protection boost:
– Clean terminals every 6 months (spring/fall ideal)
– Replace felt washers annually or when discolored
– In humid climates, add corrosion-inhibiting spray
Know When to Call a Professional
Seek expert help immediately if:
– Terminal bolts are rounded or seized
– Corrosion returns within 2 weeks of cleaning
– Battery casing shows cracks or swelling
– Engine cranks slowly despite clean terminals
Professional diagnostics you need:
– Battery load testing (free at most auto stores)
– Alternator voltage output check
– Cable integrity assessment
Maximize Battery Lifespan After Cleaning
Immediate performance gains:
– 30% faster engine cranking
– Brighter headlights and interior lighting
– Stable voltage for sensitive electronics
– Elimination of phantom electrical drains
Long-term battery preservation:
– Clean terminals every 6 months to double battery life
– Address charging system issues within 48 hours
– Replace batteries at 3-4 years (even if working)
– Upgrade to AGM batteries in extreme climates
Regular terminal maintenance is the single most effective way to avoid being stranded with a dead battery. By dedicating 30 minutes twice a year to inspect and protect your terminals, you’ll eliminate 95% of unexpected breakdowns while extending your battery’s life by 18-24 months. The next time you spot that telltale white crust, remember: this isn’t an emergency—it’s a 20-minute fix that keeps you moving. Grab your gloves and baking soda; your reliable starts await.


