
Your car won’t start on a freezing winter morning. The headlights dim to a ghostly glow as you turn the key. The radio resets itself between stations. Before you call a tow truck or buy a new battery, check the real culprit: crusty white corrosion strangling your battery connections. That chalky buildup isn’t just ugly—it’s blocking electricity like a clogged artery, starving your entire electrical system.
Cleaning corroded battery terminals ranks among the most overlooked yet critical car maintenance tasks. A mere 0.1-inch layer of corrosion can reduce electrical flow by 50%, forcing your starter motor to work twice as hard. This simple 15-minute procedure prevents roadside emergencies, extends battery life by years, and costs nothing but baking soda and elbow grease. Forget expensive diagnostics—this guide delivers the exact steps to revive full electrical power using tools already in your garage.
Why Your Engine Cranks Slowly or Won’t Start
Hard Starting Despite New Battery
You replaced the battery last month, yet your engine still cranks sluggishly on cold mornings. Corrosion creates electrical resistance between terminals and cables, forcing the starter to draw excessive current. This mimics battery failure symptoms but disappears after proper terminal cleaning.
Flickering Dashboard Lights During Operation
Headlights pulse like a disco ball when you hit the brakes. The radio resets every time you turn on the AC. These erratic electronics signal voltage starvation from poor connections. Corrosion acts like a faulty valve, restricting power flow precisely when your car needs it most.
Visible White or Blue-Green Crust on Terminals
Chalky white powder indicates lead sulfate corrosion—the most common type. Blue-green crust means copper oxidation from cable corrosion. Both severely impair conductivity. Pro Tip: Shine a flashlight sideways across terminals—this reveals thin, dangerous buildup invisible from direct overhead views.
Critical Safety Steps Before Touching Terminals
Engine Shutdown Protocol
Turn off your engine completely and remove keys from the ignition. Wait 15 minutes if recently driven—battery cases and metal brackets retain enough heat to cause second-degree burns. Never attempt cleaning while the engine runs; alternator voltage spikes could cause sparks.
Essential Personal Protection Gear
Wear heavy-duty rubber gloves (not thin dishwashing gloves) to shield against sulfuric acid residue. Safety goggles are non-negotiable—corrosion particles can splash into eyes during scrubbing. Work outdoors or in a garage with open doors; battery fumes contain hydrogen gas that ignites easily.
Tool Safety Checklist
Use wrenches with insulated handles to prevent accidental shorts. Never let metal tools touch both terminals simultaneously—this completes a circuit causing violent sparks. Keep a baking soda-water mix in a spray bottle nearby to instantly neutralize acid spills. Pro Tip: Tape plastic bags over disconnected cables to prevent accidental contact with metal surfaces.
Tools Needed for Effective Corrosion Removal

Basic Cleaning Kit (Under $5)
- Stiff wire brush (dedicated steel-bristle type—never use household toothbrushes)
- 6-inch adjustable wrench or correct socket size for your terminals
- 3 microfiber towels (one for cleaning solution, one dry, one for spills)
- Plastic cup for mixing solution (never use metal containers)
Cleaning Solutions That Actually Work
- Baking soda paste: 1 tbsp baking soda + 1 cup water (neutralizes acid corrosion)
- Petroleum jelly: Creates moisture barrier without insulating connections
- Anticorrosion felt washers: Chemically treated pads that absorb corrosive gases
- Warning: Avoid commercial “battery cleaners”—most contain acids that accelerate future corrosion.
Step-by-Step Connection Cleaning Process
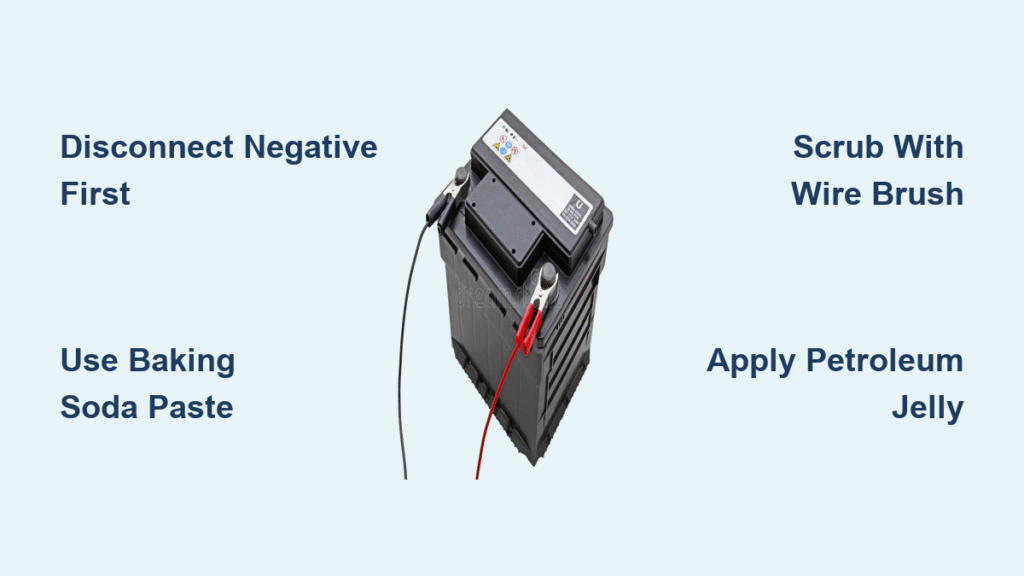
Disconnect Terminals in Correct Sequence
Loosen the negative (-) terminal nut first (black cable, marked with “–”). Wiggle the connector side-to-side until free—never pry upward, which cracks battery posts. Set cable aside on plastic engine cover. Then disconnect positive (+) terminal (red cable, marked with “+”). Critical: If cables resist removal due to heavy corrosion, spray baking soda solution directly onto the joint and wait 2 minutes before retrying.
Neutralize and Remove Corrosion Safely
Pour baking soda solution directly onto corroded areas until fizzing stops (this neutralizes battery acid). Scrub terminals with wire brush using circular motions—focus on the inner clamp surface and post sides where contact occurs. For stubborn buildup, sprinkle dry baking soda onto brush while scrubbing. Never sandblast or use metal files—this damages terminal plating. Pro Tip: Hold a dry towel underneath to catch falling debris that could short-circuit components.
Rinse and Dry to Prevent Immediate Re-Corrosion
Rinse thoroughly with clean water from a spray bottle—avoid high-pressure hoses that force moisture into battery cells. Dry terminals for 2 full minutes with microfiber towels, then air-dry 5 minutes. Test dryness by pressing a clean towel against terminals—any moisture transfer means re-drying is needed. Warning: Skipping complete drying guarantees instant re-corrosion.
Prevent Future Corrosion After Cleaning

Apply Protective Barriers Correctly
Dab petroleum jelly ONLY on the battery post (not cable clamp) using a gloved finger. The ideal layer is translucent—thick globs attract dirt and insulate connections. For superior protection, slip anticorrosion felt washers between post and clamp before reconnection. Never use grease or oil—these degrade rubber cable insulation over time.
Reconnect Terminals to Avoid Sparks
Connect positive (+) terminal first and tighten snugly (15-20 ft-lbs—hand-tight plus 1/4 turn). Then connect negative (-) terminal. Test connection security by gently twisting cables—they should not rotate on posts. Critical: Overtightening cracks lead posts; undertightening causes arcing that regenerates corrosion.
Maintenance Schedule That Actually Works
Monthly Visual Checks That Prevent Breakdowns
Pop your hood monthly and inspect terminals for “white fuzz”—the earliest corrosion stage. Check during oil changes since both require hood access. Pro Tip: Keep a dedicated wire brush in your glove compartment for emergency roadside cleanings.
Climate-Based Cleaning Frequency
- Normal conditions: Full cleaning every 6 months
- Coastal/humid areas: Clean every 3 months (salt air accelerates corrosion 300%)
- Winter prep: Clean terminals 2 weeks before first frost—cold increases electrical resistance
- After jump-starts: Always clean immediately—foreign voltage spikes accelerate corrosion
Critical Warning Signs Requiring Replacement
Replace your battery immediately if you see:
– Swollen or cracked case (indicates internal failure)
– Fluid leakage around base (sulfuric acid exposure hazard)
– Blue-green corrosion on cable strands (copper oxidation means cable damage)
– Posts that feel loose when wiggling cables (internal damage)
Troubleshooting Post-Cleaning Failures

When Cleaning Doesn’t Fix Starting Issues
If your engine still cranks slowly after terminal cleaning, test battery voltage with a multimeter. Below 12.4V indicates a failing battery regardless of clean connections. Check cable ends for hidden corrosion—slit the rubber insulation 1 inch back to inspect copper strands for green discoloration.
Performance Testing That Saves Money
Visit an auto parts store for free battery testing—they check both voltage and cold-cranking amps. If voltage tests strong but starting remains sluggish, inspect the ground cable connection to the engine block—a corroded ground causes identical symptoms.
Road Salt Damage Mitigation
In winter climates, spray terminal protectant weekly after snowstorms. Rinse wheel wells monthly with baking soda solution to neutralize salt splatter. Pro Tip: Coat exposed metal near battery with dielectric grease—it repels salt and moisture without affecting conductivity.
When to Call a Professional Instead
DIY Limitations to Recognize
Seek professional help if:
– Terminals are welded shut by extreme corrosion (requires specialized removal tools)
– Battery sits under rear seats or in trunk (complex access in modern vehicles)
– You smell strong rotten-egg odor (hydrogen sulfide gas indicates dangerous battery failure)
Cost-Benefit Analysis of Professional Service
Most shops charge $30-$50 for terminal cleaning—a steep price for a 15-minute DIY task. Only pay for professional service if you lack safety gear, have physical limitations, or drive a luxury vehicle with battery management systems requiring reset procedures.
Environmentally Responsible Disposal Practices
Safe Handling of Corrosion Residue
Collect all debris in a plastic container—never sweep onto pavement. Neutralize residue with baking soda solution before disposal. Take contaminated materials to hazardous waste facilities; 1 teaspoon of battery acid can contaminate 1,000 gallons of water.
Tool Decontamination Protocol
Soak your wire brush in baking soda solution for 10 minutes after use. Rinse tools thoroughly before storing—acid residue continues corroding metal tools. Never return battery-specific tools to household cleaning supplies.
Cleaning car battery connections isn’t just maintenance—it’s insurance against the frustration of being stranded with a dead car. That 15-minute investment prevents $100+ jump-start fees and extends your battery’s life by up to 40%. Make terminal inspection part of your monthly fuel-up routine, and you’ll never again face the heart-stopping click of a dead electrical system. Remember: a clean connection conducts 100% of your battery’s power exactly when your car needs it most. Start today—your reliable starts depend on it.


