
That crusty white or blue buildup around your battery terminals isn’t just unsightly—it’s actively sabotaging your car’s electrical system. Battery corrosion creates a physical barrier that blocks the flow of electricity from your battery to your vehicle’s electrical components, leading to frustrating starting problems and potential breakdowns. The good news? You can completely eliminate this common issue in under 30 minutes using simple household items you likely already have in your kitchen.
Ignoring corrosion allows it to silently eat away at your battery connections until your car won’t start at all. This guide gives you the exact step-by-step process to safely remove corrosion, prevent its return, and recognize when cleaning won’t solve the problem. You’ll save money on unnecessary battery replacements and avoid the embarrassment of needing a jumpstart when you’re already running late.
Identify Battery Corrosion Before It Kills Your Car
Spot Early Warning Signs Immediately
Battery corrosion begins as a powdery white film on the metal terminals and cable connections. As it progresses, you’ll notice blue-green crystals forming around the posts. Check your battery monthly—catching corrosion early prevents expensive damage to cables and terminals. The chemical reaction creating this buildup happens continuously when your battery is in use, so regular inspections are crucial.
Recognize Performance Red Flags
Your car sends clear signals when corrosion interferes with power delivery:
– Engine cranks slowly when starting, like it’s struggling to turn over
– Dashboard lights dim or flicker during startup attempts
– Car stalls unexpectedly while idling at stoplights
– Battery dies overnight despite being fully charged the previous day
Conduct a 30-Second Monthly Inspection
Pop your hood and look for any white, blue, or green deposits on the battery posts or cable clamps. If you see even slight buildup forming, address it immediately before it spreads deeper into the electrical system. Never ignore early-stage corrosion—what starts as a minor nuisance can quickly escalate to a complete failure to start.
Gather Essential Cleaning Supplies Before You Start
Must-Have Items Checklist
- Baking soda (not baking powder) – creates neutralizing paste
- Warm water in a plastic container
- Stiff-bristle brush or dedicated old toothbrush
- Clean microfiber cloths – lint-free drying
- Safety glasses and nitrile gloves – non-negotiable protection
- Petroleum jelly or battery terminal protector – for prevention
- Adjustable wrench – for cable removal
Safety Gear Is Absolutely Non-Negotiable
Battery corrosion contains sulfuric acid that can burn skin and eyes within seconds. Always wear eye protection and chemical-resistant gloves before touching anything around the battery. Keep a bucket of clean water nearby for emergency rinsing—this could prevent serious injury if you accidentally get acid on your skin.
Prepare Your Workspace Properly
Work in a well-ventilated area away from open flames or sparks. Ensure your car is completely turned off with keys removed from the ignition. Let the engine cool for 10 minutes if it was recently running—working on a hot engine increases the risk of burns and accidental short circuits.
Stop Immediately If You See These Danger Signs

Critical Battery Condition Check
Stop cleaning immediately if you notice any of these dangerous conditions:
– Cracked battery case with visible leaks
– Bulging or swollen sides indicating internal failure
– Liquid actively leaking from battery vents
These signs indicate a dangerous battery failure requiring professional replacement—not cleaning. Continuing to work on a damaged battery risks acid burns or even explosion.
Cable Inspection Before Cleaning
Look for these damage indicators that require cable replacement:
– Frayed or melted wires showing exposed copper
– Severely corroded clamps that crumble when touched
– Cracked insulation on battery cables
Damaged cables need replacement regardless of corrosion cleaning—you can’t safely reuse compromised components.
Terminal Movement Warning Test
Gently wiggle each battery terminal after cleaning. Loose terminals create poor connections and accelerate corrosion. Tighten any loose connections after completing the cleaning process. A terminal that spins freely on the post indicates severe damage requiring professional attention.
Step-by-Step Corrosion Removal Process That Works

Step 1: Create Effective Cleaning Solution
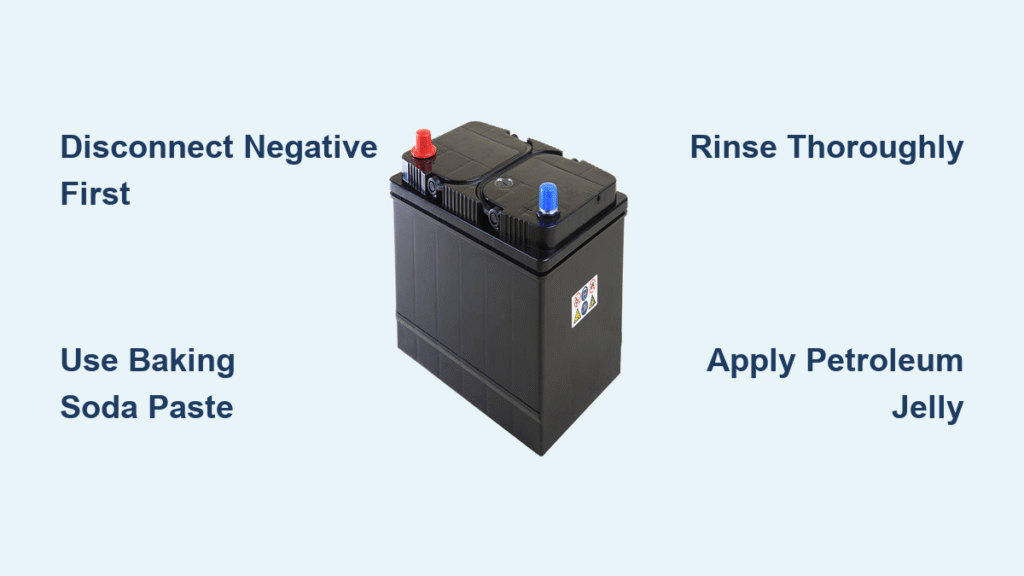
Mix 3 tablespoons baking soda with 9 tablespoons warm water in a plastic cup. The solution should form a loose paste that clings to vertical surfaces. Never use metal containers—the baking soda solution reacts with metal and becomes ineffective.
Step 2: Remove Battery Cables Safely
Always disconnect the negative (-) cable first, then the positive (+). This prevents accidental short circuits that could damage your vehicle’s electronics. Use your wrench to loosen the clamp nuts, then twist the cables off the posts. Label cables with tape if you’re unsure which is which—you don’t want to reverse connections during reinstallation.
Step 3: Apply and Scrub Baking Soda Paste
Dip your brush in the baking soda solution and scrub the corrosion vigorously. The mixture will fizz and foam—that’s the chemical reaction neutralizing the acid. Work the paste into all crevices around the terminals and cable clamps. Pro tip: For heavy buildup, let the paste sit for 5 minutes before scrubbing. The extended contact time breaks down stubborn crystals more effectively.
Step 4: Rinse Thoroughly and Dry Completely
Use a damp cloth (not dripping wet) to wipe away all residue. Follow with a clean water rinse on the battery top only. Dry completely with a fresh microfiber cloth—any remaining moisture causes rapid re-corrosion. Never spray water directly onto the battery—this risks pushing corrosion deeper into connections.
Step 5: Protect Clean Surfaces Against Future Corrosion
Apply a thin coat of petroleum jelly to the clean terminals and cable clamps. This creates a barrier against future corrosion. Alternatively, use a commercial battery terminal protector spray for longer-lasting protection. Avoid over-applying—excess jelly attracts dirt that can create new corrosion points.
Reconnect Cables Correctly to Prevent Future Problems
Follow Proper Installation Sequence
Connect positive (+) first, then negative (-)—the opposite order of removal. Ensure clamps seat fully against the battery posts with no gaps. Double-check polarity—reversing connections can fry your car’s electronics and create dangerous situations.
Apply Correct Torque to Connections
Tighten cable clamps snug but not overtightened. Overtightening can crack the battery case or strip the clamp threads. The connection should be firm enough that you can’t twist the clamp by hand. A properly tightened connection feels solid with no movement when you test it.
Perform Final Connection Verification
After securing both cables, try to twist each clamp gently. If either moves, tighten further. A loose connection causes the very problems you’re trying to solve. Start your engine immediately after reconnecting to verify proper electrical flow—don’t wait until you’re stranded somewhere.
Prevent Future Corrosion Buildup for Long-Term Success
Establish a Simple Monthly Maintenance Routine
Every 30 days, check for new corrosion forming. A quick visual inspection takes 30 seconds and prevents major problems. Wipe away any early buildup with a dry cloth before it becomes severe. Set a calendar reminder—consistency is key to preventing major corrosion issues.
Use Anti-Corrosion Products That Actually Work
- Battery terminal protectors (felt washers treated with corrosion inhibitors)
- Dielectric grease applied to connections before reassembly
- Commercial anti-corrosion spray reapplied quarterly
These products create physical barriers that block the chemical reactions causing corrosion.
Adjust Maintenance for Environmental Factors
Corrosion accelerates in:
– High humidity climates – increase inspections to bi-weekly
– Coastal areas with salt air – use marine-grade protectors
– Extreme temperature swings – apply extra protection before seasonal changes
Tailor your maintenance schedule to your specific driving conditions for maximum battery life.
Know When Cleaning Won’t Fix the Underlying Problem
Recognize Battery Age Indicators
Replace batteries over 4 years old regardless of appearance. Older batteries naturally produce more corrosion-causing gases, making cleaning a temporary fix at best. Check your battery date code—most last 3-5 years under normal conditions.
Identify Severe Damage That Requires Replacement
Skip cleaning and replace immediately if you see:
– Terminals eroded more than 25% of original size
– Cables corroded into the insulation layer
– Battery posts loose or spinning within the case
These conditions create permanent poor connections that cleaning cannot resolve.
Understand Professional Replacement Benefits
Most auto parts stores offer free battery installation with purchase, including:
– Proper disposal of old battery
– Terminal cleaning and protection
– Charging system test
– Warranty registration
Sometimes paying for professional service saves you time and prevents mistakes.
Troubleshooting Persistent Corrosion Issues
Address Rapid Recurrence Problems
If corrosion reappears within 2-3 weeks, your charging system may be overcharging the battery. Have your alternator and voltage regulator tested at any auto parts store—usually a free service. Overcharging accelerates corrosion formation significantly.
Diagnose Continued Starting Problems
Cleaned terminals but car still won’t start? Check:
– Battery voltage (should read 12.6V when engine off)
– Cable tightness (perform the wiggle test)
– Ground connection (follow negative cable to metal frame)
Often the problem lies elsewhere in the electrical system.
Determine When to Call a Professional
DIY cleaning works for mild to moderate corrosion. However, seek professional help if:
– You’re uncomfortable working around automotive electrical systems
– Corrosion appears severe or widespread
– Your vehicle has complex electronics (hybrids, luxury models)
– You’ve cleaned recently but problems persist
Safety should always come first when working with car batteries.
Key Takeaways for Reliable Vehicle Starts
Cleaning car battery corrosion takes just 20-30 minutes but saves hundreds in replacement costs and prevents frustrating breakdowns. The critical steps: disconnect safely, use baking soda paste, rinse thoroughly, and protect connections. Make terminal inspection part of your monthly routine—catching corrosion early prevents expensive cable and terminal replacement.
Remember, corrosion always returns unless you address the root cause. After cleaning, monitor your battery weekly for the first month. If corrosion reappears rapidly, your battery or charging system needs professional attention rather than another cleaning cycle. With proper maintenance, your car’s electrical system will deliver reliable starts for years to come.


