
That white, crusty substance eating away at your battery terminals isn’t just messy—it’s actively sabotaging your car’s electrical system. Known as battery erosion (though technically chemical corrosion), this buildup blocks critical power flow between your battery and vehicle. Left untreated, it causes slow cranks, electrical glitches, and sudden breakdowns that could leave you stranded. The good news? You can eliminate this problem in under 30 minutes with household items like baking soda and an old toothbrush.
This guide reveals the exact process professional mechanics use to restore full electrical conductivity, plus proven prevention strategies to stop erosion from returning. Whether you’re facing light powdery residue or thick blue-green crust, you’ll learn how to safely neutralize acids, clean connections, and extend your battery’s life by 2-3 years. No special tools or expensive chemicals required—just follow these actionable steps.
Spot Car Battery Erosion Before It Strands You
Visual Identification on Terminals and Cables
Scan your battery for telltale white, ashy powder accumulating on metal posts and cable clamps. This residue ranges from light dusting to thick, crusty layers that feel gritty when touched. Advanced cases show blue-green crystalline growth spreading along cables, while rust appears on exposed metal surfaces. Side-post batteries often hide erosion inside connection ports—check for residue around bolt holes where cables attach. If you see wet spots on the battery tray, stop immediately; this indicates active acid leakage requiring battery replacement, not cleaning.
Performance Warning Signs You Can’t Ignore
Your car communicates erosion problems before visible buildup appears. Slow engine cranking—where the starter sounds labored—is the #1 early indicator of blocked power flow. Flickering dashboard lights during startup signal inconsistent electrical contact. Frequent jump-starts often point to connection issues rather than battery failure. Intermittent electrical failures in radios, power windows, or lights worsen as erosion expands. Don’t wait for complete breakdown—these symptoms mean your electrical system is already compromised.
Essential Safety Steps Before Cleaning Battery Erosion
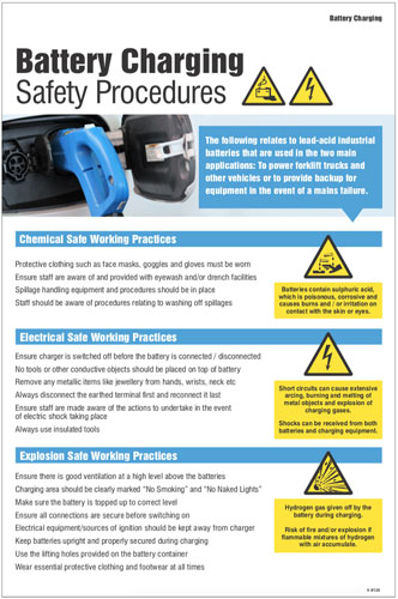
Critical Protective Gear Checklist
Never skip safety equipment—battery acid causes permanent eye damage and chemical burns within seconds. Before touching anything, put on chemical-resistant nitrile gloves, ANSI-approved safety goggles, and long-sleeved clothing. Keep a bucket of clean water nearby for emergency rinsing, and work only in well-ventilated areas. If handling heavy buildup, add a respirator mask to avoid inhaling neutralized acid particles. Skipping any of these steps risks serious injury; your safety matters more than saving 5 minutes.
Mandatory Pre-Cleaning Inspection Protocol
Turn off your engine and wait 30 minutes for components to cool. Check for critical hazards—wet spots on the battery tray indicate acid leakage, while a swollen or bloated battery case signals internal damage. Do not proceed if you observe either condition; these batteries require professional replacement due to explosion risks. For safe cleaning, confirm all terminals are dry and the battery casing shows no cracks. If your vehicle has complex electronics (like infotainment memory), note that disconnecting power may reset settings—use a $20 battery tender to preserve configurations.
Safe Terminal Disconnection Sequence
Always disconnect the negative (-) terminal first using the correct wrench size (typically 8mm or 10mm). Loosen the clamp nut just enough to wiggle the terminal free—never force it. For stubborn bolts, spray penetrating oil and wait 5 minutes before reattempting. Critical mistake to avoid: Disconnecting positive first creates short-circuit risks that can fry your vehicle’s computer. After removing cables, hang them securely away from metal surfaces using wire hooks or tape. Never let disconnected terminals touch the battery or chassis.
How to Clean Car Battery Erosion: Step-by-Step Process
Choosing Your Cleaning Solution Wisely
While auto stores sell battery cleaners for $5-15, baking soda and water neutralizes acid just as effectively for pennies. Mix 1 tablespoon baking soda per cup of warm water for standard buildup. For vertical surfaces like side-post batteries, create a thick paste with 3 parts baking soda to 1 part water—it clings better than liquid. Avoid vinegar or commercial degreasers; they worsen corrosion by introducing new acids. Pro tip: Keep a dedicated battery brush in your toolkit—it has dual brass/steel bristles designed specifically for terminal cleaning.
Professional-Grade Cleaning Technique

Apply Solution Generously: Pour baking soda mixture directly over corroded areas until fully saturated. Watch for bubbling—this fizzing reaction confirms acid neutralization. Let it sit 2-3 minutes for heavy crust; light residue needs only 30 seconds.
Scrub with Precision: Use a battery brush on terminals, stiff wire brush for cables, and old toothbrush for crevices. Focus on hidden areas—corrosion hides inside clamp interiors and side-post bolt holes. Scrub in circular motions until metal shines bright silver. Never scrape with metal tools; you’ll damage posts and create new corrosion sites.
Rinse and Dry Thoroughly: Flush all residue with clean water from a spray bottle. Critical step: Dry completely with lint-free microfiber cloths—moisture causes immediate re-corrosion. Air-dry 10 minutes with hood open before reassembly. Re-clean any remaining spots; partial cleaning guarantees rapid recurrence.
Prevent Car Battery Terminal Erosion for Good
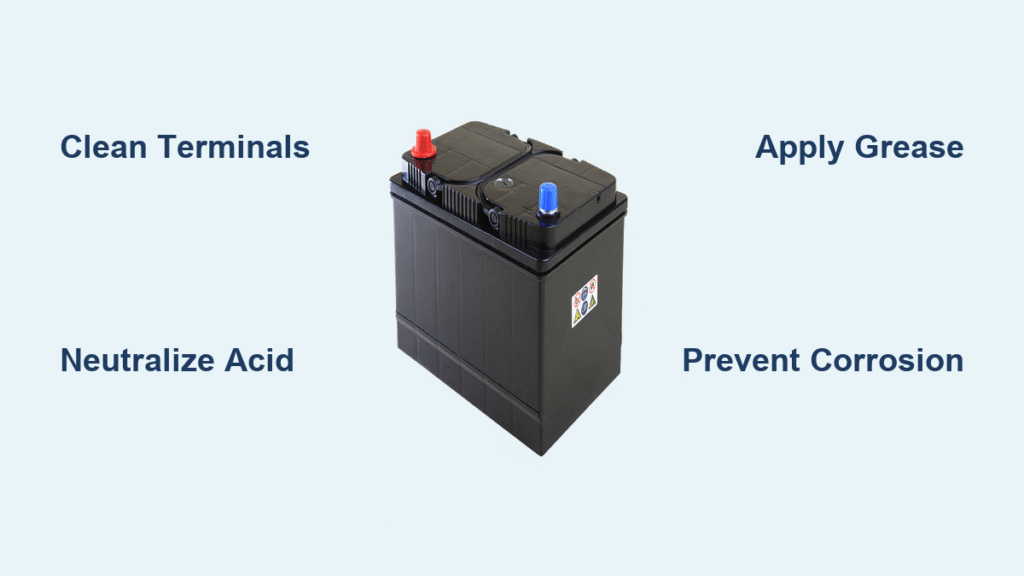
Three-Layer Protection System

Felt Washers: Install chemically-treated felt rings ($2.99/pack) between terminals and posts. These absorb escaping acid vapors and last your battery’s entire lifespan. Place them directly on clean posts before reattaching clamps.
Silicone Terminal Grease: Apply a thin coat of dielectric grease (not petroleum jelly) over felt washers and terminals. This creates a waterproof barrier that withstands 500°F engine heat without melting. Common mistake: Over-applying creates insulation that blocks electrical flow—use pea-sized amounts per terminal.
Anti-Corrosion Spray: Finish with a rust-inhibiting spray like CRC Battery Terminal Protector. One 5-second coat per terminal forms an invisible shield that repels moisture. Reapply after every cleaning session, especially in coastal or snowy climates.
Proactive Maintenance Schedule
Inspect terminals every 3 months in moderate climates; monthly in extreme heat/humidity. Clean proactively twice yearly—don’t wait for visible buildup. Replace immediately if terminals show pitting deeper than 1/16 inch or cables appear green throughout. For long-term storage, disconnect the negative terminal and apply extra grease. These 5-minute checks prevent 90% of erosion-related breakdowns.
When to Call a Pro for Severe Battery Erosion Cases
Terminal Replacement Triggers
Replace terminals when metal shows deep pitting that won’t polish smooth or when corrosion penetrates cable strands beyond the clamp. Never attempt repairs on swollen batteries—internal damage creates explosion hazards. If side-post bolts are seized solid after proper oil application, stop; forcing them cracks the battery casing. Hybrid/electric vehicles require special protocols—DIY cleaning risks high-voltage exposure.
Professional Service Red Flags
Seek expert help if you see:
– Corrosion spreading 3+ inches into main battery cables
– Persistent starting issues after thorough cleaning
– Vehicles requiring computer memory retention (modern luxury/sports cars)
– Any signs of battery fluid leakage or case swelling
Most auto shops charge $20-$40 for professional cleaning—worth every penny when complex electrical systems are involved. Remember: 30 minutes of prevention saves $150 in jump-start services and diagnostic fees.
Clean car battery erosion every six months to maintain peak electrical performance—this simple 30-minute ritual extends battery life by 2-3 years and prevents 80% of unexplained electrical failures. Visible corrosion means your system is already compromised; don’t wait for slow cranks or flickering lights to take action. By following this guide’s neutralization techniques and three-layer protection system, you’ll ensure reliable starts in any weather while avoiding costly repairs. Keep baking soda and a battery brush in your toolkit, and your vehicle’s electrical system will thank you for miles to come.


